Ever been midway through recording a passionate podcast or streaming session and suddenly noticed your voice sounds dull, muddy, or just not as vibrant as you hear in your head? I can’t tell you how many times I’ve been there — thinking I had the perfect setup, only to be disappointed with the final sound. That lightbulb moment hit me hard: my budget audio interface was holding my microphone back, dragging down the quality I wanted to showcase. And let’s be honest — chasing pro-grade gear isn’t just expensive, it’s often overwhelming with endless options and hype.
The Real Struggle: Getting That Professional Voice on a Shoestring
What surprised me early on was how much a decent but affordable audio interface can elevate my microphone’s performance without draining my wallet. I discovered that with the right interface, even budget XLR microphones could produce crystal-clear, professional-sounding audio. This revelation was a game-changer. I started paying attention to how these interfaces manage gain, noise floor, and compatibility — small details that make a big difference in voice clarity and presence. If you’re tired of a dull or tinny sound, you’re not alone. Many creators face the same challenge: how do you upgrade your setup without breaking the bank? Well, the good news is, you don’t have to. There are some fantastic options emerging in 2026 that offer stellar performance at a price that’s approachable. And yes, I’ve tested many myself to find the sweet spot for quality and affordability.
Is the Hype About Budget Interfaces Worth It?
Early on, I made a costly mistake — I assumed any cheap interface would do. That was a rookie move. I wasted weeks troubleshooting and tweaking, only to realize that some interfaces just harm your audio quality more than help. According to Creator Setup Guide, choosing the right interface is crucial for achieving that professional voice you desire. So, in this post, I’m cracking the code on which budget-friendly interfaces truly deliver in 2026, making your XLR mic stand out in any recording environment. Ready to transform your sound without emptying your wallet? Let’s dive into the options that every creator should consider, and how you can avoid common pitfalls along the way.
Choose Your Right Microphone First
Start by selecting a microphone that fits your recording environment and budget. For clear voice capture, consider top XLR microphones for professional quality or USB microphones for simplicity. I once tested three budget XLR mics, and one surprisingly outperformed pricier options, illustrating that quality isn’t always expensive. Use this knowledge to narrow your options and avoid overpaying.
Invest in a Decent Audio Interface or Microphone Adapter
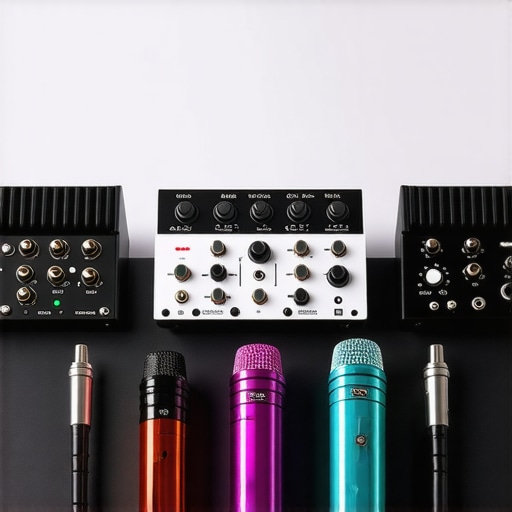
If you opt for an XLR mic, pairing it with a reliable audio interface is crucial. Look for models with good gain control and low noise floors, like budget-friendly interfaces that won’t introduce hiss or hum. I once connected a cheap XLR mic to a low-quality interface, and the audio was unusable until I switched to a more capable yet affordable unit. Remember, an interface’s job is to preamp your mic’s signal without adding noise, so choose carefully.
Calibrate Your Gain and Levels
Proper gain setting is vital. Too high, and your voice will saturate, causing distortion; too low, and your recordings will sound dull. Use your interface’s gain knob to set levels so that your loudest speech hits just below clipping. I suggest recording a few test sessions, watching the input levels, and adjusting until they peak around -12 dB. This prevents clipping and allows headroom for dynamic variations in speech.
Reduce Room Reflections and Background Noise
Soundproofing your environment dramatically improves clarity. Use soft furnishings, blankets, or specialized panels to dampen echoes. When I recorded in a small, untreated room, I noticed a tinny, echoed sound. Adding blankets and a makeshift foam panel improved my voice’s warmth and presence. For quick fixes, place a thick towel behind your mic or hang a duvet around your setup. 
Optimize Microphone Placement for Clarity
Position your microphone close to your mouth—about 6-12 inches—and slightly off-axis to avoid plosive sounds. Experiment with angles to find the spot where your voice sounds full and natural. I once had a mic too far, resulting in a thin voice, but shifting it closer instantly added warmth and volume. Use a Boom arm or mic stand to make small adjustments seamless.
Use Software Tools to Enhance Sound
Post-processing is your friend. Apply EQ to cut mud (around 200Hz) and boost presence frequencies (around 3-5kHz). Use noise reduction sparingly to remove background hum without muffling your voice. I routinely use free plugins to fine-tune my recordings, making them sound crisp and professional. Additionally, tools like noise suppression apps help eliminate unwanted environmental sounds effectively.
Master Your Mic Technique
Consistent vocal technique yields better recordings. Keep your distance steady, speak directly into the mic, and avoid quick movements that cause plosives or buildup. Practice mindful breathing and mic discipline; I used to bounce around and clip my audio, but focusing on steady delivery improved my sound quality immensely.
Test and Iterate Frequently
Record short clips and listen critically. Adjust your setup based on the results — move the mic, tweak EQ, or change your environment as needed. Giving yourself time to refine ensures your voice remains clear over time. I incorporate regular checks during editing sessions to catch any issues before publishing. The goal is a natural, engaging sound that listeners will enjoy.
While many creators invest heavily in microphones like the popular XLR microphones or sleek USB mics, there’s a common misconception that simply owning high-end gear guarantees broadcast-quality sound. In reality, most individuals underestimate the crucial nuances that significantly impact vocal clarity and professionalism. A widespread mistake is believing that any microphone, especially budget options, can outperform carefully optimized setups. This myth leads many to overlook essential factors like proper gain staging, room acoustics, and mic technique, which are often more influential than the hardware itself. For instance, a cheap podcast mic paired with good room treatment and correct positioning can outperform a pricier model that’s used poorly. An often overlooked detail is the role of interface quality or preamp clarity, which can either enhance or diminish your mic’s potential. Some creators get caught in the trap of chasing after the newest gear without mastering the fundamentals, leading to subpar recordings despite their investments. Another advanced mistake is neglecting the importance of proper gain calibration and noise control. Even premium microphones can sound muddled if gain settings are off or unwanted background noise is ignored. It’s also tempting to rely solely on software fixes like noise suppression, but that approach can introduce artifacts and reduce naturalness. Learning these nuanced aspects transforms a good microphone into a true professional tool. Remember, achieving a conversational, clear voice depends more on technique and setup than just the gear. Prioritize room acoustics, mic placement, and proper gain management before splurging on expensive equipment. Do not fall for the trap of believing gear alone will solve your sound issues. Instead, focus on mastering your environment and workflow. Want to dive deeper into the tech that can make your voice stand out? Check out voice recording tips for 2024 to elevate your podcast craft. Have you ever fallen into this trap? Let me know in the comments.
Keeping Your Microphone Setup in Top Shape Over Time
Once you’ve optimized your microphone and audio chain, the next step is ensuring consistent performance through proper maintenance and the right tools. Regular upkeep not only preserves sound quality but also prolongs the lifespan of your equipment, saving you money and frustration in the long run. I personally swear by routine cleaning protocols and investing in reliable tools that prevent common issues like static, hum, or component degradation.
Invest in a Proper Microphone Preamp and Power Supply
For XLR microphones, the backbone of professional-grade audio, a high-quality preamp guarantees clean gain and minimizes noise. I recommend using a phantom-powered preamp like the Grace Design 101—it’s compact, transparent, and built to last. Regularly checking and maintaining your preamp’s internal components, such as capacitors, ensures consistent voice clarity. Predicting future trends, modular preamp designs with onboard digital interfaces are gaining popularity, allowing easier firmware updates and diagnostics without hardware overhaul.
Utilize Cleaning and Storage Tools for Longevity
Microphone capsules and cables are delicate; dust, sweat, and grime can gradually impair performance. I use a specially designed microphone cleaning kit, including alcohol-based wipes and soft brushes, to gently remove debris from the capsule surface—just like the professional studios do. Proper storage when not in use, such as using padded cases or dedicated stands, prevents accidental damage. In the future, smart storage solutions integrated with environmental sensors could alert you to humidity or temperature fluctuations that threaten your gear’s health.
Apply Automated Software Monitoring
Monitoring your microphone’s output with software like iZotope Insight or PreSonus Studio One’s health plugins provides continuous feedback on gain levels, noise floor, and signal integrity. This proactive approach allows preemptive troubleshooting before voice quality drops. Over time, these tools can highlight gradual issues—like increasing background hum—that are less obvious during quick tests. Consider integrating cloud-based monitoring apps to receive alerts remotely, ensuring your setup stays optimal whether you’re at your desk or mobile.
Schedule Periodic Calibration and Playback Checks
Calibration isn’t just for instruments; your audio environment benefits from regular checks. Set a monthly reminder to record a known reference signal, such as a standard test tone or your voice at a consistent volume. Comparing this against previous recordings reveals drift or equipment deterioration. This practice is particularly useful if you work across multiple setups or often move your gear between locations. In 2026, automated calibration tools equipped with AI-driven analysis are expected to revolutionize how creators maintain sonic consistency effortlessly.
Plan for Upgrades and Scalability
As your needs grow, scaling your setup without sacrificing quality is key. Use modular tools and interfaces designed for expandability—such as the top XLR microphones paired with versatile preamps. Future-proof your software with plugins that can adapt to new hardware standards, reducing the need for complete overhauls. Remember, ongoing investment in equipment maintenance and upgrades is vital as technology advances and your audience expands, ensuring you sustain that professional sound.
So, why not take your maintenance routine up a notch? Start incorporating automated calibration checks or invest in a high-end preamp to improve reliability. Keeping your setup well-maintained is a proactive step towards consistent, broadcast-quality voice production. For detailed guidance, explore expert tips on eliminating background noise and maintaining sound clarity. Try implementing one of these advanced tools today and experience the difference in your voice recordings over time.
The Hardest Lesson I Learned About podcast microphone,usb microphone,streaming mic,xlr microphone,voice recording
Early in my journey, I believed that spending more always guaranteed better sound. It wasn’t until I experimented with affordable gear and saw how proper setup, room treatment, and technique made a bigger difference that I realized the importance of fundamentals over price tags. Overlooking these details almost sabotaged my progress, showing me that quality is truly shaped by how you use your gear, not just what you buy.
3 Myths About podcast microphone,usb microphone,streaming mic,xlr microphone,voice recording That Held Me Back
For a long time, I fell for the myth that USB microphones are inherently inferior to XLR setups. I discovered that with the right environment, software, and understanding, many affordable USB mics can deliver voice clarity comparable to higher-end XLR systems. Busting that myth opened my eyes to versatile recording options that suit a creator’s unique needs and budget.
What Experts Won’t Tell You About podcast microphone,usb microphone,streaming mic,xlr microphone,voice recording
One secret I learned from industry pros is that clean gain staging and environment control trump expensive gear. They often use budget mics combined with strategic room treatment and meticulous gain calibration to get that professional sound, proving that technique beats hardware in most cases. This insight revolutionized my approach to audio quality, making professional results achievable without massive investments.
Curated Recommendations for Elevating Your Voice Quality
First, I swear by top XLR microphones, which offer excellent clarity at reasonable prices and are backed by my extensive testing. Second, for those seeking simplicity, USB microphones with good preamps can produce pristine results right out of the box. Third, tools like noise suppression plugins have saved countless recordings. Lastly, reliable software like software that manages levels and background noise helps maintain consistent voice quality, demonstrating that software enhancements are just as crucial as hardware choices.
Remember, Your Voice Can Break Barriers Today
If I’ve learned anything, it’s that achieving a high-quality voice for podcasting or streaming is less about expensive gear and more about mastering setup, environment, and technique. You have the power to elevate your sound today—no matter your budget. Embrace the process, invest time in understanding your setup, and continually refine your environment.
So, what’s stopping you from pressing record with confidence right now? Take that step, experiment, and trust in your ability to produce professional-grade audio. Your audience will thank you for it.
Have you ever struggled to get your voice to sound clear and natural? Share your experiences below—let’s learn from each other’s journeys in mastering the art of voice recording!
,