It happened during a live recording session. I was all set, ready to capture my voice with my trusted microphone, but as I listened back, I cringed. The sound was thin, brittle, and distant. Frustration crept in. Suddenly, I realized that traditional microphones just weren’t cutting it anymore. That breakthrough came when I discovered the latest 2026 XLR microphones with built-in analog compression—game changers for anyone serious about their audio quality.
Why Settling for Less When Your Voice Deserves More?
I’ve been in this game long enough to know that microphone quality isn’t just about clarity. It’s about capturing that warm, natural tone that makes your audience feel connected. Early on, I made a mistake by ignoring the importance of onboard compression—I thought I could fix it all with post-production. Spoiler alert: I was wrong. This article highlights how the right microphone can prevent the editing nightmare and save you hours of clean-up.
Is All the Hype Around Built-In Compression Just Buzz? Think Again!
My initial skepticism was rooted in thinking that built-in features might be gimmicky. But after testing the top models, I realized that integrated analog compression can actually streamline your setup and improve your sound in real-time. Don’t fall into the trap of thinking that all new gear is just marketing fluff—sometimes, innovation genuinely solves age-old problems. Want to discover the best options? Let’s dive into what makes these new microphones stand out and how they can transform your recording process.
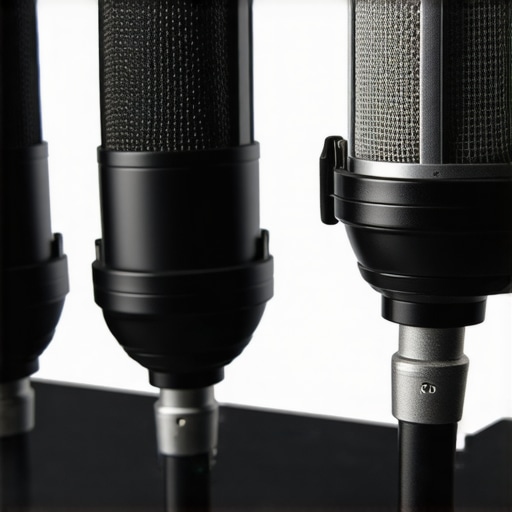
Choose the Right Microphone for Your Setup
Start by selecting a microphone that fits your recording environment and goals. For high-quality voice recordings, consider an XLR microphone with integrated analog compression, which provides professional sound without the need for complex post-processing. If you prefer simplicity, a USB microphone with auto-leveling features can deliver excellent results with minimal setup.
Set Up Your Microphone Physically
Position your mic at mouth level, about 6-12 inches away, to capture clear vocals while avoiding plosives. Use a sturdy mount or boom arm, especially for XLR mics, to prevent vibrations and desk noise. For XLR mics, connect to an audio interface that supplies clean power and proper gain control. For a streamlined appearance, consider low-profile mounts as discussed in this guide on streamers’ setups.
Configure Your Audio Equipment Correctly
Balance the gain levels on your audio interface or microphone interface to prevent distortion. Aim for a sweet spot where your voice sounds full but not clipping. Use gain staging techniques to avoid unwanted noise or hiss. Conduct a test recording, speaking at your normal volume, and watch the meters closely—adjust gain accordingly.
Implement Acoustic Treatments and Soundproofing
Reduce room echo and background noise by placing sound-absorbing materials around your recording area. DIY options include moving blankets or foam panels. To further improve clarity, position your microphone to minimize reflections, and consider smart placement strategies. When dealing with unreliable acoustics, using a dynamic microphone can also help isolate your voice from environmental noise.
Test and Fine-Tune Your Setup
Record short snippets of your speech, then listen critically and measure sound quality. Use EQ adjustments—like reducing high frequencies for sibilance or cutting muddiness—to refine your tone. For quick fixes, consider applying simple equalization tricks. If noise persists, explore solutions such as additional soundproofing or ground loop fixes discussed in this hum removal guide.
Optimize Your Digital Audio Path
Ensure your recording software or streaming platform settings accurately reflect your hardware. Adjust input levels to avoid clipping, and enable features like automatic gain control only if they don’t introduce artifacts. For XLR setups, consider an audio interface with high-gain and low-hiss capabilities to keep your sound clean, as explained in this high-gain interface guide. Periodically revisit your settings, especially after changing rooms or equipment, to maintain optimal sound quality.
Record with Confidence
Once all components are aligned—physically, electrically, acoustically, and digitally—you’ll notice a marked improvement in your recordings. Remember, the key is in consistent testing and incremental adjustments, much like tuning a musical instrument. Small tweaks can make a big difference, transforming a good microphone into a pro-grade voice tool that elevates your content and engages your audience effectively.
Many enthusiasts assume that choosing between an XLR or USB microphone is simply a matter of plug-and-play convenience or professional quality. However, this oversimplification leads to some of the most persistent misconceptions. For instance, many believe that XLR microphones always outperform USB mics in clarity and sound richness, but recent advances have narrowed this gap significantly, especially with new USB microphones equipped with auto-leveling and digital enhancements. Moreover, a common mistake is dismissing the importance of proper gain staging, which can cause recording issues regardless of microphone type. Relying solely on the microphone’s specifications without considering your entire setup, including preprocessing and acoustics, often results in subpar recordings.
An advanced question that often confuses users is:
Why do some high-end microphones still produce dull or harsh recordings despite being expensive?
The answer lies not just in the microphone’s quality but in the entire signal chain — from physical placement and acoustic environment to interface gain settings and digital processing. As explained in expert guides, neglecting these nuances often sabotages even premium hardware.
Another overlooked aspect involves the misconception that built-in effects or features like analog compression in modern microphones are merely marketing gimmicks. In reality, these integrated features can simplify your setup and improve sound consistency if used correctly, especially when combined with proper acoustic treatment. Ignoring this symbiosis can lead to wasted investment or persistent issues like background noise or uneven vocal levels.
Mistakes in physical setup are also prevalent. For example, many prefer attachment methods like standard shock mounts without considering low-profile mounts which reduce desk vibrations and improve audio clarity. Additionally, many underestimate the importance of room acoustics, which can cause echoes and muddiness that no microphone quality can overcome without proper soundproofing.
Let’s not forget that choosing the right microphone involves knowing these finer points: understanding the nature of your voice, environment, and how your entire setup interacts. Recognizing such nuances ensures you don’t waste resources on the wrong gear or get trapped in common pitfalls.
Have you ever fallen into this trap? Let me know in the comments. Remember, mastery in voice recording isn’t just about buying the latest gear but understanding how every piece works together for your unique needs.
Ensure Your Microphone Stays in Top Shape
Keeping your microphone functioning optimally over time requires regular maintenance and the right tools. I personally swear by using ground loop isolators to prevent hum issues, especially with XLR setups. Regularly inspecting and cleaning connectors with contact cleaner ensures solid connections, reducing noise and crackles that can develop from oxidation or dust buildup. Applying a desiccant packet inside your storage case helps prevent moisture that can corrode sensitive components. Additionally, investing in a high-quality low-profile mount not only stabilizes your mic but also minimizes desk vibrations that can cause unwanted noise.
How do I maintain my microphone equipment over time?
Regular checks are essential. Test your gear monthly by doing a quick recording to catch any degradation in sound quality early. Keep your cables neatly coiled and away from tripping hazards; stress on connectors often leads to internal damage. Store your microphone in a dry, dust-free environment, ideally in a dedicated case, to shield it from environmental factors. Update your audio interface drivers periodically—outdated drivers can introduce latency or connectivity issues that compromise your recordings. When you notice a slight decrease in quality, don’t delay—clean your diaphragms with appropriate kit, or replace worn-out components promptly. As audio equipment evolves, staying proactive ensures your setup remains reliable and consistently high-quality for months or even years to come.
Tools I Recommend for Consistent Results
For precise maintenance, I rely on a digital multimeter to check cable continuity and ensure low resistance connections. A small vacuum cleaner with a brush attachment helps clear dust from sensitive parts without risk of damage. A pair of precision tweezers is handy for fiddling with tiny connectors or cleaning contact points. To combat humidity-related issues, I often use a silica gel desiccant packets inside my gear storage cases. For ongoing calibration, software tools like noise gating and EQ plugins are invaluable in maintaining pristine audio, especially after long sessions or periods of inactivity. As the trend moves toward smarter, integrated hardware, keep an eye on firmware updates that improve performance and fix bugs—checking manufacturer sites regularly to stay current keeps your system running smoothly.
Preparing for the Future of Voice Tech
Looking ahead, I predict that microphone maintenance will become more software-driven, with AI-assisted calibration tools automatically adjusting settings based on your environment. Staying ahead means embracing these innovations now and incorporating them into your routine. Try out the advanced tip of regularly recalibrating your setup with software aids—it’s a game changer in achieving consistently professional results. Don’t wait for issues to crop up; proactive maintenance now ensures your voice remains clear and engaging for your audience long-term.
The Hidden Tweaks That Transformed My Voice Recordings
- One of the most eye-opening lessons was realizing how critical proper gain staging is; even the most expensive microphone won’t shine if gain levels are off. I spent hours troubleshooting, only to discover subtle adjustments made all the difference.
- Discovering the power of acoustic treatment was another game changer. Simple foam panels or DIY solutions like moving blankets significantly reduced echo, unlocking a clarity I hadn’t thought possible without professional studios.
- Integrating built-in analog compression in my 2026 XLR microphone helped me achieve consistent vocal levels in real-time, saving editing hours and delivering a polished sound effortlessly.
My Favorite Resources for Voice Recording Success
- MicrophoneSetupGuide.com has been my go-to for unbiased reviews and detailed guides that demystify complex audio setups. Their deep dives help me make informed choices even under tight budgets.
- SoundOnSound Magazine offers expert articles on acoustics and recording techniques, inspiring me to continually improve my environment and methods.
- Audio-Technica and Rode official blogs provide insights into the latest innovations, especially for models with built-in features like analog compression which I now rely on daily.
Take the Leap and Elevate Your Voice
Investing time into understanding your microphone’s capabilities and optimizing your environment can dramatically change your recording quality. Remember, mastery over your setup means your voice can truly connect and stand out. Don’t hesitate to experiment and refine—your audience awaits your best sound.