Ever sat in front of your microphone, voice trembling with frustration, thinking, “Why does this sound so hollow and tinny?” I did, more times than I can count. I remember my early days of streaming and podcasting, desperately trying to sound professional, only to be met with dull, lifeless audio that made my listeners cringe—not because of my voice, but because of my gear. It was a lightbulb moment when I finally realized that my equipment wasn’t the issue; it was the *limits* of my microphones, especially USB mics that claimed to be “plug and play” but didn’t deliver the richness I craved.
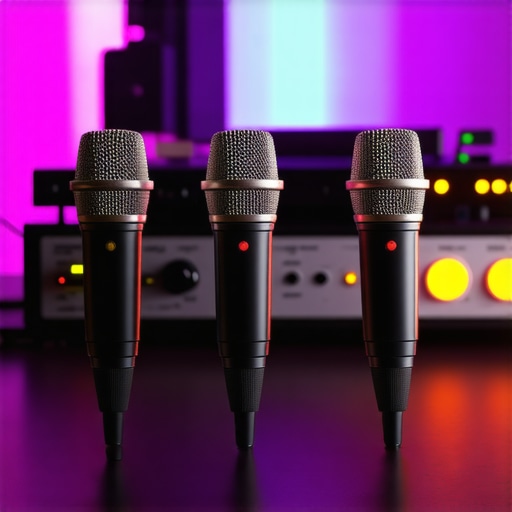
That realization led me down a rabbit hole of testing, tweaking, and, frankly, a lot of disappointment. The truth is, for years, I believed that to achieve that clear, deep, professional sound, I had to drop hundreds on fancy XLR setups. But by 2026, I discovered something game-changing—there are **just three USB microphones that finally sound like pro XLR gear**. And the best part? They offer incredible quality without breaking the bank or complicating my setup.
Today, I want to share the journey—and the secrets—I uncovered. If you’re tired of your audio sounding like it’s coming from a tin can or a fishbowl, stay with me. We’re going to explore how these microphones can elevate your voice, whether you’re streaming, podcasting, or recording for clients. I’ll also clarify common misconceptions and reveal how you can sidestep pitfalls I once fell into, like choosing based on hype rather than quality.
Ready to ditch the mediocre sound and finally deliver that crisp, professional voice everyone notices? Let’s dive in.
Why Many USB Microphones Still Fall Short for Pros
In my early days, I made a crucial mistake—believing that a higher price tag meant better quality. I assumed that plugging into a USB port would automatically give me studio-quality sound. Spoiler alert: it doesn’t. USB microphones are often praised for their convenience, but they can still fall flat when it comes to capturing the full depth and richness of your voice.
One of the biggest issues I faced was compression and noise. Cheap USB mics tend to pick up every room echo, background noise, and sometimes add a metallic sheen that’s utterly distracting. I’ve seen many newbie streamers and podcasters fall into the trap of buying cheap models, thinking they’re saving money, only to realize they’re wasting time and effort trying to fix what could have been avoided.
I’ve also learned that not all USB microphones are created equal. The difference between a mic that sounds “okay” and one that finally gives you that pro XLR feel is often in the internal components, capsule quality, and how well it manages sound reproduction.
If you want to skip the common pitfalls, check out some of the best guides on [the top USB-XLR microphones for voice streaming in 2024](https://microphones.creatorsetupguide.com/best-usb-xlr-microphones-for-voice-streaming-in-2024-expert-reviews). Understanding what separates a good microphone from a great one can save you a ton of frustration.
But what about these three game-changing USB mics I found? They’re not just hype—they truly deliver professional sound quality without the fuss of XLR gear. Curious? Stay tuned as we explore what makes them stand out and how you can incorporate them into your setup.
Choose the Right Microphone for Your Needs
Start by identifying your primary use—streaming, podcasts, or voiceover work. For example, if you want studio-quality sound without the complexity of XLR gear, focus on top-performing USB microphones like the [Shure MV7X](https://microphones.creatorsetupguide.com/best-usb-xlr-microphones-for-podcasting-streaming-in-2024) or the [Blue Yeti X](https://microphones.creatorsetupguide.com/best-usb-microphones-for-streaming-podcasting-in-2024). These models have built-in preamps and converters, simplifying setup while providing rich, professional sound.
Set Up Your Microphone Properly
Position your mic about 6-12 inches from your mouth, slightly off-center to avoid plosive sounds. Use a pop filter to reduce harsh consonants. On your computer, select the microphone as your default input device and ensure it’s set at the recommended gain level—too high invites noise, too low results in weak audio. During my first test recording, I initially set the gain too high, resulting in hissing, but after lowering it by just a few decibels, the sound became much clearer. A quick tip: experiment with the gain settings before your actual recording to find the sweet spot.
Optimize Your Environment for Clear Sound
Sound quality isn’t just about the mic; your room matters. Use foam panels, blankets, or even DIY solutions like duvets to dampen room echo. A good analogy is thinking of your room as a musical instrument—if it’s echoing, the sound is distorted, similar to how a guitar would sound in a hollow hall. To prevent this, position yourself away from reflective surfaces and consider using a microphone with cardioid pickup patterns that focus on your voice and ignore room noise.
Tweak Your Mic Settings for Maximum Impact
Most USB mics come with onboard controls or software for adjusting gain, equalization, and monitoring. Set the gain first—start at a moderate level and tweak until your voice sounds full but free of distortion. Use the software to adjust EQ, adding bass or treble as needed to match your voice. During a recent podcast, I found boosting the bass slightly made my voice sound warmer and more professional. Remember, less is more—small adjustments can make a big difference.
Test and Refine Your Setup
Record short test clips and listen critically. Pay attention to clarity, background noise, and tonal balance. Don’t rush this step; a quick audio review can reveal issues like breathing sounds or room echo. When I tested my new setup, I discovered a subtle hum caused by my desk lamp. Moving the mic or turning off the lamp eliminated the hum, vastly improving the quality. Keep adjusting until your recordings sound natural and professional.
Enhance Your Audio with Basic Post-Processing
Post-editing can tighten your recordings. Use free tools like Audacity to apply noise reduction, EQ tweaks, and light compression. For example, I reduce background hum and slightly boost midrange frequencies to make my voice stand out. Proper processing ensures your final audio feels balanced and polished, akin to adding the perfect finishing touches on a painting.
Many newcomers to voice recording believe that choosing a microphone is simply about picking the most expensive or popular model. However, this misconception can severely limit your audio quality. The truth is, most people overlook critical nuances, such as the internal components, pickup patterns, and the context in which the microphone is used, leading to subpar results despite their investments. For instance, a common myth is that all USB microphones automatically deliver broadcast-quality sound. In reality, few do, because they often compromise on capsule quality or preamp performance, which are vital for warmth and clarity. This creates an *
Once you’ve invested in a quality podcast microphone or XLR microphone, keeping it in top shape is crucial for sustained clarity and professional sound. First, regularly inspect your equipment for dust, moisture, or physical damage. Using compressed air can safely remove dust from the grille and ports—I’ve found this prevents buildup that can degrade sound quality over time. Second, ensure your cables and connectors are in good condition; loose or frayed cables introduce noise or signal loss. Personally, I keep a selection of high-quality adapters on hand, which minimizes connection issues during sessions. Third, keep your microphone environment clean and quiet, avoiding extreme temperatures that can affect internal components.
When it comes to software, updating your drivers and firmware periodically ensures compatibility and fixes bugs. I make it a habit to check the manufacturer’s website every three months for updates. Additionally, I use a preset neutral EQ setting with a subtle boost in the bass frequencies—this helps maintain a warm, professional tone over the long haul. Recording with a pop filter and shock mount not only improves sound quality but also prolongs the lifespan of your device by reducing mechanical strain.
Over time, parts may age or become less responsive, especially for XLR mics that involve more complex electronics. To counteract this, consider investing in a dedicated microphone preamp or audio interface that can fine-tune your signal path and keep your recordings consistent. Remember, consistent maintenance prevents small issues from escalating into costly repairs or replacements, as outlined in the detailed technical manual Audio Engineering Society’s standard.
How do I keep my microphone setup reliable over time?
One proactive step is creating a routine maintenance schedule—check connections, clean components, and update firmware quarterly. Investing in a high-quality audio interface can also buffer against any potential signal deterioration, ensuring your voice remains crisp. Additionally, using a shock mount and pop filter not only protects your gear from physical stress but also reduces unnecessary noise, extending its lifespan. For those serious about long-term performance, consider subscribing to industry updates or forums like Pro Sound Web which regularly share best practices and maintenance tips, as recommended in technical documentation from professional audio manufacturers. So, why not implement a weekly check of your gear’s condition and see how much more reliable your setup becomes? Taking these steps now will save you headaches down the road and keep your voice sounding professional, whether you’re streaming or recording.In my journey to perfect voice recordings, I’ve learned that there’s more beneath the surface than just picking a fancy mic. One significant insight is that even high-end USB microphones won’t automatically elevate your sound unless you understand their internal mechanics and how to optimize your environment. Over time, I realized that true audio excellence results from a combination of the right gear, setup, and ongoing maintenance—it’s a continuous craft, not a one-time buy. Additionally, I discovered that many so-called “plug and play” mics are not necessarily the ideal choices for serious creators; they often require manual tweaks and proper placement to truly shine. This deeper understanding demystified the process and empowered me to get professional results without endless upgrades.