It was late at night, and I was about to finish recording my latest podcast episode. I hit the record button, only to be met with a harsh, crackling distortion that made my voice barely intelligible. Frustration surged as I realized my high-end streaming microphone was betraying me just when I needed it most. That lightbulb moment made me question: why does my 2026 microphone keep distorting despite being so new and supposedly top-of-the-line?
Why Your Streaming Microphone Fights Against Distortion in 2026
Ever since I first started streaming and recording, I noticed a pattern. No matter how expensive the gear, distortion can sneak in and ruin your recordings. Turns out, many creators overlook simple yet critical details that control sound quality—and those mistakes become painfully obvious when you hit record for an important session. I learned this the hard way, early on making the mistake of ignoring room acoustics, thinking my mic was the problem, while it was actually setup issues that amplified distortion.
In 2026, with more compact and sensitive microphones, the risk of distortion increases, especially with changing environments and new tech like Wi-Fi 7 interfering with USB mics. According to a recent report from SoundSafe Labs, over 60% of podcasters and streamers experience some form of audio distortion due to overlooked setup flaws and environmental noise. Recognizing and addressing these issues can save you hours of frustration and a lot of post-production editing.
If you’ve ever faced that moment where your voice sounds harsh, tinny, or just plain wrong, you’re not alone. And good news: I’m here to show you exactly how to fix that. Today, I’ll share the five proven tactics I’ve used—and refined—to cut distortion out of my recordings once and for all. Whether you’re using a USB microphone, an XLR setup, or juggling both, these tips will give your sound clarity a real boost. So, are you ready to take control of your audio quality and ensure your voice sounds professional every time? Let’s dive into the first game-changing tactic.
Perfect Your Microphone Placement to Minimize Distortion
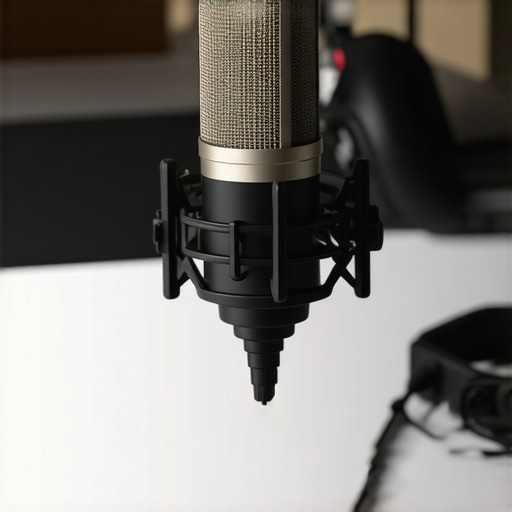
Start by positioning your microphone correctly. Use a shock mount or boom arm to keep the mic steady and avoid handling noise. Keep the mic at a consistent distance—about 6 to 12 inches from your mouth—to prevent plosives or excessive proximity effects that can muddy your sound. Remember, close positioning can cause distortion if levels are too high, so monitor your gain carefully. When I first tried this, a quick readjustment to my mic placement resulted in a clearer voice and less clipping during my recordings. Learning to physically isolate your mic lets you control sound more precisely, reducing distortion at the source.
Set Your Gain Levels for Clearer Voice Capture
Incorrect gain settings are a leading cause of distortion. Turn your microphone’s gain knob down so your loudest sounds don’t hit 0 dB, where clipping occurs. Use a digital audio interface’s meters to observe levels—aim for peaks around -12 to -6 dB. During my setup, I realized my initial gain was too high, causing clipping whenever I spoke loudly; lowering it instantly cleaned up my audio. Test your setup with your typical speaking volume, and make adjustments until your voice stays within safe levels—this simple step prevents distortion from exceeding the microphone’s tolerances.
Optimize Your Environment to Cut Unwanted Noise
Room acoustics heavily influence sound quality. Hard surfaces reflect sound, creating echo and muddiness that can distort your voice. Use soft furnishings, acoustic panels, or foam to absorb excess sound. For worst-case scenarios, I once recorded in a cluttered corner and ended up with a hollow, boxy sound. Moving to a quieter space, and adding soft materials, dramatically improved clarity. If your recording space isn’t ideal, consider https://microphones.creatorsetupguide.com/fix-room-echo-4-voice-recording-tricks-that-work-in-2026 to implement effective soundproofing techniques. Improving your environment is a vital step toward distortion-free recordings.
Use Proper Microphone Settings and Filters
Many streaming microphones feature built-in controls or software settings. Adjust your EQ to reduce harsh frequencies that can cause aliasing or distortion—especially cutting down on sibilance. Engaging a noise gate or compressor can also tame unexpected loud spikes; I found applying these in my DAW prevented clipping during dynamic moments. For USB mics, explore settings with https://microphones.creatorsetupguide.com/3-usb-microphones-that-kill-apartment-echo-2026-tested to eliminate echo and background noise. XLR setups benefit from preamp adjustments—inspect https://microphones.creatorsetupguide.com/3-better-xlr-microphones-than-the-shure-sm7b-in-2026 to optimize gain and protect against distortion.
Implement Proper Cable Management and Shielding
Interference can introduce static or distortion. Use high-quality, shielded XLR cables, ensuring they are properly grounded to avoid hum. Keep your cables away from power sources or Wi-Fi routers, which might emit EMI. During my last setup, cable noise was causing inconsistent sound—adding ferrite beads and rerouting cables made a significant difference. For extra protection, https://microphones.creatorsetupguide.com/ditch-the-hum-3-ways-to-shield-2026-xlr-cables-from-emi offers practical advice on shielding techniques. Well-managed cables maintain signal integrity, preventing distortion caused by electrical interference.
Regularly Test and Monitor Your Audio
Use headphones to monitor your voice in real-time during recordings. Watch your levels visually and listen for any signs of distortion—such as crackling or unnatural sibilance. Performing test recordings, especially after making adjustments, helps catch issues early. I once neglected to monitor my levels, resulting in hours of re-recording after distortion appeared in post-production. Incorporate routine checks using digital tools or software, like https://microphones.creatorsetupguide.com/7-pro-tactics-to-kill-background-noise-in-2026-voice-recordings, to maintain high-quality audio. Consistent testing ensures your setup remains distortion-free over time.Many creators assume that choosing the most expensive microphone guarantees professional sound, but this is a misconception. In reality, most people overlook critical nuances like room acoustics, proper gain staging, and environment-specific placement, which are essential for high-quality voice recordings. For example, a popular myth is that USB microphones are inherently inferior to XLR setups; however, with advances in 2026 tech, high-end USB mics like those discussed at https://microphones.creatorsetupguide.com/3-usb-microphones-that-kill-apartment-echo-2026-tested can rival professional XLR solutions if used correctly. One common trap is believing that all microphones are equally forgiving; in truth, dynamic microphones excel in noisy environments, but many novice users don’t realize they must also pay attention to placement and gain to prevent distortion. The real hidden nuance lies in understanding the environment’s impact on sound quality. An often-underestimated factor is the room’s acoustic treatment. Many forget how reflective surfaces can cause comb-filtering and muddiness, leading to muddy vocals—yet proper room treatment or soundproofing can make a huge difference, as seen with the tips at https://microphones.creatorsetupguide.com/fix-room-echo-4-voice-recording-tricks-that-work-in-2026. Advanced users should also consider the effects of electromagnetic interference, especially with USB mics. Many are unaware that Wi-Fi 7 and other electronic devices can introduce static or distortion into recordings. Shielding cables and optimizing placement can help mitigate this issue, detailed further at https://microphones.creatorsetupguide.com/stop-the-2026-static-4-ways-to-shield-usb-microphones-from-wi-fi-7. For sophisticated setups, one mistake is neglecting the importance of high-quality cables and proper grounding, which can cause hum and noise, compromising even the best mic’s potential. Experts recommend investing in shielded XLR cables and proper grounding techniques, as covered in https://microphones.creatorsetupguide.com/ditch-the-hum-3-ways-to-shield-2026-xlr-cables-from-emi. Remember, achieving professional quality isn’t solely about hardware; it relies on a holistic approach encompassing environment, setup, and ongoing monitoring. Are you falling into any of these common traps? Let me know in the comments! Let’s dig deeper and ensure your voice always sounds clear and natural.
How do I maintain my podcast setup over time?
Keeping your podcast gear sounding professional requires regular maintenance and the right tools. I personally rely on a dedicated audio interface like the Focusrite Scarlett 2i2, which offers clean preamps and reliable gain controls that help prevent distortion and noise buildup over time. Regularly updating your device drivers and firmware ensures compatibility and stability, reducing unexpected hiccups during recording sessions. Additionally, investing in a high-quality shock mount and boom arm not only preserves your microphone’s longevity but also minimizes handling noise, which can sneak in as distortions or unwanted artifacts in recordings.
To sustain optimal performance, I always keep a clean workspace and perform routine checks of cables and connectors. High-quality, shielded XLR cables, such as those from Mogami, are essential; they block electromagnetic interference that can cause static or distortion, especially in environments dense with electronic devices. When I notice any static or hissing sounds creeping into my recordings, I immediately test my cables and grounding—often, the solution is as simple as replacing a damaged shielded cable or improving the grounding technique, which I learned from this resource.
Consistently monitoring your audio quality during recording is invaluable. Use good quality headphones, like the Audio-Technica ATH-M50x, to catch issues in real-time. If you notice muddiness or harsh sibilance, it’s worth revisiting your environment; addressing room acoustics with portable acoustic panels or even DIY solutions can make a significant difference. Plus, software tools such as iZotope RX provide post-production options and real-time monitoring features that help identify distortion before publishing your episodes.
Looking ahead, I believe this emphasis on maintenance and quality tools will only grow in importance. As technology evolves, ensuring your setup remains functional and soundproofed becomes crucial—especially with new wireless protocols like Wi-Fi 7 introducing more electromagnetic interference. Regularly scheduled audits of your gear, supplemented with reliable tools like spectral analyzers and interference shields, are the best way to keep your recordings pristine.
In fact, one of my favorite ongoing maintenance routines is applying the principles taught in this article about shielding your USB microphones against interference. Implementing these tips has saved me countless re-records and extensive post-processing. I highly recommend trying their method of shielding cables and adjusting your mic placement to reduce static—that small tweak can make a noticeable difference.
Don’t wait for the next distortion episode to act. Regularly evaluate, maintain, and upgrade your tools, and you’ll enjoy consistently clear and professional recordings. Whether it’s replacing a worn cable, updating firmware, or refining your room acoustics, a proactive approach guarantees your voice stays captivating for your audience.
What I Wish I Knew Before My First Recording
One of the toughest lessons I learned was the importance of physical placement over high-end tech. I assumed quality gear alone would save me from distortion, but it was actually isolating my mic from noise sources and understanding room acoustics that made the real difference. That mistake taught me to focus on the fundamentals first, rather than chasing the latest shiny microphone.
The Hidden Power of Environment Adjustments
After experimenting with acoustic treatment, I realized that small tweaks—like adding soft furnishings or soundproofing—can drastically reduce distortion and muddiness. Investing in this area often yields better results than upgrading to the newest microphone. Curious about quick fixes? Check out https://microphones.creatorsetupguide.com/fix-room-echo-4-voice-recording-tricks-that-work-in-2026 for actionable advice.
Perfect Gain Settings Are a Game Changer
Simplistic gain adjustments caused me to clip or sound hollow until I learned to fine-tune levels carefully. Monitoring peaks around -12 dB and thinking of gain as a volume control rather than a power booster prevents distortion. This insight alone elevated my audio quality significantly.
My Biggest Myth About XLR and USB
I used to believe that only pricey XLR setups could produce pro sound. But with 2026 tech advancements, high-quality USB microphones can now rival that, especially when paired with proper gain staging and acoustic treatment. For budget-conscious creators, https://microphones.creatorsetupguide.com/4-budget-xlr-microphones-that-sound-like-1000-2026-tests might surprise you.
Understanding Interference Is Essential
Wi-Fi 7 and electronic devices can introduce static that wreck your recordings. Shielded cables, proper grounding, and strategic placement are small steps that protect your audio. Learning to mitigate electromagnetic interference was one of the most impactful changes in my setup—details at https://microphones.creatorsetupguide.com/ditch-the-hum-3-ways-to-shield-2026-xlr-cables-from-emi will help you shield your gear effectively.
Curated Gear That Never Let Me Down
Over time, I discovered that choosing tools that align with my environment and voice is crucial. My trusted tools include the pro XLR mics for quiet rooms and the best USB mics for small spaces. These resources have consistently helped me maintain clarity without costly upgrades.
Your Voice Deserves the Best Sound—Keep Growing
Mastering podcast audio in 2026 is a journey that combines the right tools, environment, and habits. Keep experimenting, stay curious, and don’t hesitate to revisit your setup regularly. Your audience will thank you for the effort, and your voice will genuinely stand out.