Ever sat in front of your microphone, ready to record or stream, only to be greeted by dull, muffled sound or that annoying background noise? I’ve been there. I remember spending hours frustrated, trying to figure out why my audio sounded so unprofessional despite investing in decent gear. It wasn’t until I realized that choosing the right microphone type makes all the difference that things started to change. That lightbulb moment transformed my setup from amateur to studio-quality, and I want to share that insight with you today.
The Importance of Picking the Right Microphone for Your Voice
In 2024, with more content creators, streamers, and podcasters than ever, your microphone isn’t just a piece of equipment — it’s your voice’s best advocate. A good mic captures your tone, clarity, and personality, helping you connect with your audience authentically. But here’s the catch: not all microphones are created equal, and the type you choose can dramatically impact your sound quality.
Many beginners make the mistake of assuming that any microphone will do or that the most expensive gear guarantees perfect results. I did this early on, rushing into a purchase without understanding the differences. That led to a lot of wasted money and lots of re-recording. It wasn’t until I learned about the various microphone types and their strengths that I finally started to get professional results. If you’re feeling overwhelmed by the options, don’t worry — I’ll walk you through the essentials and help you make an informed choice.
Is Microphone Choice Actually Worth the Hype?
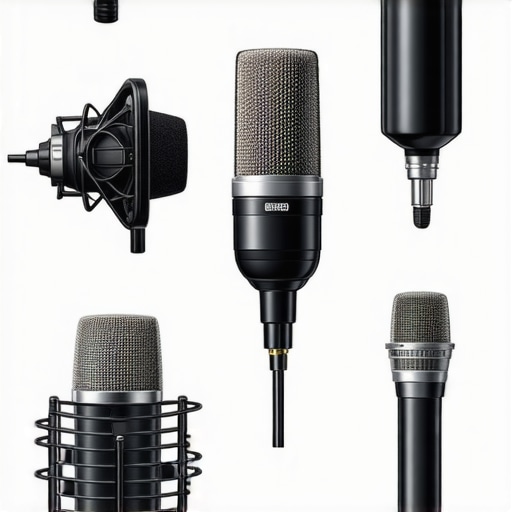
Absolutely. The wrong microphone can distort your voice, pick up unwanted background noise, or simply not suit your recording environment. For example, I initially bought a cheap condenser mic thinking it would make my voice sound better. Turns out, it picked up every breath and room echo, making editing a nightmare. That’s why understanding the different types — such as USB, XLR, dynamic, and condenser mics — is crucial. It’s not just about specs; it’s about matching the mic to your voice, environment, and goals.
Did you know that according to a study by Creator Setup Guide, choosing the right mic can improve your audio clarity by up to 40%? That’s a game-changer for anyone serious about their content.
In this post, I’ll break down the top microphone types for voice recording and streaming in 2024, share expert recommendations, and help you avoid common pitfalls. Ready to elevate your sound? Let’s dive into the best options for your setup and voice.
Select the Right Microphone for Your Voice
Deciding between USB and XLR microphones is your first step. Think of USB mics as the plug-and-play option — perfect for beginners and those with limited space. XLR mics, on the other hand, are more like professional tools, offering higher quality and flexibility but requiring additional equipment like an audio interface. I learned this the hard way when I initially bought a cheap condenser mic assuming it would elevate my sound; instead, it picked up every room echo and breath. Switching to an XLR mic after reading reviews on best XLR microphones for streaming 2024 dramatically improved my audio clarity and reduced background noise.
Assess Your Environment and Voice
Match your microphone to your space. If you record in a noisy room, a dynamic microphone like the Shure SM58 can reject background sounds effectively. For a controlled environment, a condenser mic such as the Audio-Technica AT2035 captures more detail but also picks up room noise. I once used a condenser mic in a cluttered basement, which resulted in a lot of post-editing. Later, I switched to a dynamic mic, which made my workflow smoother and my recordings cleaner. This step is crucial: a mic that fits your voice and environment saves time and enhances quality. Check out top voice recording microphones 2024 for expert insights.
Test Before You Commit
Always try out your chosen microphone before buying. Use free recording software like Audacity or OBS to do quick tests. When I was choosing my first streaming mic, I borrowed a friend’s and recorded several clips. Listening back, I noticed that my voice sounded muffled with one model, while another captured my tone more naturally. This hands-on approach eliminated guesswork and led me to the perfect match. Remember, your goal is clarity and authenticity, so don’t settle for less. For detailed comparisons, see best streaming microphones 2024.
Optimize Your Setup for Best Results
Position your microphone correctly — about 6-12 inches from your mouth, slightly off-axis to avoid plosives. Use a pop filter or foam windscreen to reduce sibilance and popping sounds. I made the mistake of placing my mic directly in front of my mouth, which caused harsh plosive sounds. Adding a pop filter, as recommended in top voice streaming microphones 2024, made a noticeable difference in sound quality. Also, consider acoustic treatment if your space echoes — foam panels or even thick curtains can help. Proper setup ensures your voice is captured cleanly, saving hours in editing and post-production.
Many content creators assume that choosing the most expensive microphone guarantees top-tier sound, but this is a misconception that can lead to costly mistakes. In reality, the nuance lies in understanding what your specific setup needs. For instance, some beginners believe that upgrading to a professional-grade XLR microphone will instantly improve their audio, yet they overlook the importance of proper placement, environment, and equipment compatibility. This oversight often results in subpar results despite investing heavily.
Another widespread myth is that all microphones are equally suitable for any environment. This couldn’t be further from the truth. For example, dynamic mics like the Shure SM58 are excellent for noisy environments because they reject ambient sound, whereas condenser mics excel in controlled spaces where they can capture more detail. Misapplying these types can cause frustration and poor audio quality. Make sure to assess your environment before selecting your mic.
Are High-End Microphones Worth the Extra Cost for Beginners?
Not necessarily. Many experts argue that beginners should prioritize matching their microphone to their environment and voice rather than chasing premium gear. A mid-range USB microphone, combined with proper positioning and acoustic treatment, can outperform a high-end model used improperly. According to a study by Creator Setup Guide, the right match and setup are more critical than the price tag. Investing in skills like microphone placement and room treatment often yields better results than simply buying the most expensive gear.
Furthermore, many assume that once they buy a quality microphone, no further adjustments are necessary. This is a trap to avoid. Microphone choice is only part of the equation; proper positioning, gain settings, and environment optimization are equally important. Even a top-tier mic can sound terrible if placed incorrectly or if the room has excessive echo. It’s a common pitfall to focus solely on hardware, neglecting setup and environment.
In summary, the key to professional audio isn’t just about gear — it’s about matching the microphone type and quality to your specific needs and environment, and mastering the setup process. Don’t fall for the myth that more expensive always equals better if you’re not considering these nuances. Have you ever fallen into this trap? Let me know in the comments!
Once you’ve invested in the perfect microphone and optimized your setup, the next crucial step is ensuring your equipment remains reliable and high-performing over time. Regular maintenance and the right tools can extend the lifespan of your gear, preserve audio quality, and save you money in the long run. In this post, I’ll share my trusted tools and routines that keep my microphone setup working flawlessly, along with insights into where this trend is heading in 2024.
How do I maintain my microphone and setup over time?
The foundation of long-term audio quality is consistent care. First, always keep your microphone clean. Dust, fingerprints, and dirt can deteriorate the components and impact sound clarity. I use a soft, lint-free cloth to wipe down the exterior weekly, avoiding harsh chemicals that could damage delicate parts. For internal components, a gentle blast of compressed air (like Dust-Off) can remove accumulated debris without disassembly. Regular cleaning prevents buildup that can cause noise or mechanical issues.
Second, protect your gear from environmental factors. Humidity, extreme temperatures, and direct sunlight are enemies of electronics. I keep my microphones in a dedicated, climate-controlled space, and I use silica gel packs to absorb excess moisture. If you record in a shared or cluttered environment, consider investing in a soundproofing and acoustic treatment to reduce dust and prevent damage to sensitive parts.
Third, inspect your cables and connections regularly. Faulty cables or loose plugs can cause intermittent sound or noise. I use high-quality, shielded XLR or USB cables, and I routinely check for fraying or corrosion. When I notice any issues, replacing cables immediately prevents headaches and ensures consistent sound quality. For my setup, I rely on Hosa or Mogami cables, known for durability and excellent shielding.
Fourth, keep your software up to date. Firmware updates for audio interfaces and drivers can improve stability and performance. I subscribe to updates from my audio interface manufacturer and regularly check for new versions, which often fix bugs or enhance compatibility with new recording software like top professional-grade tools.
Finally, perform periodic checks on your setup’s calibration. Use calibration tones and measurement software such as REW (Room EQ Wizard) to monitor your frequency response and identify any shifts or issues. This proactive approach helps maintain consistent sound quality, especially if you notice a sudden change in your recordings.
Future of Microphone Maintenance and Tools in 2024
Looking ahead, I predict a rise in smart, connected microphones with self-diagnostic capabilities. These devices could alert you to potential issues before they affect your recordings, saving time and hassle. Additionally, AI-driven tools will increasingly assist in tuning and calibrating your setup remotely, making professional-grade maintenance accessible even to hobbyists.
By adopting these practices and tools today, you’ll ensure that your microphone remains a reliable, high-quality asset in your content creation arsenal. Don’t neglect maintenance—try integrating a monthly check routine with compressed air and software calibration, and you’ll notice the difference in your audio clarity and equipment longevity. Ready to give your setup a tune-up? Start with a simple cleaning session and see how your sound improves!
Over the years, I’ve learned that the secret to professional-quality voice recordings isn’t just about having the fanciest microphone—it’s about understanding the nuances of microphone selection and setup. When I first started, I wasted hours trying different gear, only to realize that matching the right microphone type to my environment and voice made all the difference. That revelation transformed my content, and I want to help you achieve the same success.
What I Wish I Knew About Microphone Magic
- Matching Your Mic to Your Space: I once used a condenser mic in a noisy room, which caused endless editing. Switching to a dynamic microphone was a game-changer—less background noise and clearer voice.
- Not All Microphones Are Created Equal: Investing in a mid-range USB mic and learning proper placement outperformed my initial expensive condenser mic used improperly. It’s about the right fit, not the price tag.
- Environmental Awareness Matters: Acoustic treatment and placement can make or break your sound. I added foam panels and a pop filter, drastically reducing echo and pops, saving me hours of post-production.
- Regular Maintenance Is Key: Cleaning cables, updating drivers, and occasional calibration keep my setup reliable. The best gear needs love too.
- Future Innovations Will Simplify Setup: I anticipate smarter microphones with self-diagnostics and AI tuning, making professional sound more accessible for everyone.
Tools That Transformed My Voice Setup
- Best USB Microphones 2024: Reliable, plug-and-play, perfect for beginners and quick setups—trust me, it’s a time-saver.
- Top XLR Microphones: For those ready to step up to professional-grade sound, these offer unmatched clarity when paired with the right interface.
- Voice Recording Tips: Guides and reviews that helped me understand mic placement and environment optimization.
- Ultimate Microphone Guide: A comprehensive resource that demystifies the tech and helps you choose what truly fits your needs.
Step Into the Future of Voice Recording Today
Now is the perfect moment to elevate your voice with the right microphone and setup. Remember, the key isn’t just gear—it’s the harmony of equipment, environment, and your voice. Start experimenting, keep learning, and don’t be afraid to upgrade or tweak your setup. Your audience will thank you for the crisp, clear sound that truly represents your personality and message.
What has been your biggest challenge in choosing or setting up your microphone? Share your experience below—I’d love to hear your story!
This post really hits home for me. I remember starting out with a basic USB microphone, thinking it would be enough for my streaming needs. However, I quickly noticed issues with background noise and inconsistent sound quality. I learned the hard way that evaluating your environment and matching the right mic is essential. After switching to a dynamic mic for my noisy room, my audio clarity vastly improved, and I spent less time editing. One thing I found helpful was trying out different microphones before investing, using free recording software to compare results. It’s surprising how much a slight change in placement or mic type can make a huge difference. I’m curious—what specific setup improvements have others found most effective in reducing background noise and enhancing voice clarity? Sometimes I wonder if professional-grade gear is necessary or if proper setup can achieve comparable results.
I totally agree with the importance of matching the microphone type to your environment, especially as a beginner. I started with a USB mic in a small, untreated room, and the results were pretty disappointing because of background noise. Once I switched to a dynamic mic and added some basic acoustic treatment, my recordings became much clearer and more professional. It’s fascinating how much environment influences sound quality and how the right mic can make a big difference without needing top-of-the-line gear. I’ve also found that experimenting with mic placement—like keeping it slightly off-axis—improves clarity and reduces popping sounds. Has anyone tried combining a good mic with simple DIY acoustic panels? Would love to hear what setups others have found effective for noise reduction and clarity, especially on a budget.
This post really resonates with me, especially the part about choosing the right microphone for your specific setup. I used to think that upgrading to an expensive mic would instantly improve my sound, but I realized the environment and mic placement are just as critical. I started with a basic USB mic in a small, echo-prone room and then moved to a dynamic microphone with some DIY acoustic panels—huge difference! It’s impressive how much room treatment and proper positioning can elevate audio quality without breaking the bank. I’m curious, have others experimented with different room setups or DIY solutions to improve background noise rejection? I’d love to hear what worked best for different budget levels and environments.
This post really highlights the importance of selecting the right microphone type, especially for those just starting out. I’ve been experimenting with both USB and XLR mics, and I’ve noticed a huge difference in sound quality and background noise rejection depending on environment and mic placement. When I moved from a basic USB microphone to a good dynamic XLR setup with some DIY acoustic panels, my recordings became clearer and much less echo-prone. It’s fascinating how proper positioning and room treatment can compensate for less expensive gear. I’ve also found that practicing good mic technique, like staying at the correct distance and using a pop filter, really elevates the quality. How do others balance investing in equipment versus optimizing their environment? Do you think a higher-end mic will always outperform a well-set-up budget option, or can environment adjustments level the playing field? Would love to hear about different experiences with gear upgrades and room treatments.
Reading this post really made me reflect on how much environment impacts voice clarity. I initially thought upgrading my mic would solve all my issues, but I overlooked the importance of room acoustics. I learned the hard way that even the best microphone won’t shine in a cluttered or echo-prone space. After experimenting with DIY acoustic panels and positioning my mic better, I saw a huge improvement in the sound quality. I think for many beginners, it’s easy to get caught up in gear hype without considering the room setup. How do others here balance between investing in nicer equipment versus improving their recording environment? In my experience, a combination of both yields the best results, but I’d love to hear different approaches and tips from fellow creators.