I remember the exact moment I realized my microphone was sabotaging my podcast. I was mid-sentence, pouring my heart out, when I suddenly heard this uneven, muffled sound—like I was shouting into a tin can. The worst part? I didn’t know it was my microphone until I rewatched my recording. It was frustrating, embarrassing, and it made me question whether all my effort was wasted. That lightbulb moment pushed me to dig deeper into the world of microphones, and let me tell you, the right gear can make all the difference. Sometimes, it’s not about speaking louder but choosing the right equipment to ensure your voice comes through crystal clear and professional.
Today, we’re going to tackle this very challenge. If you’re tired of your voice sounding distant, fuzzy, or inconsistent during your streams or podcasts, you’re in the right place. I’ll share insights from my personal journey and reveal the top microphone choices for 2024 that can dramatically improve your audio quality. Whether you’re a newbie or a seasoned streamer, selecting the best microphone is crucial for engaging your audience and building credibility. Ready to transform your voice setup? Let’s dive into what really matters when choosing a podcast or streaming microphone that captures your voice perfectly.
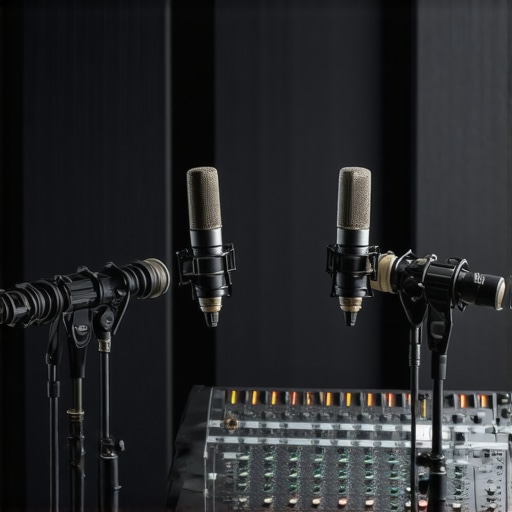
Why Do Microphones Matter So Much for Your Voice Clarity?
The truth is, your voice is the core of your content. It’s what keeps your audience glued, makes your message clear, and eventually, helps you grow. But a subpar microphone turns that voice into background noise, static, or muffled sounds—no matter how compelling your content is. Many streamers and podcasters make the mistake of assuming any mic will do, and that’s a costly error. As audio specialist Creator Setup Guide points out, investing in a dedicated microphone tailored to voice recording can elevate your content from amateurish to professional.
Early on, I bought a cheap USB mic, thinking it would be enough. But I quickly learned that poor microphone quality can distract your audience and limit your growth. Worse, it can leave you feeling frustrated, unsure whether your voice is clear enough to connect. It’s akin to trying to have a conversation with someone wearing a sock over their mouth—no matter how good your message, the delivery is muffled and ineffective. That realization led me to explore better options, like XLR microphones, which offer richer, more natural sound. The right microphone doesn’t just improve sound quality—it boosts confidence and makes your content more authentic and engaging.
Will a Better Microphone Truly Make That Much Difference?
Before you invest hundreds of dollars, it’s natural to wonder if upgrading your microphone is worth it. I understand this hesitation, especially because I made a costly mistake early in my journey. I once bought a high-end XLR mic only to misuse it because I was unaware of proper setup techniques, which resulted in poor sound quality. The mistake taught me that having the right gear is only part of the equation; knowing how to optimize it matters too. So, if you’ve been skeptical, you’re not alone. But trust me, with the right microphone and proper setup, you’ll notice a remarkable difference in your recordings and live streams.
For more detailed guidance on the top microphones to consider this year, check out my comprehensive ultimate buying guide for 2024. Now, let’s get into the specifics so you can pick a microphone that truly enhances your voice and makes your streams stand out!
Select the Right Microphone Model
Start by identifying whether a USB or XLR microphone suits your needs. USB mics are plug-and-play, ideal for beginners, and cost-effective, making them perfect for quick setups. XLR microphones, however, require an audio interface but offer superior sound quality, durability, and expandability. I once opted for a USB mic initially, but when I upgraded to an XLR model, I noticed an immediate boost in clarity and warmth in my recordings. Dive into reviews and compare top models like those recommended in this guide to find your ideal fit.
Prepare Your Recording Environment
Eliminate background noise and echo by choosing a quiet, softly furnished space. Use blankets, acoustic panels, or foam to dampen sound reflections. When I recorded my first few episodes in a bare room, the ambient echo diminished the clarity of my voice. After adding curtains and a foam panel, my audio became noticeably crisper, making editing easier and listeners more engaged. Think of your space as a personal sound booth—every surface that absorbs sound improves your voice’s fidelity.
Optimize Microphone Placement and Technique
Position your microphone about 6-8 inches from your mouth, slightly off-center to avoid plosive sounds—those sudden ‘p’ and ‘b’ noises. Use a pop filter or windscreen to reduce these plosives further. I initially placed my mic too far, resulting in weak audio, and then I learned to angle it directly towards my mouth for consistent volume. A simple adjustable mic stand helps maintain the correct positioning, which is crucial for stable voice capture. Proper placement prevents issues like muffling or excessive sibilance, ensuring your voice comes through as intended.
Configure Your Audio Interface or Mixer Correctly
If you’re using an XLR microphone, connect it to an audio interface. Set the gain control so your voice peaks around 75-85% on the meter—avoiding clipping or distortion. When I first set my gain too high, my recordings distorted frequently. After adjusting it down, the sound became cleaner and better balanced. Use software presets and check levels regularly; this practice ensures your voice remains consistent, minimizing post-editing tweaks. Remember, proper gain staging is key to professional-sounding audio.
Fine-Tune Your Recording Settings
Choose a suitable sample rate (usually 44.1kHz or 48kHz) and bit depth (16-bit or 24-bit) to capture high-quality audio. Activate noise suppression filters if your recording environment is not perfectly soundproof, but avoid overly aggressive filters that can make your voice sound unnatural. I experimented with different settings and found that moderate noise reduction preserved my voice’s natural tone without introducing artifacts. Regularly monitor your audio through good headphones—this helps catch issues early and ensures your content sounds professional.
Many aspiring podcasters fall prey to misconceptions about microphone types and setups, often oversimplifying what truly impacts sound quality. A prevalent myth is that expensive gear guarantees professional audio, but according to expert Creator Setup Guide, proper technique and environment matter just as much. For instance, novices frequently believe that USB microphones are inherently inferior to XLR models, yet high-quality USB mics like the Rode NT-USB or Blue Yeti can deliver remarkable clarity when used correctly, especially in controlled environments. The reality is, many overlook key factors such as microphone placement, gain settings, and room acoustics, which are often more impactful than the mic’s price tag or connection type. Moreover, a common mistake is assuming that all microphones are universally suitable; in truth, choosing between condenser and dynamic microphones depends heavily on your recording context, voice characteristics, and streaming setup. Dynamic mics like the Shure SM7B excel at rejecting background noise, making them ideal for untreated rooms, while condenser mics capture more detail but require soundproofed environments. An advanced trap is misinterpreting frequency response graphs without understanding your unique voice profile. For example, boosting high frequencies might enhance clarity for some voices, but can cause sibilance or harshness in others, leading to unnatural results—an issue detailed in detailed guides. Additionally, many overlook the importance of proper gain staging and microphone placement, which can make or break your sound regardless of gear. Proper positioning—around 6-8 inches from the mouth and slightly off-axis—reduces plosives and sibilance while maintaining consistency, as I discovered through trial and error. Overlooking this step results in dull or inconsistent audio, no matter how advanced your equipment is. Another nuanced point is understanding the impact of room acoustics; even the best microphone cannot compensate for echo and background noise if your environment isn’t optimized. Adding acoustic treatments like foam panels or diffusers dramatically improves clarity, which many beginners underestimate. It’s worth noting that even the most expert recommendations won’t help if you’re unaware of your specific recording conditions. Have you ever fallen into this trap? Let me know in the comments. In summary, mastering microphone audio involves more than just picking a good model; it requires understanding your voice, environment, and correct setup practices. Dive deeper into this topic with our comprehensive guides that demystify the nuances behind professional-sounding podcasts.
Ensuring Your Gear Performs Year After Year
Investing in high-quality microphone equipment is just the beginning; keeping it in optimal condition requires routine maintenance and the right tools. Personally, I rely on a few key practices and products to ensure my podcast setup remains pristine and reliable over time. Regularly cleaning my microphone with a soft, lint-free cloth prevents dust buildup, especially around the grille, which can affect sound quality. For XLR microphones, I use a specialized contact cleaner, like DeoxIT, to clean the input connectors, which I apply with a lint-free applicator to prevent corrosion and ensure a solid connection. To avoid inadvertently damaging cables, I use cable management tools such as Velcro straps and cable clips, preventing strain and accidental pulls that can lead to wear or failure.
Storing microphones correctly is equally important. I keep my gear in a dedicated, padded case, minimizing exposure to humidity and temperature fluctuations. If I notice any performance issues, I troubleshoot with audio interface software calibration tools or update firmware when applicable, ensuring compatibility and optimal performance. Many streamers overlook the importance of firmware updates, but according to expert Creator Setup Guide, these updates often contain bug fixes and improvements that sustain your equipment’s longevity.
What tools are essential for lasting microphone health?
For my routine checks, I use a multimeter to test cable continuity and a small brush for cleaning dust from internal components. Additionally, I employ a mic stand with adjustable springs to reduce mechanical stress and vibrations. A high-quality pop filter not only enhances sound quality but also protects the microphone capsule from moisture and debris, which can cause long-term damage. In my experience, investing in a shock mount significantly reduces the risk of accidental drops, safeguarding your microphone from costly repairs.
Planning for future upgrades is part of my long-term strategy. As technology evolves, I anticipate higher dynamic range microphones and smarter audio interfaces with built-in diagnostics will become more affordable and accessible. Staying proactive with firmware updates and routine cleaning ensures your gear evolves alongside these advancements without performance hiccups. For detailed recommendations on durable, professional-grade gear, I suggest checking out this comprehensive guide.
How do I maintain my setup over time?
The key lies in establishing a consistent maintenance routine. Set reminders to clean your microphone and cables monthly. Keep an eye on connection integrity by periodically inspecting for wear or corrosion. Additionally, calibrate your audio interface settings regularly—software updates often improve noise suppression and gain regulation, ensuring your recordings stay clean. Consider tracking your environmental conditions; maintaining humidity levels below 50% prevents corrosion and mold growth on sensitive components. Engaging with a community of audio enthusiasts on forums like Reddit’s r/podcasting can provide ongoing tips and shared experiences to keep your setup functioning smoothly for years to come. Don’t forget—simple tools and a little routine can keep your podcast voice sounding just as good as the day you started.
The Hardest Lesson I Learned About podcast microphone, xlr microphone, voice recording, usb microphone, streaming mic
One of the most valuable lessons I’ve discovered is that technical setup often outweighs equipment quality. I used to believe that investing in a high-end microphone would solve all my audio issues, but I soon realized that proper placement, environment, and gain control are what truly make a difference. Precision in these details transformed my recordings from mediocre to professional sounding and saving me hours in editing.
3 Myths About podcast microphone, xlr microphone, voice recording, usb microphone, streaming mic That Held Me Back
- All USB mics are bad: I thought I needed XLR for quality, but high-quality USB microphones like the Rode NT-USB proved to be game-changers when used correctly in sound-treated spaces.
- Expensive gear guarantees perfect sound: I learned that even budget microphones can sound great with good technique and environment adjustments. Cost doesn’t always equal clarity.
- You can fix poor audio quality in post: Better setup means less editing and more time focused on creating content. Investing time in proper mic placement pays dividends over expensive fixes later.
What Experts Won’t Tell You About podcast microphone, xlr microphone, voice recording, usb microphone, streaming mic
Many seasoned professionals emphasize that understanding your voice’s unique qualities changes the game. Choosing a dynamic versus condenser mic depends on your environment and voice profile—a fact many overlook. I found that experimenting with mic position and environment adjustments often beats expensive gear upgrades. Additionally, being aware of room acoustics and using treatment tools, such as acoustic panels, can dramatically improve clarity without a hefty investment. Embracing these nuanced details gave me the confidence to produce consistent, broadcast-quality audio. To dive deeper, I recommend exploring this comprehensive guide, which breaks down gear choices tailored to your voice.
Keep Your Gear Running Smoothly and The Confidence to Grow
Throughout my journey, I’ve learned that regular care—cleaning connectors, managing cables, and updating firmware—ensures my setup remains reliable. I reserve time monthly for equipment checks, which prevents minor issues from becoming costly repairs. Investing in accessories like shock mounts and pop filters not only protects your gear but enhances your sound. Remember, your microphone setup is an evolving process; staying proactive with routine maintenance and environment optimization helps you maintain high-quality recordings over years. For recommended tools to extend your gear’s lifespan, visit this trusted resource.
Your Voice Matters, Start Perfecting It Today
Taking control of your microphone environment and setup opens doors to a more engaging and professional podcasting experience. The difference in sound quality not only attracts listeners but builds your confidence as a creator. Remember, mastering your microphone isn’t just about gear—it’s about understanding what makes your voice resonate best. Take this knowledge, experiment, and watch your content soar. Now, I challenge you—what’s one aspect of your microphone setup you’re excited to improve today? Share your thoughts below, and let’s grow together in this audio journey.
,