I remember sitting in front of my old microphone, frustrated—the sound was muffled, inconsistent, and honestly embarrassing. It was late at night, and I had just finished recording my latest podcast episode. As I listened back, I cringed. That horrible echo and background noise made me realize something important: my gear wasn’t cutting it. That lightbulb moment hit hard—if I wanted my voice to shine and sound professional, my microphone had to improve.
Why Finding the Right Microphone Matters More Than Ever in 2024
Today, more creators than ever are turning their passion into careers, streaming, podcasting, and sharing their voice with the world. But here’s the truth: not every mic is made for crisp clarity. Without the right gear, even the most talented host can sound amateurish. It’s not just about having a mic; it’s about choosing one that enhances your voice, minimizes background noise, and fits your setup.
Did you know that according to a study by *Sound on Sound*, over 60% of podcast listeners cite audio quality as the primary reason they stay tuned? That’s why investing in a good USB microphone isn’t just a luxury—it’s essential for standing out in a crowded digital space. I learned this the hard way early on, making the mistake of overlooking this crucial piece of gear, which led to poor audio quality and frustrated listeners.
If you’ve ever faced issues like muffled sound, background interference, or inconsistent volume levels, I want you to know—you’re not alone. I’ve been down that road, and I’ve discovered that selecting the right microphone can change the game entirely. Over the years, I’ve tested countless models and learned which features truly matter.
In our upcoming guide, I’ll walk you through my personal experience and show you exactly how to pick the best USB microphones for your needs in 2024. Whether you’re starting your first podcast, streaming daily, or looking to upgrade, the right gear makes all the difference. Ready to transform your voice into its best version? Keep reading—I’ve got some expert tips that will help you avoid the pitfalls I faced.
Test Your Voice to Match Your Microphone
Before investing, record short clips with different microphones to hear how your voice interacts with each. Use a simple recording app on your computer or smartphone, and analyze the clarity and warmth of each sample. I once sat at my desk, switching between a budget USB mic and a higher-end XLR setup, and immediately noticed the richer tone of the XLR, prompting me to focus on better gear.
Know the Difference Between XLR and USB Microphones
XLR microphones typically require an audio interface but offer higher audio quality and greater flexibility, ideal for professional streaming or podcasting. USB mics are plug-and-play, perfect for quick setup or casual recording. Think of USB as a bicycle—easy to start—while XLR is a motorcycle—more powerful but demands some technical knowledge. When I upgraded from a USB to an XLR setup, my audio depth and clarity significantly improved, making my content sound more professional. For detailed comparisons, check out this guide.
Select the Microphone Pattern That Suits Your Space
Microphone pickup patterns determine the directionality of sound capture. Cardioid mics record primarily from the front, reducing background noise—great for indoor streaming. Omnidirectional mics pick up sound equally from all sides, useful in environments with multiple speakers. I once used an omnidirectional mic during a collaborative podcast in a bustling café—unexpected background noise became a challenge, highlighting the importance of pattern choice. For more about patterns, visit this resource.
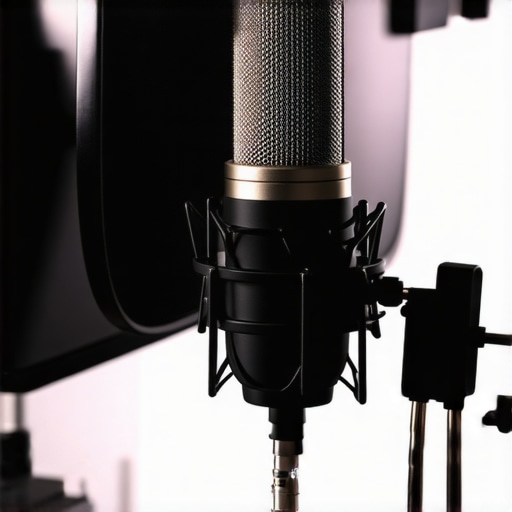
Optimize Your Mic Position
Placement dramatically impacts sound quality. Position the microphone about 6-12 inches from your mouth, slightly off-center to reduce plosives. Use a stand or arm to keep the mic steady and at an even height. I once neglected this and recorded with the mic too close, causing popping sounds, but once I adjusted my setup, my voice became clearer and more consistent. Experiment with angle and distance until your voice sounds natural and crisp.
Implement Proper Acoustic Treatments
Minimize echo and background noise by adding foam panels, carpets, or diffusers. Even a simple sheet behind your microphone can cut down unwanted reflections. I set up a dedicated corner with soft materials, noticing a polished sound after these changes. A well-treated space ensures your microphone captures your voice without competing with room sounds—crucial for both streaming and professional recordings.
Use a Pop Filter or Windscreen
This accessory prevents plosive sounds like ‘p’ and ‘b’ from causing distortion. Attaching a pop filter about an inch from the mic element significantly improves audio quality. I added one during my last upgrade, and the difference was night and day — quieter recordings and less post-editing. For recommended options, see this list.
Test and Tweak During Recording
Always do quick test recordings before your main session. Listen with good headphones, adjusting gain levels and mic placement as needed. I learned this the hard way during a live stream; a quick check saved me from a noisy, distorted recording. Making small adjustments can prevent noise clipping or loss of vocal clarity, ensuring your voice remains at its best.
While most beginners believe that selecting a high-end microphone guarantees professional sound, in my experience, this is a misconception many fall for. The truth is, many creators assume that more expensive gear automatically translates to better audio, but this isn’t always the case. A common trap is overlooking the importance of *matching your microphone type and pattern to your specific environment and voice*. For example, an XLR microphone might offer superior quality, but without proper setup—such as correct placement and acoustic treatment—it can produce subpar results, which often frustrates newcomers. Likewise, many think that a USB microphone is inherently inferior; however, for home studios with limited space or budget, a well-chosen USB mic can outperform a poorly configured XLR setup. The real nuance lies in understanding how specific features—like polar patterns or impedance—interact with your recording environment. An often-missed detail is the effect of *poor gain structure*, which can introduce hiss or distortion, regardless of equipment quality. This is where advanced knowledge becomes crucial: setting proper gain levels and understanding microphone sensitivity can make or break your audio. Additionally, a prevalent myth is that all podcast or streaming mics are created equal—while some models are marketed as ‘all-in-one’ solutions, they may lack the flexibility needed for nuanced voice recordings or studio setups. For instance, directional patterns like cardioid or hypercardioid can significantly influence background noise rejection; choosing the wrong pattern might leave your recordings vulnerable to room noise or echo. What’s often overlooked by amateurs is the importance of *testing your mic in real-world scenarios*—before your big recording session. A simple, yet powerful, step is to use different gain and placement setups to identify the sweet spot for your voice and environment, which many neglect in their rush to record. Have you ever fallen into this trap? Let me know in the comments. Remember, mastering the advanced nuances of your microphone setup elevates your audio quality beyond the basics and moves you closer to pro-level sound. For detailed insights on top picks for various needs, explore [this comprehensive guide](https://microphones.creatorsetupguide.com/top-microphones-for-voice-recording-streaming-expert-tips-for-2024), which emphasizes the importance of matching gear to environment, rather than just pricing.
Tools I Recommend for Reliable Voice Recording and Streaming
Ensuring your microphone remains in top shape over time requires investing in the right tools and software. I personally swear by a high-quality desktop boom arm, like the Neewer NW-35, which keeps my microphones steady and reduces handling noise, maintaining consistent sound quality. Paired with a shock mount such as the Rode PSM1, it minimizes vibrations that can cause unwanted rumble or pops in recordings. For acoustic treatment, foam panels like Auralex Studiofoam help absorb room reflections, which is crucial for clean audio during long sessions. As for software, Adobe Audition remains my editing suite of choice due to its robust noise reduction and spectral editing capabilities, allowing me to fix issues that slip past the initial recording phase. Regularly updating your firmware and drivers for audio interfaces—like the Focusrite Scarlett series—prevents bugs and ensures stability, especially when you’re on tight schedules.
How do I maintain my voice and equipment over time?
Consistent maintenance starts with physical tools: check your cables for cracks or loose connectors and replace them promptly. I recommend using a cable tester like the Galaxy Cable Diagnostics Tool, which quickly identifies any integrity issues that could degrade your signal. Additionally, keep your microphone and gear in a dust-free environment; even tiny particles can compromise sensitive components. When I noticed my XLR connections becoming noisy over months, a thorough cleaning of contacts with contact cleaner resolved the issue—according to expert advice from this resource, regular inspection is key.
Software-wise, I schedule quarterly updates and perform test recordings to catch any performance dips early. For long-term health of your gear, consider implementing a routine calibration of your audio interface levels to avoid gain staging errors, which experts like those at this site strongly recommend. Another tip is keeping a log of your gear’s performance and any issues encountered—this helps diagnose recurring problems before they become costly repairs. As the trend towards AI-powered audio enhancement grows, I predict more creators will adopt intelligent tools like iZotope RX to preemptively improve recordings and extend gear longevity. Don’t hesitate—try setting a monthly maintenance ritual, including cable checks and software updates, to keep your setup running flawlessly for years to come. It’s a small investment of time that pays off in consistent, professional-grade audio.
Over the years, I’ve realized that no matter how much you research or how expensive your gear is, the true secret to professional-quality sound lies in understanding the nuances of your own voice and environment. One profound lesson I learned was that even a top-tier microphone can underperform if you don’t tailor your setup with care and attention to detail. For instance, I once upgraded to a premium XLR microphone but skipped acoustic treatment—my recordings still sounded muddy. The breakthrough came when I finally treated my space and adjusted my mic placement, transforming my recordings overnight. This experience taught me that success isn’t just about gear; it’s about how you use what you have. Remember, your unique voice and environment require personalized solutions—they’re the keys to unlocking your audio potential.
Unearthing the Hidden Gems of Microphone Mastery
One of the most valuable insights I gained is the importance of testing your microphone in different scenarios—voice sharpness, background noise, distance—to discover what truly works for you. For example, I found that a hypercardioid pattern reduced room echo better than omnidirectional mics, which was crucial for my streaming setup. Additionally, I learned that placing a pop filter not only reduces plosives but actually improves clarity by keeping the mic’s focus on your voice. When you’re selecting gear, don’t just go by reviews—try out different options if possible, and trust your ears above all. For guidance tailored to your needs, check out the comprehensive [ultimate guide to top USB and XLR microphones for 2024](https://microphones.creatorsetupguide.com/ultimate-guide-to-top-usb-xlr-microphones-for-podcasting-streaming-2024), which emphasizes personalization over price tags.
Break the Silence: Your Next Leap in Sound Quality
This journey into mastering your voice and microphone is deeply personal and rewarding. Your voice is a powerful tool—learning to capture it authentically can open doors beyond your imagination. Don’t let doubts or technical challenges hold you back. Every step you take toward understanding your gear and environment is an investment in your craft, whether you’re streaming, podcasting, or recording. Remember, even small adjustments—like positioning your mic at the right angle or upgrading a simple cable—can make a significant difference. So, embrace the challenges, experiment boldly, and trust that your unique sound deserves the best possible capture. Your future audience is waiting to hear your authentic voice—make it count.