I remember the moment clearly—I was live on my first big streaming session, heart pounding, excitement in the air. As I started speaking into my shiny new microphone, instead of that lush, professional sound I envisioned, I heard a harsh, tinny echo that made me cringe. It was a lightbulb moment: my microphone was doing me no favors, and my entire setup had a glaring flaw. How could something so essential feel so elusive?
Why Finding the Perfect Microphone Matters More Than Ever
In 2024, the demand for high-quality audio in podcasts, streaming, and voice recordings has skyrocketed. With more creators competing for audiences, a subpar microphone can be the single biggest barrier to sounding professional. Good microphones aren’t just about fancy features; they’re about clarity, presence, and making your voice stand out in a saturated market.
But here’s the kicker—choosing the right microphone isn’t straightforward. There’s a bewildering array of options, from budget-friendly USB mics to high-end XLR setups, each claiming to be “the best” for streaming or podcasting. I’ve been there myself—initially making costly mistakes by prioritizing appearance over sound quality or getting swayed by shiny marketing claims.
Did you know that according to a 2023 survey by PodNews, nearly 70% of successful streamers and podcasters attribute their audio quality as a top factor for audience growth? That surprised me. It goes to show that investing in the right microphone is an investment in your content’s future.
If you’ve ever struggled to get your voice to sound rich and clear, or if you’re eyeing that professional-quality sound but feel overwhelmed by the choices, you’re not alone. Trust me, the right gear—and understanding why it matters—can transform your recordings and streams.
Let’s explore what makes certain microphones stand out and how you can avoid common pitfalls. We’ll look at the best options for various needs and how to set up your gear to ensure your voice shines through every time.
Select the Right Microphone for Your Needs
Start by identifying whether a USB microphone suits your setup best or if you’ll benefit from an XLR microphone. USB mics are plug-and-play and ideal for beginners or small setups, while XLR mics, requiring an audio interface, provide superior sound quality for professional streaming and podcasting. Consider your budget, space, and future expansion plans when making your choice. I once purchased a budget USB mic without much research, only to realize later that an XLR setup would give me the clarity I wanted—this lesson saved me from repeated upgrades later.
Understand Microphone Polar Patterns and Their Benefits
Microphones have different polar patterns, like cardioid, omnidirectional, and bidirectional, which determine how they pick up sound. For streaming, a cardioid pattern is most common because it focuses on your voice and reduces background noise. Think of it as directing a spotlight onto your voice while dimming the surroundings. When I switched from an omnidirectional mic to a cardioid one, my voice became clearer and more isolated, reducing unintended room noise. Always check the specs to ensure the microphone’s pattern suits your environment.
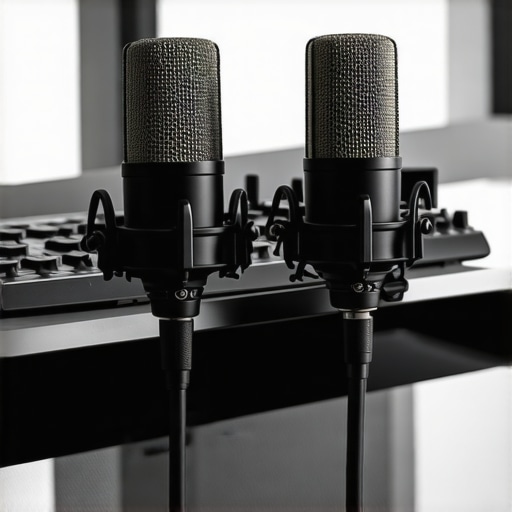
Set Up Your Equipment with Proper Positioning
Proper placement makes a huge difference. Position the microphone about 6-12 inches from your mouth, slightly off-center to avoid breath sounds. Use a shock mount and pop filter to minimize vibrations and plosive sounds—these are the explosive When diving into the world of voice recording and streaming, many enthusiasts fall prey to misconceptions that hinder their progress. One pervasive myth is that the most expensive microphone automatically guarantees professional sound. While high-end models like certain XLR microphones can offer superior quality, the real secret lies in proper setup and environment. Without acoustic treatment and correct placement, even a top-tier mic won’t deliver premium audio. Another common mistake is assuming that all USB microphones are inherently inferior to XLR counterparts. This oversimplification overlooks the advances in USB tech—many models now rival professional gear if used correctly.
What are the pitfalls when neglecting room acoustics for your mic?
Neglecting the environment significantly affects your sound quality. Echoes and ambient noise can make even the best microphone sound muddy or harsh. According to audio engineering expert Dave Rat, “Room acoustics are often more critical than the microphone choice itself.” Choosing a mic based solely on specs without considering your recording space is a rookie move that can sabotage your efforts. Additionally, many believe that switching between USB and XLR is a straightforward upgrade. However, each has its nuances. USB mics are plug-and-play—perfect for quick setups—while XLR systems require an audio interface and proper gain staging. Failing to understand these differences can lead to issues like distorted sound or unwanted noise. For instance, misadjusted gain levels on an XLR setup can clip your audio, making it unusable. The key is understanding your specific needs and environment. If you’re aiming for professional-grade quality, investing time in learning about microphone polar patterns and proper positioning is crucial. Instead of jumping straight into gear choices, focus on mastering these fundamentals first. Want detailed insights? Explore our guide on best streaming microphones for clarity in 2024 or learn how to optimize your room for maximum sound quality. Remember, selecting the right technology is just one part of the equation; how you use it makes all the difference. Have you ever fallen into this trap? Let me know in the comments.
Keep Your Gear Performing Like New
Reliable audio quality depends heavily on regular maintenance and choosing the right tools. I personally rely on a few essential practices and equipment to keep my streaming microphone and recording setup in top shape. One of my go-to tools is a compressed air can for cleaning dust from my XLR microphone’s grille and internal components—dirt buildup can degrade sound quality over time. Additionally, I use a high-quality pop filter, like the Auphonix Pop Filter, which prevents saliva buildup on the microphone capsule, extending its lifespan. Regularly inspecting cables and connectors is crucial; I prefer locking XLR cables because they resist accidental disconnection and minimize noise issues.
Tools I Recommend for Longevity and Consistency
To streamline maintenance, I swear by a few specific tools. First, a dedicated audio interface, like the Focusrite Scarlett 2i2, ensures clean gain staging and reduces electrical noise, which can otherwise cause long-term wear or inconsistent recordings. For software, I use Reaper for post-processing my recordings; its robust noise reduction features help eliminate background noise and prevent the need for repeated re-records. Also, an audio analyzer app, such as Room EQ Wizard, helps me periodically check my room’s acoustics and identify any issues that could affect my microphone’s performance over time. Having a consistent setup routine, including calibrating your gain levels and testing your mic every few weeks, helps catch issues early before they escalate.
Future Trends in Microphone Maintenance and Tools
Looking ahead, I predict that AI-powered diagnostics and maintenance will become more integrated into professional audio gear. Imagine your microphone could alert you via an app when it detects decreased performance or impending hardware failure—saving time and money. Furthermore, advances in self-cleaning microphone capsules might be on the horizon, reducing the need for manual cleaning and upkeep.
How do I maintain quality over time?
The secret is establishing a routine—regular cleaning, calibration, and environmental checks—paired with reliable tools like high-grade cables, protective pop filters, and software for noise reduction. I also stay informed by consulting expert sources. For instance, the technical guide from Shure discusses best practices for microphone care and longevity, which I follow diligently to extend my gear’s life and keep my voice sounding professional. Try incorporating routine cleaning with compressed air and investing in quality cables; these small steps can make a significant difference in the durability and clarity of your microphone setup.
Looking back, I realize that mastering my streaming microphone setup was a journey filled with lessons and surprises. The biggest breakthrough for me was understanding that even the most advanced gear can’t hide poor room acoustics or bad positioning. One lightbulb moment was discovering that regular calibration and maintenance are not optional—they’re essential to sustaining high-quality sound over time. Small improvements, like investing in a quality pop filter or learning proper gain staging, transformed my recordings from muddy to crystal clear, reinforcing that attention to detail makes all the difference in voice clarity and professionalism.
The Hidden Lessons I Had to Learn About Microphone Mastery
- Don’t Oversimplify Equipment Choices: A high-end microphone won’t compensate for a noisy room—environment matters more than you think. I initially believed I could buy the best mic and be done with it, but sure enough, my recordings suffered without proper acoustic treatment.
- Proper Placement Is King: Positioning your mic correctly can elevate your sound tenfold. I found that even small adjustments—like angling slightly off-center and maintaining the right distance—helped reduce plosives and room noise significantly.
- Invest in Routine Maintenance: Cleaning connectors, inspecting cables, and calibrating your gear regularly prevent long-term issues. Incorporating simple habits, like using compressed air to keep my gear dust-free, saved me countless re-records.
- Understanding Polar Patterns Saves Time: Choosing the right polar pattern—not just going for the fanciest mic—can drastically improve your sound. Switching from an omnidirectional to a cardioid pattern in my setup made my voice more focused and professional-sounding.
- Environmental Awareness Is Critical: Your recording space’s acoustics matter more than your mic’s specs. I learned that treating my room with foam panels created a soundproof bubble, making a better microphone perform at its best.
My Go-To Tools for Long-Term Voice Clarity
- Focusrite Scarlett 2i2 Audio Interface: It provides clean gain and reliable connection, essential for maintaining quality through countless sessions. I trust it because of its durability and consistent performance.
- Reaper Recording Software: Its noise reduction and editing capabilities allow me to clean up recordings without losing warmth, making my voice sound polished every time. I’ve tried many, and Reaper strikes the perfect balance of power and user-friendliness.
- Room EQ Wizard (REW): This helps me analyze my space and identify acoustic issues that could muddy my audio. I use it regularly to fine-tune my environment, ensuring my gear performs optimally.
- High-Quality Cables and Pop Filters: These small investments prevent unwanted noise and protect my gear, extending its lifespan. They’re the unsung heroes behind every clear, professional recording I produce.
Where the Future of Voice Microphone Care Is Heading
Innovations like AI-driven diagnostics and self-cleaning microphone capsules could revolutionize how we maintain our equipment. Imagine a mic that notifies you of performance drops before issues arise or adjusts settings automatically for optimal sound. As technology progresses, staying informed and adapting these innovations will help you keep your voice crisp and your setup reliable. Continual learning from industry experts, attending webinars, or exploring cutting-edge gear will be your secrets to staying ahead.
Keep Your Voice Sharp and Your Setup Smiling
Consistent care, a curious mind, and some strategic investments can turn your voice recordings from good to unforgettable. Remember, the real magic lies not just in the microphone you choose but in how you nurture it and your environment. Have you ever overlooked simple adjustments that made a huge difference? Share your experiences—I’d love to hear what worked for you.