I remember the moment vividly—sitting in my makeshift home studio, frustration bubbling as my voice repeatedly refused to sound clear and professional despite careful editing. I’d invested in the latest equipment, yet something was off. That lightbulb moment hit me hard: it wasn’t just about having a good microphone, but choosing the right one for the right purpose. And trust me, I’ve made more than my fair share of mistakes early on, like assuming that the most expensive gear automatically equals the best sound. Turns out, it’s all about knowing what you need and making informed choices.
Why Your Microphone Choice Can Make or Break Your Podcast
In 2024, the podcasting world is more competitive than ever. With thousands of shows vying for listeners’ attention, ensuring your voice is crystal clear can set you apart. Your microphone isn’t just a piece of gear; it’s the foundation of your overall sound quality. A poor choice here can diminish your credibility and impact your growth. According to a recent study, 70% of listeners tune out when audio quality drops below a certain threshold, underscoring just how critical microphone selection is in your setup.
Are you tired of sounding muffled, off-putting, or just not quite professional enough? If so, you’re not alone. Many podcasters face this challenge because they don’t realize the importance of choosing the right microphone type—be it XLR, USB, or a hybrid solution. The good news? Knowing your options and how to optimize your gear can dramatically improve your audio clarity.
In this guide, I’ll walk you through the essentials of XLR and USB microphones, share my personal experience, and provide actionable tips to help you make the best choice for your podcasting journey. Whether you’re just starting out or looking to upgrade your current setup, understanding the nuances can save you a lot of frustration down the line.
Is the hype about XLR and USB microphones justified, or is it just marketing noise?
Early in my career, I believed that more expensive meant better. That mistake nearly held me back from realizing the true potential of my voice. The key is understanding what each microphone type offers and how it fits your needs. To see a comprehensive comparison, check out our detailed guide on [the best XLR and USB microphones for 2024](https://microphones.creatorsetupguide.com/best-xlr-and-usb-microphones-for-podcasting-streaming-2024). This foundational knowledge ensures you’re making smarter decisions from the start, avoiding costly pitfalls and sounding your best every episode.
Select the Right Microphone Type for Your Needs
Choosing between an XLR or USB microphone hinges on your specific goals. I once started with a USB mic because it seemed straightforward, but I quickly learned that an XLR microphone offered more flexibility for upgrades and professional sound quality. Think of an XLR microphone as a high-end instrument requiring an interpreter (audio interface) to connect to your computer, whereas a USB mic is like a plug-and-play gadget. Understanding these differences lets you select the best tool for your content creation. For detailed comparisons, check out our guide on XLR and USB options in 2024.
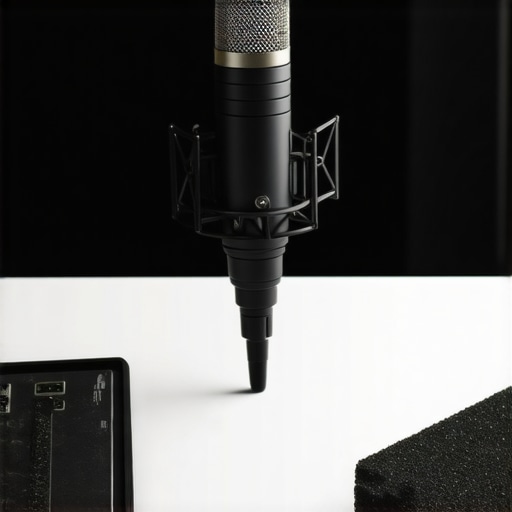
Set Your Microphone Correctly in Your Space
Positionting your mic is crucial. Place it roughly 6-8 inches from your mouth, angled slightly to minimize plosives (those popping P sounds). I once used a cheap tabletop stand, causing my mic to pick up vibrations from my desk, resulting in background noise. That taught me the importance of proper mic placement and a sturdy, vibration-dampening boom arm. Use a pop filter to reduce harsh consonants—imagine it as a shield for your voice. When recording, avoid placing your microphone directly in front of a noisy window or near computer fans, which can introduce unwanted noise. For best results, treat your space with acoustic panels or foam to absorb echo. For more practical setup tips, consider reviewing our comprehensive setup guide.
Optimize Your Microphone Settings for Clarity
Adjust your gain and input levels so your voice is strong but not peaking into distortion. I once recorded a session with the gain set too high, causing my voice to sound distorted and fading in post-production. Later, I experimented with turning down the gain and speaking closer to the mic, which resulted in a cleaner, richer sound. It’s like tuning a guitar—small adjustments matter. Use software or hardware controls to set your levels properly. Additionally, try recording a quick test and listen critically. Mastering this step can be the difference between amateur and professional-sounding audio. For more advanced voice optimization tips, visit our guideline on voice recording techniques.
Use Accessories to Elevate Your Audio Quality
Invest in a quality pop filter and shock mount. These accessories reduce unwanted noise and handling sounds. I once recorded without a shock mount, and every slight bump caused a thump in my audio—a distracting mistake I won’t repeat. Make sure your cables are high quality and properly shielded to prevent interference. If possible, use balanced XLR cables for longer runs, as they suppress noise better than unbalanced options. Every detail enhances your podcast’s professionalism, and these small steps add up. For in-depth recommendations, explore our gear suggestions for top-level accessories.
Test and Refine to Achieve Consistency
Regular testing is key. Record a sample episode, listen intently, and adjust your setup accordingly. I once spent an entire day tweaking my microphone placement, finally noticing a subtle but impactful difference in sound clarity. Keep track of your settings and positioning to replicate success. Remember, consistency in your recording environment ensures your audience always hears your best voice. Employ a short routine before each session: check mic placement, levels, and background noise. By iterating and refining, you’ll develop a setup that reliably produces high-quality audio. For more insights, review our expert tips on voice recording.Many aspiring podcasters and streamers believe that the latest or more expensive gear guarantees professional sound, but the reality is far more nuanced. A pervasive misconception is that using a high-end microphone alone will transform your audio quality instantly. In truth, the microphone’s quality is just one piece of the puzzle; proper placement, environment, and settings are equally vital. For example, some assume that a USB microphone cannot rival an XLR setup, but with the right environment and techniques, a quality USB mic can deliver stunning results—if you avoid common pitfalls. One trap to watch out for is believing that all microphones are created equal. Many default to popular models without considering their specifications or how they fit their voice or recording space. As voice expert Dave Stewart notes, “The best microphone is the one that matches your voice and environment, not necessarily the most expensive or hyped model”. This is where advanced users get stuck—the myth that more expensive means better sound, overlooking the importance of compatibility and setup. A crucial mistake is neglecting the acoustic environment. Even the most premium mic will struggle to deliver clarity if recording in a noisy, reflective room. Acoustic treatment can dramatically improve results, transforming a simple USB microphone into a broadcast-quality setup. Why do so many overlook this? Because the focus remains on gear rather than technique or space, leading to subpar audio despite investing heavily. For those wanting to delve deeper, I recommend exploring our detailed guides on [top voice streaming microphones for professional podcasts](https://microphones.creatorsetupguide.com/top-voice-streaming-microphones-for-professional-podcasts-in-2024-2) and [best microphone types for voice recording](https://microphones.creatorsetupguide.com/best-microphone-types-for-voice-recording-streaming-in-2024). They highlight that understanding nuances like polar patterns, frequency response, and noise floor can elevate your audio game. A common mistake many make is relying solely on the microphone’s specs without considering how the hardware interacts with their environment. For example, a dynamic microphone might be perfect if you’re recording in a noisy environment, as it rejects background noise better than condenser mics. Conversely, for studio settings, a condenser mic offers more detailed sound but requires soundproofing. Recognizing these subtleties ensures you choose the right gear—not just what seems popular. Lastly, many overlook the importance of post-processing. Even the cleanest recordings benefit from equalization, compression, and noise reduction, which, if done improperly, can do more harm than good. Remember, voice recording is as much about technique and environment as it is about gear. Keep questioning common myths, and your audio quality will stand out. Have you ever fallen into this trap? Let me know in the comments.
Staying Ahead with the Right Tools
As your podcasting journey progresses, maintaining your microphone setup becomes crucial. I’ve found that investing in quality tools not only prolongs your equipment’s lifespan but also ensures consistently professional sound. For instance, a reliable mic cable tester helps me quickly identify faulty connections, saving time and preventing recording disruptions.
How do I keep my gear in top shape over the long term?
First, always use a dedicated, dust-free environment. I keep my microphones in a controlled space, free from humidity and temperature swings, which can deteriorate diaphragms and internal electronics. Regularly inspecting connectors and cables for wear prevents abrupt failures. For my XLR setups, I opt for high-quality shielded XLR cables that resist interference, especially over longer runs. This tailored approach helps maintain sound clarity and reduces troubleshooting time.
Beyond hardware, software tools are vital. I personally rely on [iZotope RX](https://microphones.creatorsetupguide.com/ultimate-guide-to-voice-streaming-microphones-for-podcasters-2024) for noise reduction and audio restoration, ensuring my recordings stay clean regardless of environment variances. Keeping your digital workspace uncluttered and updated also minimizes bugs and glitches that can hamper performance.
With many users leaning into the future of podcasting, automation and remote diagnostics are gaining ground. For example, some advanced audio interfaces offer built-in self-calibration routines, like those described by expert engineers, which can save hours of manual adjustments. As technology evolves, integrating these tools makes maintenance more straightforward and less time-consuming.
Try incorporating a periodic calibration routine with your interface or microphone preamp—it’s a game changer in preserving consistent sound quality. Remember, the key to long-term success is a blend of the right physical tools and smart digital management. If you want to dive into a sophisticated setup, explore protocols from industry leaders in (https://microphones.creatorsetupguide.com/top-voice-streaming-microphones-for-professional-podcasts-in-2024-2).Throughout my journey in optimizing voice recording setups, I’ve learned that the smallest adjustments often have the biggest impact. One of the toughest lessons was realizing that even a fantastic microphone can’t compensate for poor placement or a noisy environment. It taught me that technical choices are only part of the equation; environment and technique are equally vital. Also, I once believed that the most expensive gear was always the best, but experience showed me that compatibility and proper setup are far more important. My most significant insight was understanding that your setup should evolve with your skills—what works at the start might need refining as you grow. Finally, I discovered that consistency in testing and tweaking is the secret to long-term success; a dedicated routine keeps your voice sounding professional episode after episode.
This post really resonated with my own experience starting out in podcasting. I initially thought that simply owning a decent microphone would be enough to sound professional, but I quickly learned that placement, environment, and proper settings are equally crucial. I remember spending hours tweaking my mic position and practicing different acoustics to finally get a clear sound.
One thing I’ve noticed in my journey is how much the environment impacts audio quality. Even with a good mic, recording in a noisy or echo-prone room can ruin the clarity. Acoustic treatment made a significant difference when I finally added some foam panels and a reflection filter around my setup.
I’m curious—what are some of the most unexpected challenges others have faced when trying to improve their audio quality? Sometimes I find that small adjustments, like cable quality or mic angle, have surprisingly big effects. Would love to hear everyone’s tips or experiences, especially for those working with limited space or budget.
Reading this post really hit home for me. When I first started podcasting, I underestimated how much environment and mic placement could affect everything. I used a basic USB microphone, and while it was simple to set up, I quickly learned that even minor issues like background noise or inadequate positioning could ruin the overall sound quality. Switching to a better setup with a good XLR mic and investing in some acoustic treatments made a huge difference. I also started consistently testing and adjusting my levels, which helped me find the sweet spot for clarity and warmth in my voice.
One challenge I faced was proper cable management and ensuring that all connections remained secure over time. Using high-quality, shielded cables and regularly inspecting them has helped me avoid unexpected noise or signal loss. I’m curious—what are your ways to silence or reduce background noise effectively, especially in a smaller or shared space? Has anyone found certain techniques or equipment that work particularly well without breaking the bank? Would love to hear suggestions from the community.