I remember the exact moment I realized my audio was holding me back. I was recording my latest podcast episode, feeling confident, but as soon as I played it back, my enthusiasm fizzled—thin, muddy sound that didn’t do my voice justice. Frustration crept in. I had invested in some decent gear, yet my recordings lacked warmth and clarity. That lightbulb moment sent me down a rabbit hole of research, testing, and eventually discovering the power of a high-quality microphone. Have you ever felt that way, too? That your voice deserves better, but you’re unsure where to start? Well, you’re not alone, and good news—I’ve got your back. Today, we’re diving into the best XLR microphones for high-quality voice recording in 2024, so you can finally make your recordings truly stand out and sound professional.
Why Upgrading Your Microphone Matters More Than Ever
In a world where content is king, the quality of your audio can make or break your entire project. Whether you’re a podcaster, streamer, or voice-over artist, crystal-clear sound isn’t just a luxury—it’s an expectation. Studies show that listeners are far more likely to stay tuned if the audio quality is top-notch, with some claiming that poor sound quality can reduce audience retention by up to 60%. Recognizing this, many creators are turning to top-tier microphones to elevate their voice. But with so many options out there, where do you start? Choosing the right microphone is more than just picking a shiny new piece of gear; it’s about understanding what suits your voice and recording environment best. The switch from generic to professional equipment can seem daunting, but I promise—it’s completely doable once you know what to look for.
Is Investing in a Top XLR Microphone Really Worth It?
Here’s a question you might be pondering: “Do I really need that expensive mic?” I get it. When I started, I made the mistake of thinking all microphones are created equal. Turns out, I wasted months on equipment that wasn’t suited for my voice or environment, resulting in subpar recordings. It wasn’t until I chose a microphone designed for high fidelity that everything changed. So, if you’ve faced similar disappointments, know you’re not alone. The right mic can transform your content, add credibility, and significantly improve listener engagement. Want to learn how to pick the perfect one for your setup? Keep reading—I’ve got some practical tips coming your way.
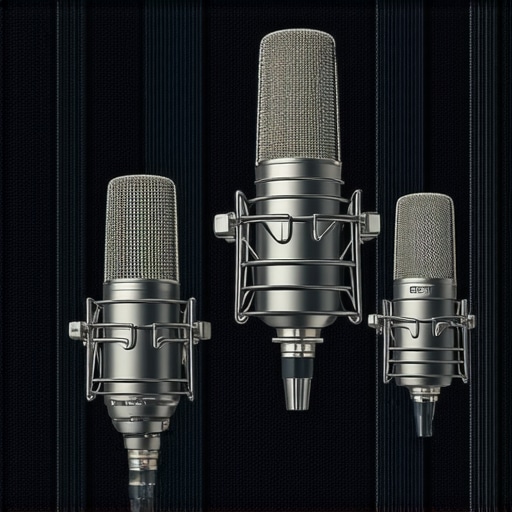
Select the Right Microphone Type
Start by choosing between a USB microphone or an XLR microphone. USB mics are plug-and-play, great for beginners, while XLR mics require an audio interface but offer superior sound quality. I once bought a USB mic expecting studio-level results, but after switching to an XLR setup, my recordings gained warmth and depth. For detailed comparisons, check out this guide.
Position Your Microphone Properly
Placement is everything. Position the microphone about 6-12 inches from your mouth, slightly off-axis to reduce plosives. Think of it as crouching beside a campfire; staying too close risks overwhelming the sound, too far results in lost detail. I once used a boom arm to elevate my mic, which minimized desk noise and improved clarity. Use a pop filter or foam windscreen to prevent popping sounds, similar to a shield protecting a knight.
Set Up Your Recording Environment
Acoustic treatment transforms your space into a professional studio. Use foam panels, blankets, or even soft furnishings to absorb sound reflections. I struggled with echo in my office until I added some blankets behind me, which smoothed out the reverb. The goal is to create a space where your voice is captured cleanly, much like quieting a recording booth. For more tips, see this resource.
Adjust Your Microphone Settings
Configure gain, EQ, and compression for optimal sound. Set gain so your loudest sounds don’t peak into the red zone—think of it as turning down a garden hose so it waters evenly. Use software or hardware sliders to prevent distortion. Applying light compression helps even out dynamic range, making quiet parts audible without loud peaks. I experimented with settings live, recording a messy take, then adjusting until my voice sounded warm and balanced. Tools like audio processing can assist in fine-tuning your results.
Test and Iterate
Always record test clips and listen critically. Play back your recordings on different devices—headphones, speakers, even your car stereo. This is akin to tasting a dish in different contexts to balance flavors. Gather feedback and tweak your setup accordingly. Remember, the key is consistency; once your sound feels right, stick with it. I kept adjusting for a week before I finally achieved a clear, professional tone that resonated with my audience.
Final Tips for Excellence
Maintain your equipment—clean your mic capsules and replace foam windscreens as needed. Invest time in learning how to use editing software to further enhance your recordings. And don’t forget about your voice—warm up, stay hydrated, and practice good mic technique. Each step builds towards that polished, broadcast-ready sound that makes your content stand out. For comprehensive equipment reviews, visit this page.
Even seasoned creators often fall prey to pervasive misconceptions that hinder their audio quality and overall professionalism. One common mistake is assuming that all microphones, whether USB or XLR, are created equal. This oversimplification ignores the nuanced differences in diaphragm size, polar patterns, and internal components that significantly affect the final sound. For instance, a large-diaphragm condenser microphone can capture more detail and warmth, which is critical for voice recordings, yet many overlook this advantage, opting for cheaper, small-diaphragm models that lack depth. Moreover, the prevalent belief that plugging in a decent mic guarantees studio-quality sound is misleading. Proper positioning, acoustic treatment, and gain staging are often ignored, leading to an ‘oops’ moment where users realize their recordings lack clarity despite high-end equipment.
Another misconception is the idea that a USB microphone can entirely replace an XLR setup for professional-quality broadcasts. While USB mics are convenient, they typically sacrifice sound fidelity and flexibility, especially in acoustically untreated spaces. Advanced users know that pairing an XLR mic with a quality audio interface, like detailed in [this comprehensive guide](https://microphones.creatorsetupguide.com/ultimate-guide-to-top-microphone-types-for-voice-recording-streaming), unlocks superior dynamic range, lower noise floors, and greater customization through EQ and compression.
Beware the trap of relying solely on default gain settings or neglecting the importance of a proper environment. Many creators blast their voice through poorly treated rooms, resulting in distracting echo or reverb. Acoustic treatment, even with simple solutions like blankets or foam panels, can dramatically improve clarity, akin to recording in a professional studio. A common mistake is avoiding the use of pop filters, which do more than combat plosives—they help maintain consistent mic distance and protect your capsule from moisture buildup.
Lastly, advanced creators know that mastering post-production is essential. Over-compression or excessive EQ can strip away natural warmth, making voices sound unnatural. Subtle adjustments, combined with proper mic technique, will yield the most authentic and engaging results. For a deeper dive into these nuances, I recommend checking out [this in-depth resource](https://microphones.creatorsetupguide.com/best-usb-xlr-microphones-for-voice-stream-quality-in-2024).
Do you find yourself falling for any of these myths? Have you ever experienced a frustrating recording session because of assumptions that didn’t hold up? Let me know in the comments! Remember, the devil is in the details, and mastering these subtle points can elevate your content from amateur to professional.
Keeping It Running: Tools and Techniques for Longevity
Once you’ve invested in a quality microphone and optimized your setup, the next step is ensuring these tools stay in top shape over time. Regular maintenance not only preserves your equipment’s performance but also extends its lifespan, saving you money and headaches down the line. Personally, I rely on specific tools and methods that have proven effective for my workflow and can help you maintain professional audio quality consistently.
First, I always keep a microfiber cloth and a gentle cleaning solution handy to clean my XLR microphones’ capsules and cables. Dust and debris can accumulate, leading to degraded sound quality or even damage. Gently wiping the capsule surface can prevent unwanted noises caused by dirt particles. Additionally, using a specialized aerosol cleaner designed for electronics allows safe removal of dust from internal components if your microphone’s design permits.
For securing connections and preventing wear, I recommend investing in high-quality XLR and USB cables with durable connectors. Cheaper cables often develop faults after a short period, resulting in crackles or loss of audio. I prefer locking connectors where possible, as they stay firmly in place, ensuring stable recordings during long sessions.
Software tools also play a crucial role. I use audio editing applications like Audacity or Reaper to perform routine checks of recorded audio. Regularly reviewing your recordings helps catch issues early—be it background noise, clipping, or imbalance—that might be overlooked during live sessions.
In the future, I predict the trend toward integrated maintenance solutions. Smart microphones with self-diagnostic features, similar to advanced gear in other tech sectors, will become commonplace, alerting you proactively to potential problems before they affect your recordings. Keeping an eye on emerging innovations can help you stay ahead and ensure your setup remains top-tier.
How do I maintain my microphone and streaming tools over time?
Practicing a routine maintenance schedule is essential. This includes cleaning your mic surfaces weekly, inspecting cables for wear, and updating your audio software periodically. Proper storage is equally important—keep your microphones in protective cases or padded bags when not in use. This shields them from environmental hazards like humidity and dust, which can cause corrosion or internal damage. Additionally, calibrate your equipment occasionally by testing and adjusting gain levels and settings, ensuring consistent sound quality across sessions. As I mentioned earlier, try using specialized cleaning tools and high-quality cables to prevent common issues affecting longevity. Staying vigilant with these simple but effective tips will guarantee your investment continues to serve you well for years to come.
What I Wish I’d Known Before My First Microphone
One of the most impactful lessons I learned was the importance of mic placement—it’s not just about having a good microphone but knowing how to position it correctly. I once recorded an entire episode with the mic too close, causing plosives and distorted sound, only to realize later that a simple adjustment could have saved me. Another insight was the myth that expensive gear guarantees quality; in reality, proper setup and acoustic treatment matter more than price tags. Additionally, I underestimated the power of a well-treated space—adding blankets and foam drastically improved my recordings, even on a modest budget. Finally, mastering basic post-production techniques, like gentle equalization and compression, transformed my raw recordings from average to broadcast-ready, proving that your workflow is just as vital as your equipment.