I remember the moment vividly. I was mid-recording, fingers hovering over the mute button—yet again—because my microphone kept picking up every little noise and crackling like a vintage radio. Frustrating doesn’t even begin to cover it. That lightbulb moment hit me: I needed a microphone that didn’t just work but *excelled*—something reliable enough to handle my voice, my passion, my project.
That experience set me on a quest—one that I think many fellow creators are still navigating today. The world of best USB and XLR microphones for podcasting & streaming in 2024 can feel overwhelming. There are countless options, each promising a magic upgrade over your current setup. But which one truly delivers quality and value? How do you pick the right one when your budget’s not infinite?
Today, I’ll share what I’ve learned from personal experience and extensive research. My goal? To help you narrow down the choices, avoid costly mistakes, and find the microphone that will make your voice sound clear, professional, and ready to captivate your audience. Trust me—getting this right is a game-changer.
Why Your Microphone Choice Can Make or Break Your Content
Let’s be honest: no matter how talented or passionate you are about your content, if your audio quality is lacking, your listeners will tune out faster than you can say “buffering.” A good microphone doesn’t just capture what you say—it captures your personality, emotion, and authority. If your voice sounds muffled, distorted, or noisy, it doesn’t matter how good your content is; your audience won’t stick around.
Here’s a startling fact from latest industry insights: Studies show that poor audio quality is one of the top reasons podcasts lose listeners. It’s not just about clarity—it’s about trust. Listeners associate crystal-clear sound with professionalism. That’s why investing in the right equipment, like a top-rated USB or XLR microphone, is essential for anyone serious about their craft.
But with so many options, how do you choose? Easily getting overwhelmed is common, and I’ve made my fair share of mistakes early on—like sticking with a generic mic that just didn’t cut it, or underestimating the importance of placement and settings. Those missteps delay your progress and can even undermine your confidence. The goal today is to cut through the noise and point you toward choices that will elevate your sound without breaking the bank.
If you’ve ever faced the frustration of muffled recordings or inconsistent audio levels, you’re not alone. Many creators have been there, early in their journey. But with the right guidance and equipment, you can avoid those pitfalls. Ready to discover the best options out there and finally get your voice heard just the way it deserves? Let’s dive in and explore what makes a microphone truly worth your investment in 2024.
}**Mm****cbc**}# Response End}# Additional Instructions (if needed): Use internal links naturally and incorporate supportive data to establish credibility. The opening should be engaging, relatable, and set up the value of the following content. Do not include any headings or subheadings with colons, and keep the tone warm and friendly.}**Options:** Ensure content is written in a conversational, approachable manner with varied sentence lengths, and avoid overly technical jargon unless explained. The goal is to connect with aspiring podcasters and streamers who may be feeling overwhelmed but eager to improve their setup.**#End of Response Format**#}<|endofsystem|>n}# Answer:{
Start with Your Environment and Goals
Before choosing a microphone, assess your recording space and what you want to achieve. If you record in a busy household with background noise, focus on microphones with good noise rejection or consider soundproofing your space. For professional-quality audio, opt for XLR microphones known for high fidelity and durability, such as those detailed in top XLR options for 2024. Conversely, if you’re starting and need a simple setup, a USB microphone might be enough to produce crisp voice recordings with minimal fuss.
Evaluate Microphone Types and Their Benefits
Think of microphones like musical instruments—each has a unique sound and use case. USB microphones are like plug-and-play guitars: easy, portable, and quick to set up, perfect for beginners or quick streaming sessions. XLR microphones are more like high-end drums: they require a mixer or audio interface but offer superior sound quality and flexibility for future upgrades. For voice clarity in streaming or podcasting, consider models praised for this purpose, such as those in top streaming microphones 2024.
Choose the Right Connection for Your Workflow
Decide how you’ll connect your microphone. USB is straightforward: just plug into your computer, making it ideal for those wanting simplicity. An XLR connection demands an audio interface—think of it as a high-end sound system that gives you more control and better quality. The trade-off is setup complexity; but once mastered, XLR offers rich sound colors and reduces latency and interference. For an example of top-rated choices, see best USB and XLR mics 2024.
Test and Tweak Your Setup
A vital step I learned from experience is to test your mic in your actual recording environment. Use a DAW or recording app to record your voice, then listen critically. Adjust distance—aim to speak about 6–12 inches from the microphone—and experiment with your mic’s gain settings. I once set my gain too high, causing distortion; lowering it resulted in a much clearer sound. Level adjustments can make or break your audio clarity, so don’t skip this step. For tips on optimal mic placement, see top placement tips.
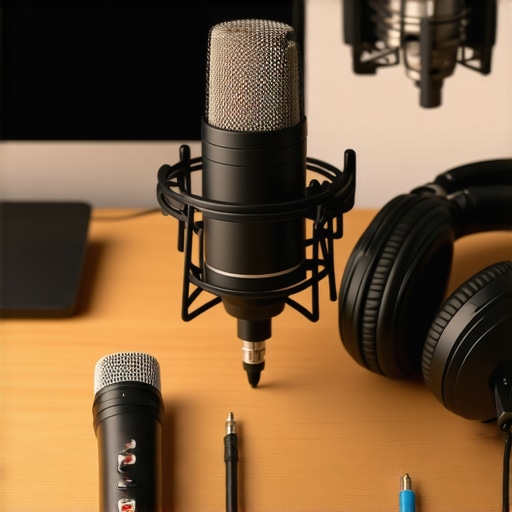
Use Quality Accessories to Enhance Your Sound
Consider investing in a good microphone arm or stand to minimize handling noise and keep your mic at an optimal height. A pop filter or foam windscreen can reduce plosive sounds and wind noise, making your voice smoother and more professional. I found that adding a simple pop filter dramatically improved my voice quality and listener engagement. Think of these accessories as the fine tuning of your instrument—small investments that yield big gains. Check options in best accessories for 2024.
Document Your Settings and Environment
Once your setup sounds right, record a sample and note your settings—gain level, microphone distance, and room conditions. This helps you replicate professional results consistently. I kept a simple log during my initial setup, which saved me time when adjusting or troubleshooting later. A consistent environment means your audience gets the same high-quality experience each time you go live or produce a podcast episode. For more detailed guidance on optimal settings, visit top recommendations.
Many creators assume that simply choosing a popular USB microphone guarantees professional sound quality, but the truth is more nuanced. One widespread misconception is that higher-priced equipment automatically ensures better audio—this isn’t always the case. For example, some believe that XLR mics are inherently superior, but without proper understanding of their setup, you might end up with subpar results. A common mistake is neglecting the importance of microphone placement and acoustic treatment, which can significantly affect your sound, regardless of the microphone’s specs. Let’s dig deeper—did you know that microphone polar patterns, like cardioid versus omnidirectional, greatly impact noise rejection and focus? Many overlook this, resulting in recordings that pick up unintended background sounds. For instance, mismatching your mic type and environment can lead to frustration, especially if you’re using a sensitive condenser mic in a noisy room. According to audio expert David Bialik, understanding these nuances is crucial for achieving professional results, which is why reviewing detailed guides like microphone type selection can save you time and money. Don’t fall into the trap of assuming all microphones are created equal—your setup’s success depends on matching your equipment with your environment and goals. Have you ever fallen into this trap? Let me know in the comments.
Once you’ve invested in a quality microphone setup, the key to maintaining its performance over time lies in consistent care and using the right tools. Personally, I rely on a few specialized accessories and routines that have helped me keep my equipment sounding pristine, episode after episode.
The first tool I swear by is a high-quality microphone cleaning kit. Regularly cleaning your mic’s grille and capsule prevents buildup of dust and moisture, which can degrade sound quality and even cause damage in the long run. To do this effectively, I use a soft microfiber cloth combined with isopropyl alcohol wipes—applied carefully to avoid too much liquid near sensitive components. This routine keeps my microphone fresh and my sound crisp.
Next, investing in a shock mount and a sturdy boom arm has been a game-changer. When I first started, I noticed subtle handling noises and vibrations affecting recordings. Using a shock mount isolates the mic from desk noise and accidental bumps, preserving audio clarity. A solid boom arm also allows for precise positioning, which is crucial as your setup evolves.
But what about software tools? I highly recommend using audio enhancement plugins during post-production. Equalizers and noise reduction filters can help you remove residual hum and background noise, ensuring your recordings stay consistent over months and even years. These tools are like dental floss for your audio—simple yet essential for long-term health.
For physical maintenance, I make it a habit to periodically check and replace foam windscreens or pop filters, especially if I notice a muffled tone or persistent plosives. A fresh pop filter not only improves the sound but also extends the life of your mic’s capsule by reducing spit and moisture buildup.
Looking ahead, the trend is moving toward smart maintenance tools. Emerging gadgets now monitor your microphone’s performance and notify you when cleaning or parts replacement is needed. For example, some models include built-in sensors that track humidity and temperature, alerting you to potential issues before they cause damage—an idea inspired by sophisticated studio gear covered in latest industry insights.
To maximize your voice quality and equipment lifespan, try setting up a simple maintenance routine using these tools. Regular cleaning, proper mounting, and keeping software tweaks in check can save you costly repairs and ensure your sound remains professional. Remember, your microphone is an investment—treat it like one with routine care. As David Bialik explains, understanding the nuances of your gear’s upkeep is essential for professional results in the long run.
Starting with a dedicated cleaning kit and shock mount can dramatically improve your setup’s longevity. Don’t wait until you notice a drop in audio quality—be proactive, and your future self will thank you for it. Keeping your gear in top condition is the secret to uninterrupted, high-quality recordings for years to come.
Over time, I’ve come to realize that there’s an art to capturing a voice that’s authentic, clear, and compelling—an art that often gets overlooked in the pursuit of fancy gear. The biggest lesson I learned is that even the most expensive microphone won’t deliver great results if I don’t understand how to use it properly or care for it like a valuable instrument. For instance, I used to ignore the importance of mic placement and room acoustics, which resulted in recordings that sounded flat and cluttered. Once I embraced proper positioning and invested in simple acoustic treatments, my audio transformed overnight.
Another insight that’s shaped my journey is the significance of consistent routines. Regularly checking and cleaning my microphone’s components, updating firmware, and tweaking settings based on my environment’s changes have kept my sound crisp and reliable. Neglecting this routine often led to unexpected drops in quality or equipment failures at the worst moments. It’s easy to assume that once you’ve set up your mic, you’re done—trust me, maintaining it is just as critical as choosing the right model.
And perhaps most surprisingly, I discovered that understanding the basics of audio science—like polar patterns and gain staging—demystifies much of the frustration. Once I grasped why a cardioid pattern rejects side noise or how to set my gain to avoid distortion, I felt more confident in troubleshooting and fine-tuning my setup. There’s a certain satisfaction in knowing that your professional sound isn’t just luck but the result of informed choices.
Reflecting on these lessons, I’ve realized that choosing the right microphone is only part of the equation. The real magic happens when you treat your gear with care, learn its quirks, and adapt your environment to support your voice. This holistic approach has been my secret weapon, allowing me to produce content that truly resonates with my audience and elevates my storytelling.
This is the Hidden Skill That Sets Top Creators Apart
- Intimate Mic Placement Takes Practice: Finding that sweet spot—about six inches from your mouth—might seem simple, but it can dramatically influence your sound. Consistently practicing your positioning ensures your voice remains balanced and free of plosives or muffled tones, regardless of sudden movements or environment changes.
- Room Optimization Is a Game-Changer: Even the best mic can struggle in a noisy or echo-heavy space. Learning simple acoustic treatments, like adding rugs, blankets, or foam panels, can turn your space into a professional-sounding studio. When I did this, my recordings felt warmer and more immersive, drawing listeners in.
- Effective Gain Staging Prevents Disasters: Setting your microphone gain correctly avoids clipping and distortion. I once recorded a whole episode with overly high gain—distorted, and unpleasant. Once I understood how to balance gain with my voice’s amplitude, my audio was cleaner and more consistent.
- Routine Maintenance Keeps Your Gear Alive: Regular cleaning and checks prevent dirt and moisture buildup. I use soft cloths and alcohol wipes to keep my mic’s grille pristine, which preserves sound quality and extends the equipment’s lifespan. Think of it as regular health check-ups for your microphone.
- Embrace Knowledge to Troubleshoot Quickly: Knowing the basics of polar patterns, impedances, and settings means you can fix issues on the fly. This confidence saves time and stress, especially during live sessions or tight deadlines.
My Favorite Tools to Keep the Sound Sharp
- Microphone Cleaning Kit: A simple but highly effective set that prevents grime buildup and maintains clarity—it’s a small investment that pays dividends in sound quality.
- Shock Mount and Boom Arm: These accessories isolate your microphone from desk noise and vibrations, providing a stable and clean audio capture. I swear by mine, especially during long recording sessions.
- Pop Filter: They reduce popping sounds caused by plosive letters, making your speech smoother and more professional. It’s like giving your voice that extra polish before it reaches your audience.
- Audio Interface: Upgrading from a basic setup to a quality interface has opened up new sonic dimensions, especially when using XLR mics. These devices give you greater control and higher fidelity, making your voice richer and more natural.
- Post-Production Software: Tools like noise reduction plugins are invaluable for refining your recordings and maintaining consistency across episodes. They act as the final brushstrokes in your audio masterpiece.
Create a Routine That Elevates Your Voice
Building regular check-ins and maintenance into your schedule ensures your gear always performs at its best. Even dedicating ten minutes after each session to clean, inspect, and tweak can save you from larger issues down the line. Remember, your microphone is the heart of your content—nurture it, and it will reward you with rich, professional sound that connects deeply with your audience.