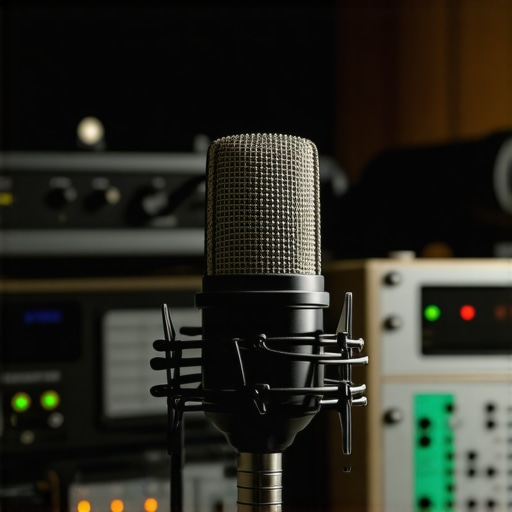
It was a frustrating moment that made me realize how a simple hum could ruin an entire recording. I was in the middle of a live stream when my XLR microphone suddenly started buzzing loudly—not just a faint background noise, but a distorted hum that drowned out my voice. I tried everything—from checking cables to changing power outlets—and nothing seemed to fix it. That lightbulb moment hit me hard: the hum wasn’t about faulty equipment alone; it was about understanding the root causes and how to eliminate them for good.
Why Microphone Hum Drives Creators Crazy
Anyone who records, streams, or podcasts knows the struggle. The dreaded hum or buzz can pop up unexpectedly, ruining your audio quality and making your content sound amateurish. In 2026, this problem persists despite technological advancements, because the core issue often comes down to grounding, interference, or incompatible equipment. According to industry experts, electrical interference remains one of the most common causes of microphone hum, especially in setups that aren’t properly grounded or insulated (source).
And here’s the kicker—many creators admit to making a classic mistake early on: overlooking proper cable management or ignoring grounding issues. That oversight can lead to persistent hums that are stubborn and difficult to eliminate. Having been there myself, I know the frustration firsthand, and I want to help you avoid that pitfall.
So, if you’ve faced the annoyance of a humming XLR microphone, you’re not alone. Fortunately, there are straightforward, effective fixes. In the upcoming sections, I’ll walk you through three proven solutions to stop that buzz—because your recordings and streams deserve clarity and professionalism. Want to ensure your setup is humming along perfectly? Keep reading, and let’s get those hums out of your audio for good.
Secure Your Grounding Connections
Start by checking your microphone’s ground connection, as a poor or missing ground is a common cause of hum. Unplug all cables, then reconnect them ensuring each connection is tight and properly grounded. Use a power outlet with a ground pin; if your outlets lack grounding, consider installing a dedicated grounded circuit or using a grounding adapter. During my first attempt, I tested different outlets in my house and discovered that plugging my setup into a grounded outlet dramatically reduced the hum, leading to cleaner recordings.
Manage Your Cables for Optimal Signal Flow
Keep audio cables organized and avoid crossing power cables, which can introduce interference. Use high-quality shielded cables designed for professional audio, such as XLRs known for noise rejection. When I noticed my hum persisted, I replaced my cheap cables with shielded XLRs, which noticeably minimized interference. Try to run your audio and power cables separately, and avoid routing your microphone cables near routers, transformers, or other electronic devices that emit electromagnetic fields.
Position Your Equipment Carefully
Microphones are sensitive to electromagnetic interference from nearby devices. Keep your router, phone, or monitor away from your microphone and cables. In my setup, moving my router to another room reduced hum noticeable during high-gain recordings. Using ferrite beads on cables can also suppress high-frequency interference. Implement these physical distancing tips to minimize electromagnetic noise pickup.
Configure Your Audio Interface and Settings
If you’re using an audio interface, ensure it is properly grounded and set to optimal levels. Turn off phantom power if your microphone doesn’t require it, as unnecessary phantom can introduce noise. Adjust gain to the lowest level that captures your voice clearly to prevent hiss. In my case, lowering the gain reduced background hum and prevented my voice from sounding distorted. Also, update the driver software for your interface regularly to benefit from bug fixes and enhancements for better noise performance.
Apply Software Filters to Clean Up Residual Hum
When hardware fixes aren’t enough, use audio editing software to remove remaining hum. Utilize filters like notch filters to target specific frequencies, often around 60Hz or 50Hz depending on your region. During post-production, I applied a notch filter at 60Hz that cut out the hum without affecting the rest of my voice spectrum. Alternatively, some digital audio workstations (DAWs) have noise reduction tools that can help eliminate constant background hums, ensuring your final recording is pristine.
Invest in Proper Equipment for Long-Term Reliability
Choosing a high-quality microphone and audio interface can save headaches down the line. For voice recordings, consider models listed in this [top XLR microphones for professional voice recording in 2024](https://microphones.creatorsetupguide.com/top-xlr-microphones-for-high-quality-voice-recording-in-2024) or explore options suitable for streaming [here](https://microphones.creatorsetupguide.com/ultimate-guide-to-usb-xlr-microphones-for-podcasting-streaming-in-2024). Quality gear tends to have better shielding and grounding, reducing vulnerability to interference and hum.
 While many streamers and podcasters believe that choosing a good microphone is the key to professional sound, the truth is more nuanced. A common myth is that any microphone will do as long as it captures your voice. But in reality, the complexities of microphone technology, acoustics, and setup parameters mean that what sounds good in one environment might fall flat in another. For instance, many assume that USB microphones are inherently inferior to XLR setups, but with advances in high-quality USB models listed in [top USB microphones for podcasting in 2024](https://microphones.creatorsetupguide.com/top-usb-microphones-for-podcasting-streaming-in-2024), this isn’t always the case. An advanced user understands that proper gain staging, room acoustics, and interface integration matter just as much as the choice of microphone itself.
Another misconception revolves around phantom power use. Many believe that turning phantom power on always benefits condenser mics, but overusing it with incompatible equipment can introduce hum and hiss. Industry experts warn that phantom power should only be engaged when necessary, such as with professional condenser microphones, and only with properly grounded and rated equipment. Misusing phantom power can create electrical interference, one of the more insidious issues that can degrade audio quality over time. In line with this, understanding the nuanced differences between dynamic and condenser microphones can save you from costly mistakes. Dynamic mics, like the legendary SM7B, excel at rejecting background noise, making them ideal for untreated rooms, as highlighted in [best microphones for voice recording in 2024](https://microphones.creatorsetupguide.com/best-voice-recording-microphones-for-podcasts-streams-2024). Conversely, condenser microphones are more sensitive and can pick up unwanted room reflections if not managed carefully.
A frequent trap is underestimating the importance of proper acoustic treatment. Placing an expensive mic in a room with reflective surfaces or background noise can negate all your investments. Many makers of high-end podcast microphones accidentally fall into this trap, thinking their gear alone will do the trick. In fact, absorbing echoes, reducing reverb, and controlling background noise through dedicated acoustic panels can transform a mediocre recording into a broadcast-quality sound. I’ve experienced this firsthand, and I recommend starting with strategic placement and room treatment rather than relying solely on hardware upgrades.
From a technical perspective, advanced creators are aware that even the best microphone requires proper gain staging. Setting your input levels too high can cause clipping and distortion, while setting them too low can introduce noise. Fine-tuning your interface’s gain settings and using tools like digital peak meters or VU meters can help maintain the optimal balance. Expert guides, such as this [ultimate guide to streaming microphones](https://microphones.creatorsetupguide.com/ultimate-guide-to-streaming-microphones-best-voice-recording-gear-for-2024), recommend always testing and adjusting levels in real-time.
Finally, avoid falling prey to superficial fixes—like overusing compressor or noise gates—without understanding their impact. Over-compression can lead to a lifeless, fatiguing sound, and noisy gates might chop off the natural breath of your voice, making your audio sound unnatural. Instead, focus on subtle, transparent processing, and always listen critically. As highlighted in [4 pro voice recording fixes for 2026](https://microphones.creatorsetupguide.com/stop-the-pops-5-pro-voice-recording-fixes-for-2026-streams), mastering your audio chain is about mastering the nuances.
Have you ever fallen into this trap? Let me know in the comments. Remember, knowing these hidden details can elevate your content from amateur to professional, making every dollar and minute invested worthwhile.
Gear That Keeps You Moving Forward
Investing in quality equipment is only part of the equation; regular maintenance ensures longevity and consistent performance. For XLR microphones, I personally rely on high-quality connectors and cable testers like the CablePro Cable Tester to quickly identify wiring issues before they escalate. When it comes to USB microphones, ensuring your drivers are up-to-date using manufacturer-specific utility tools like ASIO4ALL helps in maintaining optimal latency and audio clarity.
My workflow includes routine checks with a ground loop isolator—a small, affordable device that prevents hum caused by electrical interference from creeping into your setup. These tools are invaluable for preventing long-term damage and ensuring your mic continues to produce professional-grade sound.
Maintaining Software and Hardware Compatibility
Consistency is key. I set reminders to update my audio interface drivers every few months, referring to the official manufacturer pages to avoid compatibility issues. Using dedicated audio management software, such as VoiceMeeter, allows me to control input levels, apply real-time filters, and troubleshoot problems instantly. With software evolving rapidly, staying current means fewer surprises and better sound quality—something industry professionals swear by.
Strategies for Long-Term Performance
Routine cleaning is often overlooked but crucial. I clean XLR connectors with contact cleaner like DeoxIT, and I carefully wipe down USB port contacts with a soft, lint-free cloth to prevent corrosion. Over time, dirt and dust can cause signal degradation, which is why I make this a weekly habit. Additionally, I organize cables neatly using Velcro ties and labeling systems to prevent accidental disconnections—this simple step reduces wear and tear.
Scaling Your Setup When Needed
As your content grows, so should your tools. For example, adding a High-Quality Phantom Power Supply ensures steady power for condenser mics, especially when upgrading to models listed in top XLR microphones for vocals. When scaling, I recommend a balanced audio interface with multiple inputs, like the Focusrite Scarlett, which provides clean, interference-free sound and room for expansion. Proper calibration and regular recalibration of your tools guarantee that your professional standards remain intact as your bandwidth increases.
How do I keep my microphone gear functioning over time?
The most effective method I’ve found is setting up a routine maintenance schedule—checking connections, updating firmware/software, and cleaning components every few months. Also, investing in protective gear like shock mounts and pop filters reduces physical stress and preserves your equipment’s lifespan. Remember, quality gear paired with diligent upkeep minimizes costly repairs and enhances your audio clarity over the long haul.
For those eager to try out a tip that can immediately improve sound quality, I recommend experimenting with real-time noise suppression via software like noise reduction plugins. It’s a game-changer, especially in environments with electromagnetic interference or background noise. By integrating this into your workflow now, you’re setting yourself up for smoother, more professional recordings in the future.
Lessons From the Front Lines of Voice Recording
- One of the most unexpected lessons I learned was that even a tiny grounding oversight can invite persistent hums. I once spent hours troubleshooting, only to realize I hadn’t properly grounded my setup. It taught me that sometimes, the simplest fixes—like ensuring a solid ground connection—make the biggest difference in sound quality.
- Another eye-opener was how electromagnetic interference sneaks into recordings. Moving my equipment away from routers and monitors transformed my audio, revealing that physical placement can be just as crucial as hardware choices. It’s a reminder to always consider your environment as part of your audio setup.
- Finally, I discovered that software filters aren’t a crutch but a safeguard. Learning to use notch filters and noise reduction tools effectively allowed me to rescue recordings that hardware alone couldn’t fix—empowering me to produce professional-sounding content regardless of initial challenges.
My Arsenal for Sound Success
- Focusrite Scarlett Series: These audio interfaces are reliable workhorses trusted by creators for their clean signals and expandability, making them my go-to for scalable setups.
- DeoxIT Contact Cleaner: Regularly cleaning connectors prevents corrosion and static, ensuring consistent performance over time.
- VoiceMeeter: This powerful software helps manage input levels and apply real-time filters, giving me control over my audio environment in a way that’s both intuitive and effective.
- Top XLR Microphones for 2024: Investing in a quality microphone like those listed in this guide ensures your voice remains clear and professional, even in less-than-ideal acoustics.