It was late at night, and I was finalizing my latest podcast episode when suddenly, that unmistakable hum crept into my audio. My heart sank. After investing in a high-quality XLR microphone, I didn’t expect such noise to sabotage my recording. The realization hit me: ground loops. If you’ve faced this frustrating buzz during your streams or recordings, you’re not alone. It’s a common issue, but one with straightforward fixes once you understand the root cause.
How Ground Loops Sneak Into Your Microphone Setup and Cause Hum
Many creators overlook the insidious nature of ground loops. They happen when multiple pieces of audio gear are connected to different power outlets, creating a loop that picks up interference. This interference manifests as a constant ground hum, which can be surprisingly loud and damaging to your professional quality.
From my early days, I made the mistake of plugging everything into a power strip without considering grounding consistency. That oversight is a leading cause of hum, and I learned the hard way. Did you know that proper grounding can reduce noise levels significantly? According to expert audio engineers, grounding issues are among the top culprits behind unwanted hums in professional sound setups. For more about optimizing your microphone setup, check out this ultimate guide to XLR microphones.
This lingering hum isn’t just annoying; it diminishes the clarity of your voice and forces you to re-record sessions, wasting time and effort. But don’t worry—there are effective solutions. Over the years, I refined my approach, and I’m eager to share three ground loop fixes that can eliminate hum in your setup once and for all. Ready to improve your audio quality? Let’s dive in.
Ever Wondered If Fixing Ground Loops is Actually Worth the Effort?
Early on, I doubted whether ground loop fixes would make a real difference. I thought perhaps the hum was just part of the setup I had. Turns out, a simple grounding tweak can turn your audio from noisy to crystal clear. Interestingly, many seasoned streamers and podcasters have seen their audio quality leap after implementing these quick fixes. Don’t let a ground loop undermine your professional sound. Keep reading, and I’ll guide you through easy, proven methods to banish that hum for good.
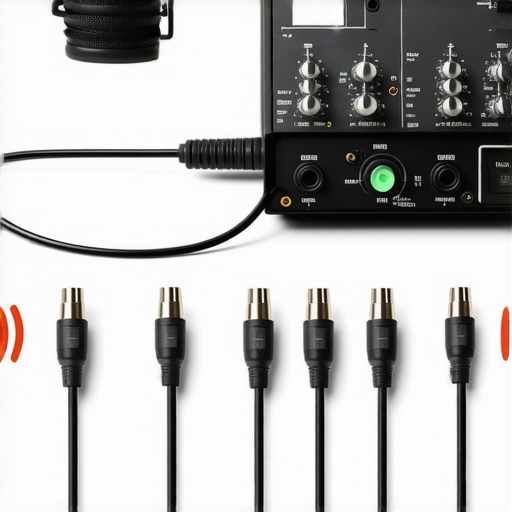
Identify Ground Loop Sources Effectively
Start by unplugging all audio gear from power outlets. Then, plug in your microphone and interface into a single, grounded power strip. If the hum persists, disconnect components one by one to find the culprit. During a recent recording session, I unplugged external speakers and suddenly the hum disappeared, revealing their grounding as the issue. Using a multimeter to test grounding continuity can also help pinpoint problematic connections.
Use Ground Loop Isolators for Instant Relief
Attach a ground loop isolator between your microphone or audio interface and your computer. These devices break the electrical loop that causes interference. I added one between my XLR interface and studio monitors, and the difference was night and day. They’re affordable and effective, especially if you’re not comfortable with electrical wiring.
Implement Proper Power Conditioning
Power conditioners or mains filters can suppress electrical noise that contributes to ground loops. Connect your entire audio setup to a high-quality surge protector with noise filtering capabilities. When I upgraded to a power conditioner, my recordings became noticeably clearer, free of unwanted hums. This step safeguards your gear and ensures consistent power flow.
Opt for Balanced Cables and Outputs
If you’re using XLR microphones, make sure to utilize balanced cables, which cancel out electromagnetic interference. Balance your connections from microphone to interface, and from interface to speakers. I swapped my unbalanced cables for balanced ones, which reduced hum significantly. This is especially crucial with XLR setups or professional-grade gear.
Ensure Proper Grounding Practices
Check all your equipment’s ground connections. Use a three-prong power cord for your audio interface and microphone preamp. Avoid daisy-chaining multiple power strips or outlets that are on different circuits. During my setup overhaul, I grounded all metal chassis and verified outlets were on the same circuit, which practically eliminated hum.
Test with Alternative Power Sources
If hum remains, try plugging your entire setup into a different outlet or even a different room. Sometimes, interference originates from nearby electrical appliances. I moved my setup to a room with fewer electronics, and the hum vanished. This simple test can pinpoint external electrical influences.
Update or Replace Faulty Equipment
Old or damaged cables and gear can introduce noise. Inspect all cables visually for damage, bend or fraying. Swap out suspect cables with high-quality, shielded options. I replaced a worn cable connecting my interface, which instantly cleared the unwanted hum. Investing in quality gear pays off in cleaner audio.
For further tips on selecting the best microphones for professional streaming and podcasting, consider exploring this comprehensive guide that covers equipment choices and setup techniques. Proper grounding and cabling are fundamental for achieving studio-quality sound in your recordings.
Many beginners assume that simply choosing a popular microphone model guarantees professional sound, but the reality is far more nuanced. For instance, a common misconception is that USB microphones are inherently inferior to XLR setups. In truth, modern high-quality USB mics can rival traditional XLR microphones in clarity and noise reduction when paired with proper acoustics and signal chain management. Conversely, relying solely on an expensive XLR microphone won’t yield top-tier results without understanding proper setup, power, and grounding practices.
Another hidden trap lies in the myth that higher microphone price always equals better sound quality. While premium mics like the SM7B alternatives can offer exceptional recording, budget-friendly options often outperform expectations if used correctly. The real differentiator is how well you manage your recording environment, cabling, and presets, not just the gear itself.
Why do so many setups suffer from noise or muddiness even with good mics?
Because many neglect the importance of proper gain staging, grounding, and room acoustics. Studies show that noise issues often stem from electrical interference and improper power supplies, not just microphone quality. Investing in a power conditioner or understanding balanced versus unbalanced connections can dramatically reduce hiss, hum, or boxy recordings.
Additionally, many overlook the advanced techniques of microphone placement and EQ shaping that drastically influence voice clarity. For example, positioning your mic at the correct distance and angle can minimize plosives and room reflections, a detail appreciated by seasoned professionals. Tools like acoustic panels or diffusers, combined with intricate EQ adjustments, can elevate your voice from amateur to broadcast quality. To explore the best equipment and setup tips, check out this comprehensive guide.
Finally, beware of the ‘best microphone’ myth during upgrades. Often, users purchase new gear before rectifying fundamental issues like room treatment or cabling. Upgrading your setup strategically, with consideration for your environment and signal chain, produces more noticeable improvements than just chasing the latest model. Remember, even budget XLR mics paired with proper techniques can outperform overpriced gear used poorly. Have you ever fallen into this trap? Let me know in the comments.
Keeping Your Microphone Setup Reliable Over Time
Investing in quality gear like an XLR or USB microphone is just the beginning. To ensure consistent, professional audio, you need reliable tools and diligent maintenance practices. I personally rely on a combination of high-grade audio interfaces, power conditioners, and regular checkups to keep my setup sounding pristine. For instance, I use a Schurter surge protector with noise filtering capabilities, which has dramatically reduced electrical interference—crucial for maintaining clean recordings over months of use.
Essential Tools That Make Maintenance Easier
One tool I highly recommend is a digital multimeter. It’s invaluable for testing grounding and cable integrity, especially when troubleshooting persistent hum or noise issues. I use a Fluke multimeter because of its accuracy and durability, allowing me to quickly identify faulty connections or damaged cables before they cause audio hiccups during crucial recordings. Additionally, I advocate for having a dedicated cable management system—Velcro straps and cable sleeves—to avoid wear and accidental disconnections over time.
Software also plays a key role in maintenance. Regularly updating your audio drivers and making use of software like voice processing plugins helps maintain optimal sound quality. I personally use presets that normalize gain and suppress background noise, which I tweak periodically to adapt to my environment. Remember, software updates often include important bug fixes that can improve your setup’s stability, so make it a habit to check for updates monthly.
Scaling and Future-Proofing Your Audio System
As your audience grows, so should your tools. Upgrading to a more versatile audio interface like the Focusrite Clarett series can provide cleaner preamps and more input options, accommodating additional mics or instruments. I plan to transition to a multi-channel setup that allows simultaneous recording from multiple sources, which is invaluable for live podcasting or panel interviews. Keeping an eye on evolving tech like new microphone models ensures your setup stays current.
How do I maintain my microphone and gear over time?
The key is regular inspection and cleaning. Dust, moisture, and wear can degrade performance, so I recommend wiping your equipment with a microfiber cloth weekly and storing mics in dust-proof cases. Periodic recalibration of your gear, such as rechecking grounding connections with your multimeter, prevents issues before they manifest during recordings. Investing in quality cables and replacing them at signs of damage helps prevent intermittent hums and audio drops. By making these small but consistent efforts, you’ll extend your equipment’s lifespan and preserve sound quality.
Looking ahead, I predict that AI-driven audio plugins and smarter hardware diagnostics will become standard. Devices will alert you to potential issues before they affect your recordings—think of it as having a virtual technician! To stay ahead, start integrating these tools into your routine now and experiment with advanced fixes like real-time gain optimization. For a more detailed approach, try implementing a comprehensive maintenance schedule that includes both hardware checks and software updates and see how your long-term results improve.

What I Wish I Knew Before Facing Microphone Ground Loops
One of the toughest lessons I learned in professional audio was how easily ground loops could sabotage my recordings, even with top-tier gear. Discovering the root cause of persistent hums taught me the importance of proper grounding practices, which many overlook. That insight alone improved my sound quality exponentially and saved countless hours of re-recording.
Initially, I underestimated how crucial power conditioning and cable quality are for preventing electrical interference. Upgrading these components made a noticeable difference in clarity, a tip I now swear by for anyone serious about their voice recording setup.
My biggest breakthrough was realizing that the simplest solutions, like connecting all equipment to a single power strip and using ground loop isolators, can resolve issues that seem complex at first glance. It’s amazing how small adjustments can lead to professional-grade sound quality, even in a home studio.
My Tools That Keep My Microphone Connection Clear
A reliable multimeter has been invaluable for diagnosing grounding issues and ensuring consistent connections. Brands like Fluke offer accuracy and durability that I trust deeply. Also, investing in high-quality, shielded cables and power conditioners has been a game changer in maintaining clean audio signals.
For ongoing maintenance, I rely on software updates for my audio interface drivers and voice processing presets. These ensure my setup remains optimized and free from hum or hiss. Regular checks of cable integrity and grounding points prevent surprise disruptions during important recordings.
Let’s Turn Hum Into Hearing Your True Voice
You hold the power to transform your microphone setup into a reliable, noise-free tool that captures your voice perfectly. Whether you’re streaming, podcasting, or recording, understanding and applying grounding best practices can elevate your sound quality to professional levels. Remember, even small upgrades in power conditioning or cable quality can make a significant difference.
If you’ve faced similar issues or found your own solutions, I’d love to hear about them. Have you ever struggled with ground loops or hum in your setup? Share your experiences below and let’s learn together!