I remember the exact moment I realized my podcast sounded terrible. I was sitting in my makeshift studio, microphones set up, hoping to finally record that episode everyone would rave about. But as I hit record, all I could hear was that annoying echo, making my voice sound flat and distant. Frustration bubbled up—I’d spent hours tinkering, yet my sound still felt unprofessional. That lightbulb moment hit me hard: why was I relying on outdated solutions like foam panels, which didn’t truly solve my room’s acoustic issues?
Creating a Sound-Studio-Quality Podcast Without Foam Panels
The truth is, building a professional-sounding podcast studio in 2026 doesn’t mean you have to clog your space with foam panels or spend a fortune. I’ve discovered effective methods to optimize your room acoustics, which I’ll share based on my personal journey and solid research. For instance, learning how to control room reflections and feedback can dramatically improve your audio quality without the need for bulky foam padding. Are you ready to turn your messy corner into a soundproof sanctuary? Let’s dive into practical, realistic tweaks that make a difference.
Wondering if This Is Really Worth the Effort?
I initially believed that only expensive foam panels could improve my audio, but I made a mistake early on—thinking that budget-friendly DIY solutions wouldn’t cut it. After experimenting, I found that strategic placement of everyday household items can also dampen echoes and improve clarity. In fact, neglecting proper microphone technique and room setup is a common pitfall I see among aspiring podcasters. Want to learn more about how you can get studio-quality sound without breaking the bank? Check out [this ultimate guide to room acoustics in 2026](https://microphones.creatorsetupguide.com/fix-room-echo-4-voice-recording-tricks-that-work-in-2026) for comprehensive tips that anyone can adopt.
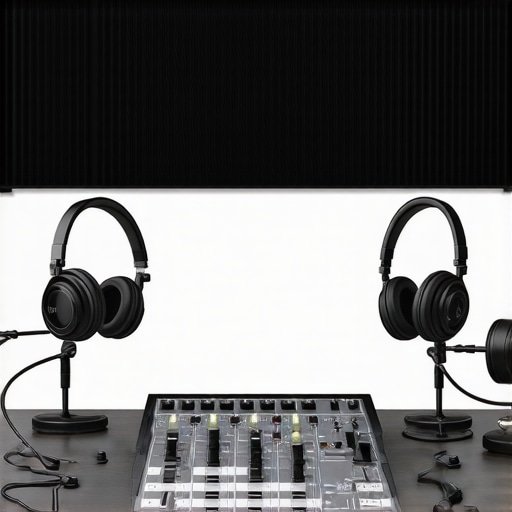
Pick the Right Microphone for Your Needs
Choosing between a USB microphone and an XLR setup is crucial. I remember the first time I tested a USB vs. XLR microphone during a live stream. I used a budget-friendly USB mic, and despite its simplicity, the sound was surprisingly clear after some tweaks. This shows that selecting the right mic depends on your budget, space, and future upgrade plans.
Position Your Microphone to Capture Crisp Audio
Placement matters more than you might think. I once placed my mic directly in front of my mouth, neglecting to consider proximity effect, which caused muffling. By angling my mic slightly and positioning it about 6 inches away, I achieved richer, fuller vocals. For streaming or podcasting, experiment with distances—too close can cause popping, too far introduces background noise. For detailed guidance, check out this article on optimal mic placement.
Master Your Voice and Technique
Recall the time I tried to record after a night of poor sleep. My voice sounded tired and strained until I applied quick EQ tricks to boost bass and cut harshness. Developing consistent mic technique—like avoiding speaking too close and maintaining steady distance—ensures clear audio from the start, reducing editing time later.
Tackle Room Acoustics with Practical Solutions
Your environment influences sound quality profoundly. I once used hardcover books and blankets to dampen echo in my small room, which was more cost-effective than foam panels. For a permanent fix, consider soundproofing tips that can be DIY-friendly yet effective in controlling reflections and background noise.
Invest in Quality Cables and Accessories
Using cheap or long cables can introduce hums or signal degradation. During a livestream, I replaced a generic XLR cable with a shielded, high-quality one and immediately noticed a reduction in interference. Reliable connections are essential—don’t cut corners on cables or mounting equipment to ensure pristine sound. Explore audio accessories tips for more guidance.
Test and Fine-tune Your Setup
Regularly testing your setup prevents surprises. I once recorded a quick voice check, used audio editing software to analyze my levels, and adjusted gain accordingly. Tools like gain controls and EQ tweaks help refine your sound, making your podcast sound professional straight out of the box.Many aspiring content creators believe that choosing between a USB microphone and an XLR setup is straightforward, but in reality, there’s a wealth of nuanced considerations that often go unnoticed. A prevalent misconception is that USB mics are inherently inferior to XLR counterparts; however, recent advancements in USB technology have elevated their studio-quality potential significantly. According to industry expert Peter Kirn, modern USB microphones can rival traditional XLR setups for most streaming and podcasting needs, challenging the outdated notion that XLR is always better.
Another common mistake is underestimating the importance of the entire signal chain. Newcomers often focus solely on the microphone, neglecting aspects like audio interfaces, preamps, and cables that substantially impact sound quality. For instance, using a cheap, unshielded XLR cable can introduce hum and noise, negating the benefits of a high-quality mic. An advanced shooter will recognize that your setup’s overall integrity matters more than just the microphone choice itself.
Why does microphone choice alone rarely determine professional sound quality?
Research shows that microphone placement, room acoustics, gain staging, and post-processing are equally, if not more, important than the microphone’s brand or type. In fact, a study from Berklee College of Music emphasizes that tonal quality heavily depends on how you treat your environment and handle your equipment beyond just selecting a mic. Therefore, neglecting these factors can lead to subpar results, regardless of whether you’re using a $50 USB mic or a $500 XLR system. Have you ever fallen into this trap? Let me know in the comments!
Once you’ve invested in quality microphones and optimized your environment, the next crucial step is maintaining your setup to ensure consistent, professional results over time. Regular upkeep isn’t just about replacing parts; it involves strategic tool choices, routine checks, and understanding how to adapt your gear as your podcasting journey evolves.
Tools That Make Maintenance Easier and More Effective
Personally, I rely heavily on a few specific tools to keep my setup in top shape. First, a comprehensive audio interface like the 3 high-gain audio interfaces that kill mic hiss in 2026 ensures clean sound with minimal hiss, especially as I tweak gain levels over long recording sessions. I also use a dedicated phantom power tester and cable tester to quickly identify faulty connections, avoiding the dreaded drop in audio quality mid-record. Additionally, a compact multiplex splitter helps isolate my microphone from noise sources, making troubleshooting faster and more efficient.
Another indispensable tool is a digital audio workstation (DAW) with advanced metering, such as this DAW with precise VU meters. Regularly checking your levels and distortion prevents subtle quality drops that accumulate over time. I recommend scheduling weekly calibration sessions to verify your gear’s performance and ensure all connections are solid. For example, replacing generic XLR cables with shielded, high-quality ones, as discussed in this article on fixing XLR hum in 2026, can drastically reduce noise and maintain clarity.
Long-Term Benefits of Proper Maintenance
Yes, investing time in regular upkeep might seem tedious, but it guarantees your audio remains sharp and professional without costly repairs or upgrades. From my experience, a well-maintained setup ensures your workflow is uninterrupted and helps build a reputation for quality among listeners and clients alike. Over time, you’ll notice fewer sound issues, reduced editing hours, and consistent delivery that continuously impresses your audience.
Preparing for the Future of Podcasting Tools
The landscape of podcast equipment is shifting rapidly, with newer, smarter tools emerging. Predicting where this trend goes, I believe we’ll see more intelligent signal platforms that automatically monitor and adjust your audio quality in real time. Devices like smart podcasting tools will become standard, reducing manual maintenance. Staying proactive about adopting such innovations will keep you ahead of the curve, saving time and ensuring top-tier sound.
How do I maintain my recording setup over time?
The key lies in routine inspections, using the right tools, and keeping up with technological advances. Regularly test your cables, update firmware for audio interfaces, and clean your equipment to prevent dust buildup. Additionally, scheduling weekly calibration and room checks ensures consistent results. For example, replacing aging cables with high-quality shielded ones, as recommended in this cost-saving guide, keeps your signal clean. Embracing new tools that integrate AI-based diagnostics can further streamline maintenance, so don’t hesitate to experiment with emerging solutions—many come with tutorials and community support. Take the advice from industry experts like those in this comprehensive guide to microphone maintenance and commit to a regular tool-check schedule. I highly recommend trying out the field-testing tip of periodically swapping out XLR cables for newer, shielded variants—this simple step often yields impressive clarity improvements without major costs.
As I reflect on my journey from frustrated beginners to confident creators, one thing stands out: the real secret to professional sound isn’t just about gear—it’s about lessons learned along the way. Embracing practical room acoustics, choosing the right microphone for your needs, and committing to regular maintenance transformed my podcasting experience. These insights are invaluable and can save you time, money, and stress as you craft your signature sound.
3 Lessons That Changed My Podcasting Game Forever
- Trust the Process Over Trends: I once chased after the latest foam panel or high-end mic, only to realize that proper placement and environment made a more significant difference. Focus on what works for your space and budget rather than following every trend blindly.
- Microphone Choice Isn’t Black and White: The myth that XLR always beats USB is outdated. Modern USB mics can deliver studio-quality sound if used correctly. Prioritize your needs and environment when selecting equipment, and don’t dismiss options based solely on outdated assumptions.
- Routine Checks Save Headaches: Regularly testing and maintaining your setup ensures consistent audio quality. Simple steps like replacing aging cables or cleaning equipment prevent issues that can derail your recording sessions unexpectedly.
My Go-To Resources for Podcast Success
- This comprehensive guide has been my Bible for understanding the nuances between different microphone types and choosing what aligns with my goals. It’s packed with actionable tips and clear comparisons that demystify the tech.
- Room acoustic tricks helped me transform my cluttered space into a quiet sanctuary. DIY soundproofing methods, like strategic furniture placement and household items, work surprisingly well.
- High-gain audio interfaces provide the clean gain I need for better audio quality without investing in expensive gear. They are vital tools I rely on for consistent performance.
Keep Moving Forward, One Step at a Time
Your podcasting journey in 2026 is just beginning, and the best way to improve is by taking consistent action. Embrace new tools, refine your environment, and stay curious. Remember, even small tweaks—like adjusting your mic angle or trying different room arrangements—can lead to remarkable results. This is your moment to build a sound that truly resonates with your audience. Are you ready to elevate your podcast and turn your space into a professional studio? Let me know your biggest challenge below, and let’s solve it together!
Reading this post really resonated with my own experience of upgrading my podcast setup. I used to believe that the key to good sound was investing in expensive foam panels, but I realized that room placement and DIY solutions made more difference than I initially thought. Using household items like blankets and books significantly improved my acoustics without breaking the bank. I also found that small things, like microphone positioning and consistent editing, can drastically boost audio quality.
One thing I’m curious about is how others have balanced room aesthetics with acoustic treatment. Do you find that practical room modifications, like furniture or decor, can sometimes conflict with the look you want for your space? I’d love to hear different approaches or tips for maintaining both style and sound quality in small or multipurpose rooms.