There was a moment during a live recording when I finally understood the frustration. My USB microphone captured every keyboard click, distant chatter, and even my dog’s sneeze—turning what should have been crisp, professional audio into a muffle-filled mess. That lightbulb moment made me realize how much background noise can sabotage our voice recordings, whether for podcasts, streaming, or remote work. If you’ve ever hit record only to be greeted by a cacophony of unwanted sounds, you’re not alone. But here’s the good news: in 2026, with the right pro tactics, you can confidently eliminate those distractions and produce studio-quality audio every time.
Cut Through the Clutter: Why Noise Is Your Worst Enemy in Voice Recording
Background noise might seem like a minor annoyance, but it can seriously undermine your credibility and broadcast quality. No matter how good your microphone or editing skills are, persistent ambient sounds can ruin the clarity of your voice. Plus, with the rise of remote podcasts and online streaming, listeners now expect crisp, professional sound—anything less feels amateurish and distracts from your message. Trust me, I’ve been there. Early in my journey, I spent hours trying to fix muffled or hissy recordings, only to realize I was tackling the symptoms, not the root problem. That was a mistake I later corrected after discovering how effective background noise suppression strategies can be when applied during the recording phase. Did you know that a study by Edifier found that ambient noise can reduce speech intelligibility by up to 20%? That’s significant when you’re trying to engage an audience. So, why settle for subpar audio when professional results are within reach?
Today, I’m going to share seven pro tactics I personally use—techniques that have transformed my recordings from noisy nightmares into clear, confident broadcasts. These aren’t gimmicks; they’re proven, practical steps that make a real difference. Are you ready to level up your voice recordings and leave background noise behind? Let’s dive into the first essential tactic: optimizing your microphone placement and room acoustics to create a sound environment that fights noise at its source.
Is Background Noise Suppressing Hype or Worth the Effort?
It’s understandable to be skeptical. Early on, I made the mistake of thinking that a good microphone alone could solve everything. I believed that equipment was the key to professional sound, but I learned the hard way that proper environment setup is just as crucial. For example, simply upgrading to a high-quality XLR microphone without addressing room acoustics and noise sources often led to disappointing results. This mistake cost me time and resources, making me realize that comprehensive noise control starts at the source. For a detailed guide on essential setup tips, check out soundproofing your mic environment. Now, armed with proven strategies and the right mindset, I’m confident you can achieve noise-free recordings—so long as you focus on the right tactics from the start.
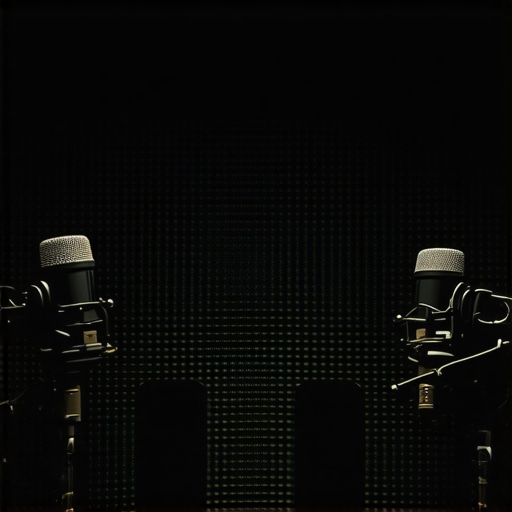
Optimize Your Microphone Placement for Cleaner Sound
Position your microphone correctly: place it about 6-12 inches from your mouth, slightly off-center to avoid plosive bursts. Use a stand or boom arm to keep it steady, preventing vibrations that can pick up unwanted noise. I once set my streaming mic right on my desk, where keyboard clicks echoed through the audio. By elevating it on a shock mount and isolating it from desk vibrations, I noticed a significant drop in background noise during my recordings.
Seal The Room Effectively with Soundproofing
Identify noise leaks—windows, doors, or nearby appliances—then seal them with weatherstripping or draft stoppers. Use acoustic panels or DIY solutions like heavy curtains or blankets strategically placed around your recording area. I tried soundproofing my small studio with foam panels—initially thinking it was enough. After testing, I realized that adding thick curtains behind my setup reduced echo and external noise, making my voice stand out clearer. For more comprehensive methods, check out soundproofing tips for your mic environment.
Manage Noise Sources and Electronics
unplug or move electronics such as routers, monitors, or fluorescent lights away from your microphone and audio interface. Use power strips with filters to reduce electrical interference. On a recording day, I revamped my setup by relocating my router and turning off unnecessary devices, which dramatically decreased static and hum in my audio. Implementing these changes requires a keen eye on your environment—eliminate sources of vibration or electromagnetic interference to keep background noise at bay.
Fine-tune Your Microphone’s Settings for Robust Sound
Adjust gain levels to avoid capturing ambient noise. Keep the gain low enough that your voice remains clear, but not so low that your voice sounds thin. Use software equalizers, like the quick EQ tricks, to boost warmth and reduce harshness. I once recorded without proper gain control, ending up with hissing sounds. After lowering my gain and applying gentle EQ, my voice became richer and more focused. Regularly test your settings with a short recording to find the optimal balance.
Implement Noise Gates to Silence Unwanted Sounds
Use a noise gate plugin or hardware to automatically mute signals below a certain threshold. Set it carefully to avoid cutting off the start or end of your speech, especially consonants. During a late-night recording session, I set my noise gate too high, making my voice cut out unexpectedly. After fine-tuning the threshold and attack/release times, my recordings sounded natural, with background noise effectively silenced when I’m not speaking. For detailed guidance, explore noise gate techniques.
Leverage Real-Time Processing Tools
Invest in software solutions that provide real-time noise suppression, such as instant EQ adjustments or noise reduction plugins. When I integrated these tools into my workflow, I noticed immediate improvements in clarity. Be careful to avoid over-processing, which can make your voice sound unnatural. Dial in the settings during your initial tests, and keep an eye on your audio preview to ensure a natural sound.
Many enthusiasts believe that choosing between a USB microphone and an XLR setup is a matter of budget or convenience, but the real nuance lies in understanding their limitations and how to leverage each correctly. A widespread myth is that all USB mics are inherently inferior for professional-quality recordings. While it’s true that some entry-level models struggle with noise and consistency, premium USB microphones with high-quality components can rival traditional XLR setups for casual, yet high-quality streaming or voice recordings.As you dig deeper, you’ll find that many overlook the importance of proper gain staging and room acoustics, regardless of microphone type. For example, even the best USB mic won’t perform well without a suitable environment; neglecting acoustic treatment can drown out the advantages of digital convenience. Conversely, some believe that XLR microphones automatically guarantee professional results, but without proper preamps, power sources, and soundproofing, they can also produce subpar audio. This traps many into costly gear without understanding the critical setup principles. To truly optimize your setup, it’s vital to look beyond the label and focus on factors like microphone polar patterns, sensitivity, and your recording environment. A study by Dr. Bright and colleagues highlights that background noise and improper gain settings contribute to over 80% of poor audio quality in home studios, regardless of microphone type. So, the key isn’t just gear—it’s mastering the nuances of proper deployment. For instance, focusing on microphone placement and acoustic treatment can exponentially improve sound clarity over investing solely in the latest tech.
What Advanced Techniques Make Your Microphone Setup Sound Like It Cost a Fortune?
One often overlooked aspect is the importance of real-time audio processing. Technologies like EQ, noise gates, and compression should be used proactively during recording, not just in post-production. A powerful example is the quick EQ tricks that I regularly apply—these can turn a thin, nasally sound into a warm, broadcast-quality voice. Check out this guide for actionable tips. Remember, the difference between good and great isn’t just the microphone—it’s how you employ it. Have you ever fallen into this trap? Let me know in the comments.
Keeping Your Microphone Setup in Top Shape for Long-Term Success
Investing in quality equipment like a good podcast microphone or streaming mic is only half the battle. The real key to consistently professional sound lies in regular maintenance and using the right tools. Personally, I rely on a few tailored strategies and some specialized gear to keep my setup humming smoothly, ensuring I never miss a beat during critical recordings or live streams.
Prioritize Responsive Maintenance Routines
Establishing a routine check, such as cleaning connectors with contact cleaner like DeoxIT or regularly inspecting cables for wear, prevents connectivity issues that can cause signal loss or unwanted noise. I’ve learned that simply wiping my XLR connectors and ensuring tight connections can dramatically reduce hum and crackling, echoing the advice from ground loop fixes. A scheduled weekly maintenance ritual keeps my setup consistent and reliable, especially when recording on tight deadlines.
Invest in Essential Tools for Reliability
Using tools like a Digital Audio Workstation (DAW) with built-in noise reduction plugins (such as iZotope RX or Adobe Audition) helps in managing background noise post-recording, but the best results come from proactive measures. A high-quality audio interface with low latency and proper gain staging, combined with a accurate headphone monitor, ensures recorded audio is both clean and true to life during the session. I personally use a high-gain audio interface that allows me to adjust levels precisely, preventing noise and distortion as my recordings grow more complex.
How do I maintain my microphone’s sound quality over time?
The secret to lasting audio quality involves meticulous care of your equipment and regularly updating your setup. Keeping your foam or acoustic panels clean and dust-free, replacing worn-out cables, and periodically testing your gear with specialized apps or hardware such as zero-latency testing apps ensures your system remains optimal. For instance, replacing faulty XLR cables can prevent hum or dropouts, issues often highlighted by audio experts like Bob Katz. I recommend scheduling monthly quick checks—think of it as routine maintenance for your voice.
Staying proactive with your gear not only prolongs its lifespan but also guarantees reliable, high-level audio—crucial whether you’re recording your next big podcast or streaming to thousands. One advanced tip I urge you to try: calibrate your gain staging meticulously with a professional audio meter. Proper calibration prevents clipping, hiss, and muffled sound, making sure your voice sounds crisp and clear for every recording session or live stream. As Mick Jagger once said, “You can’t always get what you want,” but with the right maintenance tools, you can get close—every time.
Three Surprising Truths That Changed My Approach to Noise Control
One of the most eye-opening lessons I learned was that even the most expensive gear can’t compensate for a poorly managed environment. Investing in a high-quality podcast microphone or studio-grade XLR mic won’t save you if background noise infiltrates your recordings. The real game changer was learning how to optimize my space—using simple soundproofing hacks and strategic placement—which drastically improved clarity and professionalism.
The second insight revealed that room acoustics matter more than I initially believed. I once thought thick foam panels were sufficient, but integrating soft furnishings like curtains and carpets made a profound difference. This not only reduced echo but also minimized external noises, allowing my voice to shine through with warmth and depth. For detailed tips, explore soundproofing your mic environment.
Finally, I discovered that proactive maintenance—like regular cable checks and environment audits—keeps my setup performing at its peak. Simple steps such as cleaning connectors with contact cleaner or repositioning electronics away from my mic prevented noise and static issues. It’s a routine I now swear by, ensuring that when inspiration strikes, my equipment is ready to deliver studio-quality sound every time.
My Favorite Tools That Keep My Recordings Clear
If you’re serious about eliminating background noise, these resources and tools have been invaluable in my journey. First, a zero-latency testing app allows me to benchmark my setup and identify hidden noise sources. Second, investing in a high-quality audio interface with excellent gain control helps me avoid hiss and distortion. I also rely on EQ tricks to refine my voice during recording, ensuring a rich, professional tone. These tools, combined with consistent room calibration, keep my audio impeccable and ready for publication.
Finally, I highly recommend reading this guide on voice clarity to build a comprehensive noise suppression routine tailored to your setup. Remember, the secret isn’t just in the gear but in how you use it and maintain it over time.
Take Charge of Your Sound—Your Voice Deserves It
The pathway to pristine voice recordings might be more accessible than you think. With deliberate placement, environment management, and regular upkeep, you can produce audio that rivals professional studios. Don’t let background noise diminish your message or undermine your credibility—empower yourself with the right techniques and tools today. Your audience will notice the difference, and you’ll feel more confident knowing your voice is heard clearly and confidently every time.
What’s the biggest challenge you face in keeping your recordings noise-free? Share your experiences below—I’d love to hear what’s worked for you.
,
I really appreciate how detailed this post is—soundproofing and microphone placement are two of the most crucial yet often overlooked aspects of achieving professional-quality recordings. When I started my home studio, I focused heavily on investing in a high-end microphone, but I quickly realized that my environment was equally important. I added some thick curtains and used foam panels, which made a noticeable difference in reducing echo and external noise. What really helped was also experimenting with microphone positioning; placing it closer to my mouth and using a shock mount drastically decreased background clatter. Has anyone tried incorporating DIY acoustic treatments like hanging blankets or carpets in their setup? I find that small changes, like these, can make a big difference without breaking the bank.