I vividly remember the first time I hit “record” for a podcast episode and heard that awful, tinny sound come through my headphones. It was like I was speaking into a tin can. Frustration set in fast. I realized early on that a good microphone isn’t just a luxury—it’s the foundation of a professional-sounding podcast. But with so many options out there—USB, XLR, streaming mics—how do you pick the right one? I’ve been down that rabbit hole, trying to find the perfect gear that balances quality, ease of use, and budget. Today, I want to share what I’ve learned and help you avoid the rookie mistakes that can turn your audio into noise.
Why Your Microphone Choice Can Make or Break Your Podcast in 2024
In 2024, the importance of sound quality has skyrocketed. Listeners expect crystal-clear audio—it’s almost as important as your content itself. A survey by Creator Setup Guide found that poor audio quality can cause listeners to tune out within seconds. That’s why investing in the right microphone matters more than ever.
Over the years, I learned that choosing between a USB or XLR microphone isn’t just about convenience. It’s about the sound profile, the flexibility for future upgrades, and how much complexity you’re ready to handle. Early on, I made the mistake of thinking a cheap USB mic could carry my podcast forever. Spoiler: it didn’t. That mistake taught me that quality gear pays off—big time. And with the rise of streaming and remote interviews, your microphone’s role is more critical than ever.
Is All the Hype About Top Microphones Actually Warranted?
Here’s a fact that surprised me: even budget microphones can sound good if you know how to set them up properly. But to truly elevate your podcast, you need gear that offers clarity, warmth, and low noise. I’ll guide you through my favorite picks for 2024, so you can make an informed decision without wasting money or time.
If you’ve ever faced the dilemma of choosing the right microphone—struggling with background noise, muffled voices, or complex setups—you’re not alone. I’ve been there, and I want to help you skip those painful lessons. Ready to find your perfect microphone match? Let’s dive into the options that can transform your sound and boost your credibility as a podcaster.
Select the Right Microphone for Your Needs
Start by identifying your recording environment and budget. If you’re streaming or recording solo at a desk, a USB microphone offers simplicity and decent quality. For higher fidelity and future-proofing, consider an XLR microphone which, paired with an audio interface, provides professional-grade sound.
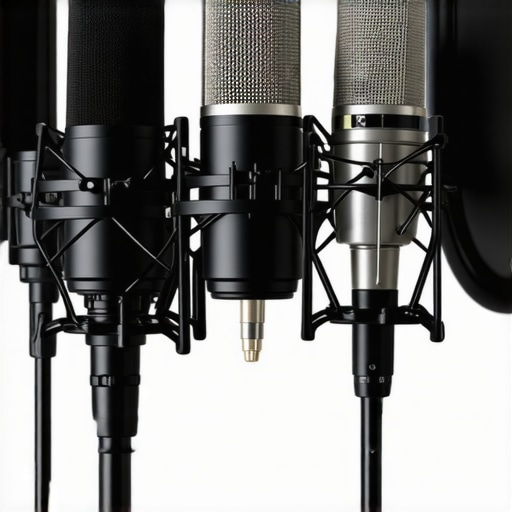
Understand the Core Types of Microphones
Choosing between dynamic and condenser microphones depends on your recording setup. Dynamic mics excel at rejecting background noise, making them ideal for untreated rooms or noisy environments. Condenser mics capture more detail and warmth, perfect for controlled spaces. I learned this firsthand when I switched from a cheap USB to a condenser XLR mic; the clarity made my voice sound rich and professional, dramatically increasing listener engagement.
Learn How to Properly Set Up Your Microphone
Placement is key. Position your mic about 6-12 inches from your mouth, slightly off-axis to reduce plosives. Use a pop filter to soften harsh sounds. I once recorded an entire episode with the mic too close, causing muffled audio. Moving it back and adding a pop filter cleaned up my sound instantly. Experimentation is necessary—test different angles and distances to find your sweet spot.
Optimize Acoustic Environment for Better Sound
Eliminate echo and background noise with simple solutions. Use a dedicated recording space, add soft materials like foam panels, or even blankets. When I recorded in a cluttered room, the echo was distracting. After creating a makeshift sound booth with blankets and cushions, my recordings became clearer and more professional.
Use Software and Hardware to Enhance Quality
Invest in a quality audio interface if using an XLR mic, and set your gain correctly—too high causes noise, too low results in weak sound. Use editing software to remove residual noise and EQ your voice. A quick tip: I always record a few seconds of silence to identify background noise, then remove it in editing. This step ensures your final audio is crisp and clean.
Test and Iterate for Consistent Results
Regularly review your recordings to catch issues early. Record short clips, listen critically, and adjust your setup accordingly. I learned that what sounded good on my headphones sometimes didn’t translate to other devices, so I tested on multiple speakers and earbuds. Consistent testing helps you refine your setup for optimal results in every episode.
Many podcasters fall into the trap of oversimplifying microphone choices, believing that a simple USB mic is always sufficient. In reality, this misconception can hinder the professional quality of your recordings, especially as your skills and audience grow. For instance, the myth that all USB microphones are created equal leads beginners to buy budget models, only to find their audio lacks warmth and clarity. While USB mics are convenient, they often lack the nuanced sound profile of higher-end XLR options. Many overlook the importance of understanding the core differences between dynamic and condenser microphones, which can dramatically affect your recording environment and sound quality.
One common mistake is assuming that the most expensive microphone guarantees the best sound. In fact, the environment plays a crucial role. An expensive condenser mic in a noisy, untreated room will still pick up unwanted background sounds. Conversely, a well-chosen dynamic microphone in a controlled space can outperform pricier models. This is where advanced users often get caught up in gear obsession rather than optimizing their environment or setup. For example, the top microphone types guide highlights that choosing the right microphone type for your setting is more critical than brand names or price tags.
Are XLR Microphones Worth the Extra Hassle?
Many believe that XLR mics are only for professionals, but that’s a misconception. The real advantage of XLR microphones lies in their ability to deliver cleaner, warmer sound, especially when paired with quality audio interfaces. However, a common oversight is neglecting proper gain staging and impedance matching, which can cause noise or distortion. Without proper setup, even the best mic can sound mediocre. Additionally, many overlook the importance of regular maintenance and calibration of their gear, which can subtly degrade audio quality over time. For advanced users, understanding how to balance gain, use high-quality preamps, and incorporate noise reduction techniques can make the difference between amateur and professional sound. This nuanced approach often gets ignored by beginners eager to upgrade their hardware without mastering fundamental setup skills.
Streaming mics are often marketed as all-in-one solutions, but they can be traps if used improperly. For example, many default to auto gain settings or overlook the importance of proper positioning. The best streaming microphones are those that allow manual control and proper placement, reducing ambient noise and plosive sounds. Remember, the secret isn’t just the mic itself but how you use it within your environment. Overlooking acoustic treatment or mic technique can sabotage even the most expensive gear.
Finally, advanced podcasters understand that voice recording is a nuanced art. They focus not only on hardware but also on post-processing, such as EQ, noise gating, and compression, which are often underestimated. A study by industry experts emphasizes that mastering these techniques can elevate your audio from good to exceptional, regardless of your initial gear. So, don’t just buy gear—invest time in learning how to optimize every element of your setup. Have you ever fallen into this trap? Let me know in the comments.
Maintaining your podcast microphone, whether it’s a USB microphone or an XLR microphone, is crucial for ensuring consistent, high-quality audio over time. Even the most advanced gear can degrade if not properly cared for, leading to unexpected noise, diminished clarity, or even complete failure. Fortunately, with a few simple habits and the right tools, you can keep your equipment performing at its best for years to come.
How do I maintain my microphone and accessories over time?
First, always store your microphone in a dedicated case or a dust-proof environment when not in use. Dust and moisture are silent enemies that can cause corrosion or damage diaphragms, especially in condenser models. I personally use a microfiber cloth to wipe down my mic after each session, removing any sweat, saliva, or dust, which if left unchecked, can lead to buildup that affects sound quality.
Next, invest in a high-quality pop filter and shock mount. These not only improve sound but also protect your microphone from physical shocks and plosives. I recommend checking your shock mount every few months for loose screws or wear and replacing it if it shows signs of deterioration. This proactive step prevents sudden damage during intense recording sessions.
Regularly inspecting your cables and connectors is equally important. Frayed or loose connections can introduce noise or cause signal dropouts. I keep a set of spare XLR and USB cables on hand, and I test all connections periodically to catch issues early. For USB microphones, ensure your ports are clean and free of dust or debris—use compressed air if needed.
Tools I recommend for long-term upkeep
For cleaning, I swear by isopropyl alcohol wipes and a fine-bristled brush. These help remove stubborn grime from connectors and mesh grills without damaging the surface. To track the health of your audio signal, use software like audio analysis tools that can identify degradation or background noise that creeps in over time.
Additionally, consider investing in a dehumidifier or silica gel packs for storage areas to prevent moisture buildup, especially if you live in a humid climate. This extra step can extend the lifespan of your gear significantly.
What about upgrading and scaling your setup?
As your podcast grows, so should your tools. Upgrading to a higher-end microphone or adding a dedicated audio interface can boost your quality further. But remember, even the best gear needs regular maintenance and calibration. For example, periodically checking the preamps or replacing worn-out cables ensures your setup remains reliable and high-quality.
Looking ahead, I predict that smart, connected microphones with built-in diagnostics will become more common, making maintenance even easier and more precise. For now, adopting a disciplined routine of cleaning, inspecting, and upgrading your gear is the best way to ensure your voice stays clear and professional, episode after episode. So, I challenge you to implement one of these maintenance tips today—your future self will thank you for it!
Over the years, I’ve learned that even tiny details in microphone setup can dramatically impact your podcast’s professionalism. One of the hardest lessons I learned was the importance of environment over equipment. Investing in a top-tier microphone won’t help if your room’s acoustics are a mess. I wish I had grasped earlier how crucial acoustic treatment and proper placement are—these often make more difference than brand or price. Additionally, I underestimated the value of regular maintenance. Simple habits like cleaning connectors and inspecting cables have saved me from unexpected noise and technical failures. Lastly, I discovered that mastering post-processing techniques can elevate your audio to a whole new level, turning decent recordings into broadcast-quality episodes. These insights changed my approach and can do the same for you, helping you avoid costly mistakes and achieve crystal-clear sound every time.