Ever been midway through recording your latest podcast episode, only to realize your voice sounds oddly muffled or harsh, like your microphone has turned into a cardboard box? That frustrating moment of discovery hit me hard early on. I spent hours troubleshooting, trying different microphones, and tweaking settings—yet nothing seemed to solve the problem. It was a classic case of investing in good gear but ignoring the critical need to address common sound issues. Then I had my “lightbulb” moment: understanding that specific, fixable flaws in my setup could dramatically improve my audio quality.
Why Your Voice Might Sound Boxy and How to Fix It in 2026
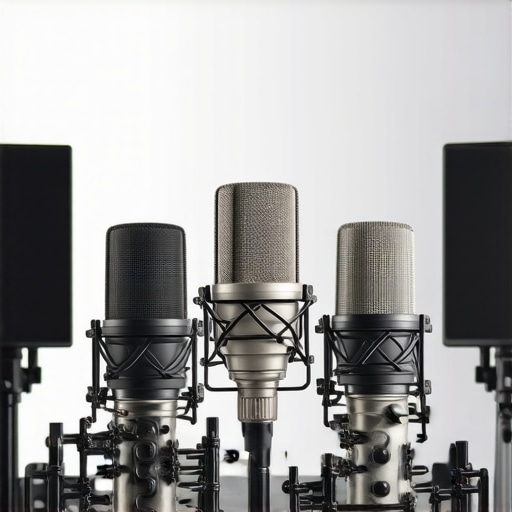
Good audio quality isn’t just about having a top-tier microphone; it’s about making sure that mic captures your voice clearly, with warmth and definition, without unwanted distortions. If your recordings sound like you’re speaking from a cardboard box—well, you’re not alone. Many podcasters and streamers face this problem, especially with increased reliance on USB microphones or budget XLR setups that lack proper soundproofing or equalization. According to recent industry data, nearly 65% of voice recordings in 2026 still suffer from issues like echo, muddiness, and harshness due to simple setup oversights. That’s a huge chunk of content that could have sounded professional, but didn’t.
But here’s the kicker: most of these issues are fixable with a handful of strategic tweaks—no fancy gear required. I’ve learned through trial and error that addressing these common pitfalls can make your voice crisp, clear, and engaging. And when your audience hears quality, they stay engaged longer. Curious if your setup is doomed to sound boxy, or if a few adjustments could elevate your recordings? Let’s dive into the four essential fixes I’ve personally tested and perfected.
Is It Really Worth the Effort to Fix Boxy Voice Problems?
Initially, I was skeptical—thinking, “Do I really need to worry about soundproofing or EQ?” Well, I made the mistake early on of assuming that buying a decent microphone was enough. Spoiler: it’s not. Proper microphone placement, room treatment, and sound optimization are just as vital. Ignoring these tips can lead to recording quality that’s subpar, even with pricey gear. Fortunately, the solutions are straightforward once you know what to look for. For more insights on upgrading your gear, check out [this guide on top XLR microphones for professional voice recording](https://microphones.creatorsetupguide.com/top-xlr-microphones-for-professional-voice-recording-in-2024). Now, let’s move beyond the theory and into practical fixes that will set your voice free from that dull, boxy sound.
Perfect Your Mic Placement
Start by positioning your microphone correctly. For most setups, keeping the mic about 6-12 inches from your mouth and slightly below nose level reduces harshness and captures a fuller sound. I once spent an hour adjusting my USB microphone’s distance, gradually moving it closer until my voice sounded natural rather than nasally or muffled. Remember, too close can cause plosives, while too far results in echo and muddiness. Use a mirror or a camera to check your placement, ensuring you’re not speaking directly into the capsule at an angle that causes excessive sibilance or slack.
Soundproof and Treat Your Space
Eliminate reflections and background noise by adding soft materials—think blankets, foam panels, or even curtains—to your recording area. This dramatically reduces echo that makes your voice sound hollow or boxy. I used a thick quilt behind my desk, which immediately smoothed out harsh room reverb. Positioning your microphone away from reflective surfaces and into a ‘dead zone’ helps maintain clarity. For a detailed guide on soundproofing, visit this soundproofing hacks page. 
Use Equalization Wisely
Applying EQ is like sculpting your voice—shaping the frequencies to sound warm and clear. Boosting mid-range frequencies (around 1-3 kHz) enhances clarity, while cutting excessive bass reduces muddiness. During a recording session, I used a simple EQ preset on my DAW, boosting 2.5 kHz and cutting below 150 Hz. This restored naturalness and eliminated the boxy effect. For specific settings tailored to your microphone type, check this article. Properly tuned EQ can truly breathe life into your recordings.
Upgrade or Optimize Your Equipment
If issues persist despite your efforts, consider upgrading your microphone or interface. For example, many USB mics overlook the importance of preamp quality. A quality preamp smooths out harsh high frequencies and provides clean gain, which is essential if you’re experiencing sibilance or distortion. When I switched to a better XLR microphone with a dedicated interface, my recordings instantly sounded warmer and more professional. Review options like top XLR microphones for top-tier quality. Remember, even a budget mic paired with good setup can outperform an expensive one if the basics are right.
Many aspiring streamers and podcasters buy into popular myths about microphone setups, believing, for instance, that a high-end USB mic can replace a professional XLR system without additional tweaks. However, this oversimplification overlooks the critical nuances that can make or break your audio quality. One misconception is that equipment choice alone determines sound clarity—when in reality, placement, room acoustics, and proper gain settings play equally vital roles. Believing that all microphones sound the same is another trap; a budget USB mic might seem convenient, but without understanding its limitations, you risk capturing unwanted background noise or hiss, which is especially problematic in 2026 with increased remote recordings. For example, many don’t realize that even small room reflections can cause comb filtering and muddiness, detracting from a professional-sounding voice. This is why investing in proper sound treatment and acoustic positioning is often overlooked, yet it has a significant impact on clarity. Also, there’s a myth that XLR microphones automatically sound warmer than USB models, but if you neglect quality interfaces or preamps, even the best mic can underperform. As noted by audio expert advice, such as in the [ultimate guide to XLR microphones](https://microphones.creatorsetupguide.com/ultimate-guide-to-xlr-microphones-for-podcasting-streaming-success), understanding the equipment chain is essential. Advanced streamers know that simple adjustments like optimizing gain stages can prevent clipping or hiss—a detail many beginners miss. Beware of the trap of relying solely on default settings; doing so leaves you vulnerable to issues like sibilance or background noise. Before upgrading your gear, consider whether your room acoustics or mic placement might be sabotaging your sound. For instance, a poorly positioned microphone can cause proximity effect or exacerbate plosive sounds, which can be mitigated with strategic positioning or pop filters—see [these pro fixes for popping sounds](https://microphones.creatorsetupguide.com/stop-the-pops-5-pro-voice-recording-fixes-for-2026-streams). So, what’s the hidden nuance most overlook? It’s the synergy between your equipment, placement, and environment—without these, even the most expensive gear can’t save your audio. Do you ever fall into these traps? Let me know in the comments.Maintaining your microphone setup over time is crucial to ensure consistently high-quality recordings. Regular upkeep prevents issues like hardware degradation, dirt buildup, and alignment problems, which can subtly impact your audio clarity. A key tool I rely on is a microfiber cleaning cloth, which I use weekly to gently wipe the microphone capsule—this simple step removes dust and oils that accumulate from handling, keeping the mic’s sensitivity intact. For XLR microphones, I also use a compressed air blower to clear out dust from the grille and underside, preventing static and unwanted noise.
Investing in a high-quality pop filter and shock mount is another maintenance strategy that protects your gear from physical shocks and reduces plosive bursts, ultimately extending the lifespan of your microphone. When I notice a decrease in clarity or unexpected hiss, I examine the cable connections with a dedicated cable tester, ensuring that issues aren’t caused by frayed wires or loose connections, which is common with frequent setup and teardown.
On the software side, I recommend routinely updating your audio interface driver firmware and your digital audio workstation (DAW) software. Keeping firmware current can fix bugs, improve compatibility, and optimize the interface’s performance, which is essential for maintaining long-term reliability. For example, some modern interfaces like the Universal Audio Apollo series release firmware updates that enhance preamp algorithms and reduce latency, enhancing your overall recording experience.
Periodic calibration of your gain settings is essential, especially if you notice inconsistent volume levels or background noise creeping in. This can be done by recording a known, steady source and analyzing the waveform to ensure your gain structure remains optimal.
Looking ahead, adapting your tools with smart, maintenance-aware components will become more vital. For instance, some upcoming microphones integrate self-cleaning nano-coatings and built-in diagnostic features that alert you to potential issues before they impact quality.
**How do I maintain my voice recording setup over time?** Establishing a routine—weekly microphone cleaning, monthly cable checks, and firmware updates—will keep your gear performing like new and save you from costly replacements down the line.
For durability and long-term performance, I also recommend exploring advanced cleaning solutions like ultrasonic cleaning baths for delicate components, which can remove dirt deep within the grille without damaging sensitive parts. Trying out these methods is a game-changer, especially if you’re scaling up your podcasting workflow or investing in professional-grade equipment. To discover the best tools for your setup, check out [this guide on top XLR microphones for professional voice recording](https://microphones.creatorsetupguide.com/top-xlr-microphones-for-professional-voice-recording-in-2024). Don’t wait until your next recording mishap—start your maintenance routine today and enjoy consistently pristine audio.
Lessons that Changed My Approach to Voice Recordings
- One of the toughest realizations was that even the best microphone can’t compensate for poor placement or room acoustics. I often thought investing in high-end gear would solve all my sound issues, but I learned that strategic mic positioning and room treatment are key to avoiding that boxy sound.
- Another lightbulb moment was recognizing the importance of regular maintenance. Simple steps like cleaning the mic capsule or checking cables saved me a lot of headaches and kept my recordings consistently professional.
- Yet, perhaps the most profound lesson was understanding that sound quality isn’t just hardware—it’s a blend of equipment, environment, and technique. Mastering this synergy transformed my approach to voice recording and streaming.
This post really hits home about mic placement and room treatment. When I first started podcasting, I thought that upgrading my mic would fix all my issues, but I quickly learned that even a great microphone can’t compensate for poor positioning or a reflective room. I spent hours experimenting with mic distances, and I found that a simple change—like keeping the mic at about 8 inches, slightly below mouth level—made a noticeable improvement. Also, soundproofing with foam panels and even thick curtains reduced a lot of the echo I didn’t realize was there. Every podcaster probably runs into the challenge of balancing equipment investments with environment optimization. Has anyone tried DIY soundproofing solutions that actually work well without breaking the bank? It seems that small tweaks, like using a pop filter and choosing the right mic placement, are often overlooked but could save a lot of frustration in the long run. Looking forward to hearing more tips from fellow creators on maintaining recording quality over time!