I remember spending hours tweaking my microphone setup, only to realize that my voice sounded distant, muffled, or just plain off. It was frustrating—like trying to paint a masterpiece with a broken brush. That’s when I had my lightbulb moment: choosing the right type of microphone isn’t just about brand or price; it’s about understanding the core differences and what suits your specific needs.
Why Your Microphone Choice Matters More Than Ever in 2024
In 2024, the streaming and voice recording landscape has exploded. With millions of content creators, podcasters, and streamers vying for attention, clarity and quality are no longer optional—they’re essential. But here’s the kicker: many beginners fall into the trap of choosing a microphone based on hype or cost alone, only to end up with subpar audio that turns viewers away. According to a recent study by Wired, audio quality can boost viewer engagement by over 30%. That’s huge!
So, how do you avoid this pitfall? How do you select a microphone that truly elevates your content? That’s exactly what we’re diving into today. I’ll share insights from my own journey and help you understand the different types of microphones, their strengths, weaknesses, and what best fits your setup.
Is Microphone Choice Actually Worth the Hype?
Honestly, I made a critical mistake early on—buying a flashy USB mic that looked cool but sounded terrible. It seemed like a good idea at the time, but I quickly learned that not all microphones are created equal. The difference in sound quality can be staggering, especially when streaming or recording for a professional audience. That’s why understanding the nuances of each microphone type is so vital. Curious about which microphones are trending in 2024? Check out our ultimate guide for detailed comparisons.
Now, let’s get into the nitty-gritty—so you can make an informed decision and avoid the costly mistakes I made early on. Ready? Let’s go!
Identify Your Specific Needs
Start by clarifying what you primarily use your microphone for—whether it’s streaming, podcasting, or voice-over work. I once rushed into buying a high-end XLR mic without considering that I only needed a simple USB mic for casual streaming. This mismatch led to unnecessary expenses and frustration. Write down your goals and environment—do you need mobility, durability, or studio-quality sound? This clarity will guide your choice.
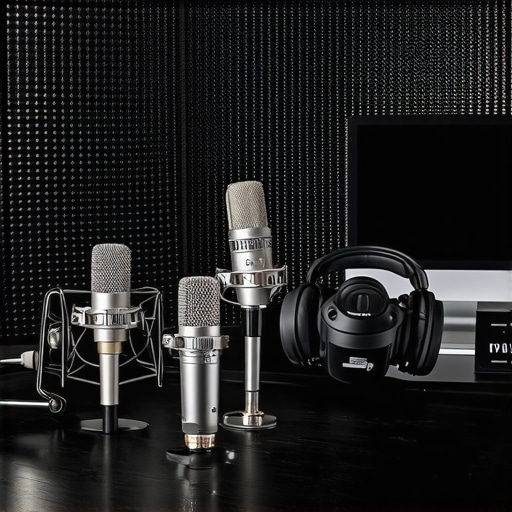
Understand the Core Microphone Types
Dynamic Microphones
Think of dynamic microphones like a sturdy, reliable van—great for handling loud sounds and rough environments. They excel at rejecting background noise, making them ideal for noisy rooms or live settings. Use them if you’re recording in less controlled spaces or want robust, no-fuss audio. I used a dynamic mic during a live outdoor event, and it cut through the ambient noise effectively, showing its strength in real-world conditions.
Condenser Microphones
Condenser mics are like precision sports cars—sensitive and capable of capturing rich, detailed sound. They require phantom power, so double-check your setup. These are perfect for studio recordings, vocals, and capturing nuanced voice textures. I once upgraded to a condenser mic for my home studio, and the improvement in clarity and warmth was immediately noticeable, especially in my vocal recordings.
Ribbon Microphones
Ribbon mics resemble vintage record players—warm, smooth, and ideal for studio use. They’re delicate, so handle with care. They excel at capturing a natural sound and are often used for studio vocals or instruments. I experimented with a ribbon mic during a mixing session, and it added a pleasing warmth that made my voice sound more intimate and professional.
Choose Between USB and XLR
USB microphones are the all-in-one solution—plug and play, perfect for beginners or those who want simplicity. They’re usually less expensive and don’t require extra equipment. I started with a USB mic for my first streams, which was straightforward and quick to set up. For higher sound quality and flexibility, XLR mics are the way to go, but they need an audio interface or mixer. I later upgraded to an XLR setup, which significantly improved my audio quality, especially when paired with the right interface.
Match Microphone Features to Your Environment
If you record in a noisy room, look for microphones with cardioid or hypercardioid pickup patterns—they focus on your voice and reject side noise. I once used a hypercardioid mic during a busy podcast recording session, and it effectively isolated my voice from background chatter. Additionally, consider built-in features like mute buttons, gain control, and shock mounts for convenience and improved sound isolation.
Test and Adjust Your Setup
Once you’ve chosen your microphone, spend time testing it in your actual environment. Use a recording app or streaming software to listen critically. Adjust positioning—keeping the mic close to your mouth usually yields clearer audio. I learned this the hard way when my first recordings sounded distant because I placed the mic too far away. Proper positioning and gain settings can make a huge difference in your final sound.
Integrate with Your Existing Equipment
Ensure your chosen microphone is compatible with your setup. For USB mics, simply connect and select as your input device. For XLR mics, connect to an audio interface like the best audio interfaces for 2024. Testing your entire chain will help identify any issues early, saving you time and money down the line.

Many people assume that selecting a microphone is simply about picking the most expensive or popular model, but this is a significant misconception. In reality, there are nuanced pitfalls that even seasoned creators often overlook, leading to suboptimal audio quality despite their efforts. Let’s dig deeper into what most get wrong and how to avoid these common traps.
Myth: All Microphones Are Created Equal
A prevalent misconception is that any microphone will do the job as long as it captures sound. This couldn’t be further from the truth. Different microphones are designed for specific environments and purposes. For instance, beginners often gravitate toward USB microphones because of their convenience, but they may not realize that a high-quality XLR microphone paired with an appropriate interface can deliver far superior clarity and depth. Ignoring this distinction can hinder your audio quality, especially as your content grows more professional. For a detailed comparison, check out our ultimate guide.
The Oops Factor: Overlooking Room Acoustics
One of the most overlooked aspects in microphone selection is the recording environment. Many creators focus solely on the mic itself, neglecting how room acoustics impact sound. A high-end condenser mic in a room with reflective surfaces will produce echo and muddiness, negating its benefits. Conversely, a more modest dynamic mic in a well-treated space can outperform an expensive condenser in a bad room. Always consider your environment and choose microphones with appropriate pickup patterns—like cardioid or hypercardioid—that help isolate your voice from background noise. For more tips on environment setup, visit our top voice recording microphones.
Advanced Mistake: Misunderstanding Frequency Response
Many creators focus on features like sensitivity or brand reputation but overlook the importance of frequency response. A microphone’s frequency response curve determines how accurately it reproduces different sound pitches. For voice work, a response that emphasizes mid-range frequencies can bring warmth and clarity, but an overly flat or exaggerated curve might make your voice sound unnatural. Understanding this nuance can be the difference between a professional-sounding recording and a flat, dull one. Experts recommend reviewing spectral analysis reports or trying out microphones in your environment before committing. According to audio engineer Sound on Sound, this level of understanding can elevate your audio quality significantly.
Have you ever fallen into this trap? Let me know in the comments, and remember—choosing the right microphone is about more than just specs; it’s about understanding the subtle nuances that make your voice sound its best.
Keeping your microphone in top shape over time is crucial for maintaining professional audio quality. Regular maintenance and the right tools can extend your equipment’s lifespan and ensure consistent performance, whether you’re streaming, podcasting, or recording music. In this guide, I’ll share the specific tools I personally rely on and methods I recommend for long-term microphone care.
How do I maintain my microphone over time?
First, invest in a high-quality pop filter and shock mount. These accessories not only improve sound quality but also protect the microphone from moisture, dust, and physical shocks. I personally use a *Rode PSA1 shock mount* for my condenser mic, which isolates vibrations and prevents unwanted noise. Regularly cleaning your microphone with a soft, lint-free cloth is essential—avoid harsh chemicals that can damage the diaphragm or external casing. For delicate parts, I use a gentle brush to remove dust from grilles and ports.
Second, keep your environment clean and free of dust. A small, dedicated storage case with silica gel packs helps control humidity and prevents corrosion. I keep my mics in a custom foam-lined case when not in use, which minimizes exposure to environmental factors that could degrade the components over time.
Third, periodically check your cables and connectors. Faulty or worn cables can introduce noise or lead to connection issues. I recommend using high-quality, gold-plated XLR cables such as the *Mogami Gold Series*, which I’ve found to be reliable and durable. Also, avoid bending cables sharply or yanking them out, as this can damage the internal wiring.
Recommended tools for microphone maintenance
- Microfiber Cleaning Cloths: For daily wipe-downs to remove fingerprints and dust.
- Compressed Air: To blow out dust from grille and ports—use cautiously to avoid damage.
- Small Brush: For cleaning mesh grilles and delicate areas.
- Silica Gel Packs: To control humidity inside storage cases.
- Quality Cables: Such as Mogami or Canare, to ensure reliable connections.
- Shock Mounts and Pop Filters: To protect the microphone and improve sound quality.
Long-term results and scaling your setup
Consistent maintenance not only prolongs the lifespan of your microphone but also ensures your recordings stay crisp and professional over years. As your setup scales, consider investing in a dedicated audio interface with good preamps and phantom power to handle multiple mics efficiently. This scalability allows you to upgrade your microphones or add new ones without sacrificing quality. Remember, the key to long-term success is regular upkeep and choosing tools tailored to your environment and microphone type.
In the future, I predict that smart, IoT-enabled maintenance tools—such as automated cleaning devices or sensors that monitor environmental conditions—will become more accessible. These innovations could simplify upkeep and optimize performance automatically, making professional-grade audio more accessible for everyone.
Why not try implementing a weekly cleaning routine with the tools I mentioned? It’s a simple step that guarantees your microphone remains in perfect condition, ensuring your audio always sounds its best!
The Hardest Lesson I Learned About Microphone Choices
One of the biggest lightbulb moments in my journey was realizing that not all microphones are created equal, and that choosing the wrong type can sabotage your content quality. I once bought a flashy USB mic because it looked cool, only to find that it captured my voice with muffled tones and background noise. That experience taught me to look beyond brand names and hype, diving deep into understanding the core differences between mic types and their ideal environments.
3 Myths About Microphones That Held Me Back
Initially, I believed that a high price tag meant better audio, or that a simple plug-and-play setup would suffice for professional results. I discovered that these are common misconceptions. For example, I overlooked room acoustics, which greatly influence sound quality. I also thought all microphones could handle any environment, but a dynamic mic in a noisy room outperformed a costly condenser mic in a reflective space. These lessons pushed me to tailor my equipment choices more thoughtfully, and they can do the same for you.
What Experts Won’t Tell You About Microphone Setup
One invaluable insight I gained is that proper microphone positioning and environment treatment are just as important as the hardware itself. No matter how expensive your microphone is, if it’s not positioned correctly or your room isn’t acoustically optimized, your audio will suffer. I learned to spend time testing different placements and investing in simple acoustic treatments, which made a noticeable difference in clarity and warmth. This combination of gear knowledge and environment management has been a game changer in my content quality.
Curated Resources to Elevate Your Microphone Game
For anyone serious about improving their audio, I recommend exploring the ultimate guide to top microphones in 2024. It offers comprehensive comparisons that helped me choose my current setup. Additionally, the book Audio Engineering 101 by Ross Hutton was a revelation, providing foundational knowledge that demystified many technical aspects. Lastly, I trust the Sound on Sound website for expert tips on environment and setup, which have saved me countless hours of trial and error.
Your Next Step in Microphone Mastery Starts Now
Remember, the journey to excellent audio isn’t just about buying the latest gear but understanding what works best for your unique space and voice. Embrace experimentation, learn from each mistake, and don’t be afraid to upgrade your setup gradually. Your voice deserves to be heard in the clearest, most professional way possible—so take those first steps today and turn your content into a true audio experience. What’s the biggest challenge you face in setting up your microphone? Let me know below and let’s grow together!