Discovering the Perfect Microphone: A Personal Journey into 2024’s Best for Streamers
When I first started streaming, I was overwhelmed by the sheer number of microphone options available. I remember spending hours researching and testing various gear, trying to find that sweet spot between quality, affordability, and ease of use. My journey led me to the world of top podcast microphones and voice recording gear, and I want to share my insights with you, hoping it saves you some time and frustration.
Why I Switched to a High-Quality Microphone
Up until recently, I used a basic USB mic that served me well for casual streaming. But as I started taking my content more seriously, I noticed my audio quality was holding me back. My viewers and listeners deserved better sound, and I was eager to upgrade. I did a deep dive into the best USB and XLR microphones for 2024. The difference was night and day. The clarity, depth, and richness of my voice improved dramatically, making my streams more engaging.
My Favorite Microphones for Streaming and Podcasting
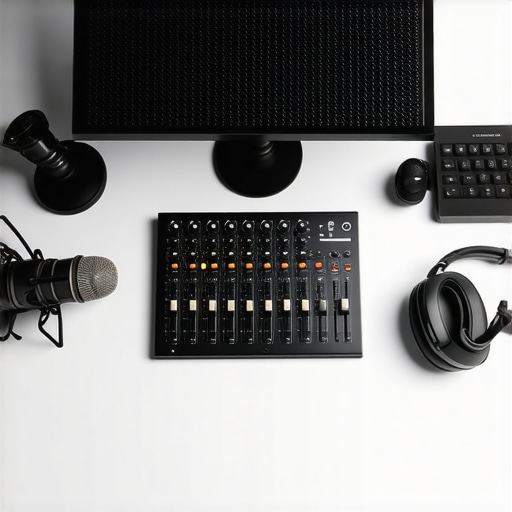
Among the many options, I found that a versatile condenser microphone like the Shure SM7B became my personal favorite. It’s renowned for its ability to block out background noise and capture a warm, natural tone—perfect for my home studio setup. For those on a budget, the best USB microphones like the Blue Yeti or Audio-Technica AT2020USB+ also delivered impressive results without the need for additional equipment.
How My Gear Transformed My Streaming Experience
Switching to high-quality voice recording gear didn’t just improve sound—it boosted my confidence. I found myself more comfortable speaking on camera and engaging with my audience. Additionally, I invested in a good pop filter and boom arm, which helped me achieve a cleaner, more professional setup. I also realized that good acoustics and environment matter. As I read in expert reviews, even the best microphone can be underwhelming without proper placement and room treatment.
What Makes a Microphone Truly Stand Out for Streamers?
Deep down, what should I look for in a microphone for my streaming setup?
Great question! In my experience, a microphone’s ability to capture your voice clearly and naturally is paramount. Factors like cardioid pickup patterns, low self-noise, and ease of connectivity make a big difference. I found that models with XLR connection provide more flexibility and higher audio fidelity, but USB mics are perfect for quick setups and beginners. Ultimately, it’s about matching your needs with the right gear.
If you’re serious about elevating your audio quality, I encourage you to explore the options I mentioned. And if you have questions or want to share your own experiences with the best microphones for streamers, please leave a comment below—I’d love to hear your thoughts!
Unlocking the Secrets of Professional Audio: What Truly Defines a Top Streaming Microphone?
When diving deeper into microphone selection, it’s essential to understand that not all models are created equal—especially when it comes to catering to specific streaming needs. As I’ve explored in my journey, factors like polar patterns, frequency response, and build quality can significantly influence your overall sound. For instance, a cardioid pattern is often preferred for solo streaming because it minimizes background noise, but what about situations where you have multiple speakers or need more versatile coverage? Here, selecting a microphone with switchable polar patterns can be a game-changer. For further insights on high-end options, check out the top microphones for 2024.
Why Do Some Microphones Elevate Your Streaming Beyond Basic Sound?
Beyond technical specs, the craftsmanship and brand reputation behind a microphone often reflect its performance. For example, the Shure SM7B is renowned not only for its professional-grade sound but also for its durability and consistent performance over years of use. Its internal shock mount and pop filter design help eliminate unwanted noise and plosives, which are common pitfalls for amateur setups. When I upgraded my gear, I realized that investing in such a microphone was akin to upgrading my entire streaming environment. This aligns with expert advice from industry leaders, emphasizing that your microphone is an investment in your brand’s credibility and audio professionalism (source).
Can the Right Microphone Transform Your Content’s Authenticity?
Absolutely. Authenticity in voice is a nuanced aspect that hinges on how well your microphone captures the natural tone and subtle nuances of your voice. For example, condenser microphones tend to excel at this, but they can be sensitive to room acoustics. That’s why I recommend pairing your mic with proper acoustic treatment—think foam panels or even simple DIY solutions—to prevent echoes and background noise from undermining your sound quality. This holistic approach ensures that your audience perceives you as genuine and professional. For those curious about the latest gear, exploring expert-reviewed microphones can provide valuable guidance.

What Are the Practical Considerations for Microphone Placement and Environment?
Placement is often overlooked but critically impacts sound quality. Positioning your microphone at mouth level, about 6-12 inches away, with a pop filter, can significantly reduce plosives and sibilance. Also, consider your room’s acoustics—hard surfaces reflect sound, creating echo, while soft furnishings absorb unwanted reverberations. Practical tips include using a boom arm for consistent positioning and experimenting with different angles to find the sweet spot for your voice. These practical adjustments, combined with the right microphone, can elevate your streaming game from amateur to professional.
What do you think is the most overlooked aspect of microphone setup for streamers, and how do you address it? Share your tips below or suggest more reading materials—your insights could help fellow creators refine their audio setup!
The Art of Microphone Placement: Finding Your Voice’s Sweet Spot
One of the most overlooked yet impactful aspects of audio quality is microphone placement. I spent countless hours experimenting with different positions in my setup, realizing that even a few inches can make a significant difference. Placing the microphone too close can cause muffling or plosives, while too far away results in a thin sound that lacks presence. I found that maintaining about 6-12 inches from my mouth, slightly off-axis, combined with a pop filter, created a natural, full-bodied tone that resonated well with my voice.
Creating a Sound-Friendly Environment: Beyond the Microphone
It’s tempting to think that a high-end microphone alone will solve all your audio issues, but environment matters just as much. Hard surfaces like walls and windows reflect sound, leading to echoes and background noise. I tackled this by adding soft furnishings—curtains, rugs, and foam panels—transforming my room into a cozy acoustic space. The difference was remarkable; my voice became clearer, and background noise diminished. As I learned from industry experts, room treatment is a crucial investment for serious streamers.
How Do I Balance Aesthetics and Functionality in My Acoustic Setup?
Striking the right balance between a visually appealing and acoustically effective setup can be challenging. I wanted my space to look professional without sacrificing sound quality. I opted for discreet foam panels that blend with my decor and a adjustable boom arm that keeps the microphone at an optimal height. I also experimented with different placements of furniture and soft materials to find that elusive sweet spot—where aesthetics and acoustics coexist harmoniously. Remember, small adjustments can lead to major improvements; don’t hesitate to experiment with different configurations until you find what works best for your voice and space.
What Are the Advanced Nuances of Microphone Positioning for Multiple Speakers?
When hosting guests or collaborating with others, microphone positioning becomes exponentially more complex. I learned that using multiple directional microphones or a high-quality boundary mic can help capture multiple voices clearly. Switching to a microphone with switchable polar patterns, like the best microphones of 2024, allows me to adapt to different scenarios—whether I’m alone or in a group. Proper placement ensures each voice is balanced, avoiding one overpowering others or losing clarity. This is especially critical for podcasts or collaborative streams where sound professionalism directly influences viewer perception.
How Can I Prevent Room Echoes and External Noise Without Breaking the Bank?
Addressing room acoustics doesn’t always require expensive treatments. I started with DIY solutions—placing bookshelves filled with books, hanging thick blankets behind me, and sealing gaps around windows and doors. These simple steps drastically reduced echoes and external noise. For a more permanent solution, consider investing in portable soundproofing panels or a vocal booth, which can be surprisingly affordable. Remember, the goal is to create a controlled sound environment where your voice shines through without distractions. For detailed tips, explore expert advice on room treatment.
Share Your Experiences: What Has Made the Biggest Difference in Your Audio Setup?
Every streamer’s environment is unique, and what worked for me might not be perfect for you. I’d love to hear about your journey—what placement tips or acoustic treatments have transformed your sound? Do you have any DIY tricks or favorite products that made a difference? Drop your insights in the comments or share this article with fellow creators. Together, we can elevate our audio game and craft authentic, professional content that truly resonates with our audiences.
Mastering Microphone Polar Patterns for Multi-Host Setups
When expanding your streaming or podcast setup to include multiple speakers, understanding the intricacies of microphone polar patterns becomes indispensable. For example, switching from cardioid to omnidirectional or figure-eight patterns allows you to capture multiple voices with clarity while minimizing crossover noise. I’ve experimented extensively with high-quality microphones of 2024 that feature switchable polar patterns, enabling dynamic adaptation to different recording scenarios. Proper placement—such as positioning microphones equidistant from each speaker—ensures balanced audio, avoiding overwhelming one voice while muffling another. This nuanced approach elevates the professionalism of your content and fosters an engaging listening experience.
Integrating Acoustic Treatment for Natural, Authentic Sound
Advanced microphone placement alone isn’t sufficient without addressing room acoustics. I’ve discovered that even minor adjustments—like installing bass traps in corners or diffusers on walls—can significantly reduce echo and flutter echoes. According to industry-leading experts, a well-treated environment enhances the microphone’s ability to accurately capture your voice’s subtleties, resulting in a natural and authentic sound. For a more DIY-friendly approach, hanging thick blankets or installing portable acoustic panels can be surprisingly effective, especially when working within budget constraints. These measures transform your space into a controlled acoustic environment where your voice truly shines, free from distracting reverberations.
What are the most overlooked acoustic treatments that can make a tangible difference in your audio quality?
Many creators underestimate the power of strategic placement of soft furnishings or the importance of sealing gaps around doors and windows. Even simple solutions like placing bookshelves filled with dense materials behind your mic can absorb unwanted reflections. I also recommend experimenting with different microphone angles and distances in conjunction with acoustic modifications—sometimes, a small tweak in positioning can dramatically improve clarity. For more detailed insights, explore expert room treatment advice that emphasizes cost-effective solutions.
Advanced Microphone Placement: Fine-Tuning for Optimal Sound
Achieving that perfect sound begins with meticulous placement—nothing beats the impact of a well-positioned microphone. For solo streamers, positioning the mic at mouth level, about 6-12 inches away, slightly off-axis, with a pop filter, yields a full-bodied, natural tone. When recording multiple voices, I recommend experimenting with angled placements and using directional mics to isolate each speaker. Additionally, employing a shock mount can reduce mechanical vibrations, further refining audio quality. Remember, small positional adjustments—like angling the mic slightly downward or upward—can capture more of your voice’s nuances, enhancing authenticity and engagement. For detailed placement strategies, check out comprehensive guides on professional mic positioning.
How Do I Use Audio Processing Tools to Polish My Sound?
Beyond hardware, leveraging software tools such as equalizers, compressors, and noise gates can elevate your audio to professional standards. I’ve integrated plugins like advanced audio processing that subtly enhance clarity, reduce background noise, and add warmth to my voice. A well-designed processing chain ensures your listeners experience consistent, polished sound regardless of room acoustics or mic imperfections. However, moderation is key—over-processing can make your voice sound unnatural. I suggest starting with subtle adjustments and gradually refining your settings, listening carefully to the results. For more expert tips on mastering your audio, explore industry-recommended practices outlined in my preferred resources.
What are your go-to software tools or plugins for achieving broadcast-quality sound, and how do you integrate them into your workflow?
If you’re serious about elevating your audio quality, I encourage you to share your experiences or ask questions about advanced processing techniques. The journey toward professional-sounding content is continuous, and each small improvement adds up to a significant difference. Engage with our community to exchange insights and discover new tools that can help you craft authentic, compelling audio—your audience will thank you for it.
Things I Wish I Knew Earlier (or You Might Find Surprising)
1. Microphone Placement Is More Critical Than You Think
When I first started, I underestimated how much microphone positioning could make or break my sound. I used to place my mic randomly, expecting good results, but once I experimented with angles and distances—about 6-12 inches from my mouth—I noticed a significant improvement in clarity and warmth. It’s like tuning an instrument; small adjustments can unlock a richer, more natural voice.
2. Room Acoustics Can Be a Game-Changer
Initially, I believed that investing in a premium microphone alone would fix all my audio issues. Turns out, environment matters just as much. Adding simple DIY treatments like hanging blankets or placing bookshelves helped absorb echoes and background noise. Creating a sound-friendly space turned my voice into a more authentic and professional-sounding presence.
3. Not All Microphones Are Created Equal, Even in the Same Category
I used to think a good microphone was a good microphone—period. But after trying different models, I realized that features like polar patterns, self-noise levels, and build quality can drastically impact your results. For solo streaming, a cardioid pattern is usually best, but switchable polar pattern mics offer versatility, especially if hosting guests.
4. Software Processing Is a Hidden Gem
Beyond hardware, I discovered that using software tools like EQ, compression, and noise gates can elevate your sound. Subtle tweaks make your voice more polished without sounding artificial. I recommend starting with basic plugins and gradually experimenting to find what enhances your unique tone.
5. Consistent Microphone Placement Beats Fancy Gear
No matter how expensive your mic is, inconsistent placement can ruin your sound. Developing a routine—keeping the mic at the same distance and angle—helped me maintain a stable, professional tone. Trust me, consistency is key to building a recognizable audio signature.
6. Microphone Quality Reflects Your Brand
Investing in a reputable microphone like the Shure SM7B or similar models communicates professionalism. It’s an extension of your brand, and viewers subconsciously notice better sound quality. Over time, I’ve come to see my mic as a long-term investment in my content’s credibility.
Resources I’ve Come to Trust Over Time
- SoundOnSound Magazine: An industry favorite, their reviews and guides helped me understand technical specs in a simple way.
- Sweetwater’s Microphone Buying Guide: Trusted for honest recommendations and detailed comparisons, it’s my go-to for new gear decisions.
- Podcastage YouTube Channel: A friendly, insightful resource for testing and reviewing microphones, perfect for beginners and pros alike.
- Recording Revolution Blog: Offers practical tips on acoustics and setup, making complex ideas approachable.
Parting Thoughts from My Perspective
Mastering microphone setup and understanding the nuances of sound can dramatically elevate your streaming quality. From experimenting with placement and environment to choosing the right gear and processing tools, each step contributes to a more authentic and engaging experience for your audience. If this resonated with you, I’d love to hear your thoughts—what’s been your biggest challenge or breakthrough in your audio journey? Share your insights in the comments or pass this article along to a fellow creator who might find it helpful. Remember, great sound isn’t just about equipment; it’s about crafting a space where your voice can truly shine.
Reading through this detailed journey into high-quality microphone setups really resonates with me. I remember initially starting with a simple USB mic, thinking that was enough, but once I upgraded to an XLR setup like the Shure SM7B, the difference in clarity and professionalism was night and day. One thing I learned early on is how much your environment impacts your sound; even the best microphone can underperform if your room echoes or is too noisy. Investing in acoustic treatments like foam panels and diffusers, combined with proper mic placement, made a huge difference. I also found that software tools—like EQ and noise gates—help polish the final sound without overdoing it. How do others balance the effort between environment tweaks and equipment upgrades? Do you find one more impactful than the other? Would love to hear your tips for creating a professional sound with limited space or budget.
This post really hits home for me. When I first started streaming, I was overwhelmed by all the different equipment options, especially when trying to pick between USB and XLR setups. I went with a budget USB mic for a while, but after upgrading to a microphone like the Rode NT-USB, I immediately noticed a more professional sound that helped boost my confidence on camera. What I’ve learned from my experience is that environment matters just as much as the gear itself. Simple acoustic treatments such as hanging thick curtains and adding soft rugs made a noticeable difference in reducing echoes. I’m curious, does anyone have recommendations for affordable acoustic solutions that don’t involve tearing apart your room? Also, how do you balance the effort between upgrading your mic versus improving your room acoustics? I’d love to hear how others have managed this, especially those with limited space and budget. Getting the right sound has truly transformed my engagement levels, and I believe it’s worth every investment.
Reading through this post really highlights the importance of not just choosing the right microphone but also paying close attention to environment and placement. I started with a USB mic as well, thinking that would be enough, but I quickly noticed background noise and echo affecting my recordings. Upgrading to an XLR setup and adding some inexpensive DIY acoustic panels made a huge difference in sound clarity. Regarding microphone placement, I’ve found that even a slight adjustment—like angling the mic downward or moving it a few inches—can really improve the richness of your voice. Has anyone experimented with different room setups or DIY treatments to enhance their audio quality? I’m curious about affordable solutions that don’t require major renovations. Also, how do you balance investing in better gear versus optimizing your room environment? I feel like both are equally critical for a professional sound, especially in a small home studio.
This post really resonates with me, especially the part about environment impact on audio quality. When I switched from a basic USB microphone to a more professional XLR setup like the Shure SM7B, the difference was immediately noticeable. But what truly made a difference was addressing my room acoustics—adding foam panels and even DIY solutions like hanging blankets helped reduce echo and background noise. I’ve found that no matter how good your mic is, if your environment isn’t optimized, your sound can still suffer. It’s interesting how small tweaks in placement and some simple acoustic treatments can transform your recordings. For those on a tight budget, what DIY solutions have worked best for you? And how do you prioritize between upgrading gear and improving your room? I’d love to hear your tips for balancing both in limited space.
I really appreciate this comprehensive overview! Upgrading my microphone from basic USB to an XLR like the Shure SM7B was a game changer for my streaming. But I also learned that room treatment plays an equally crucial role. I started with DIY solutions like hanging blankets behind me, which drastically reduced echo and background noise. For anyone on a budget, I’d recommend starting with soft furnishings and strategic placement before investing in more costly acoustic panels. One challenge I faced was balancing aesthetics with practicality—you want a clean, professional look without sacrificing sound quality. How have others managed to keep their setup visually appealing while optimizing acoustics? Also, do you think investing in a high-quality mic is more impactful than spending time on room treatment, or are both equally essential? Would love to hear your experiences—it’s inspiring to see how much environment and gear can elevate streaming quality!
This article really resonates with me, especially the part about balancing gear upgrades with proper acoustic environment. I started out with a decent USB microphone but quickly realized that my room’s acoustics were limiting the sound quality. Since then, I’ve been experimenting with DIY solutions like hanging blankets and repositioning furniture, which surprisingly made a big difference. I believe that even with the best mic, poor room treatment can ruin the overall sound. In your experience, which do you think yields a better impact: investing in a high-end microphone or improving room acoustics first? I’d love to hear more tips from other creators on managing limited space and budget while striving for professional audio quality.
This article really hits close to home for me. When I started out, I initially relied on a basic USB mic, which worked fine for casual streams. But as I aimed for higher quality, upgrading to a professional XLR microphone like the Shure SM7B made a noticeable difference — the clarity and warmth of my voice improved tenfold. I also underestimated the importance of room acoustics; adding DIY treatments such as hanging blankets and positioning furniture strategically really helped minimize echoes and background noise. I’ve noticed that small things like microphone placement—about 6 inches from your mouth and slightly off-axis—can dramatically elevate the sound. I’d love to hear from others: what’s your biggest challenge when optimizing your audio setup? Do you prioritize gear upgrades or acoustic treatment more? Or perhaps a mix of both? Sharing tips and experiences could really help fellow creators refine their setups on a budget.
This post really made me think about how much consistent mic placement can impact the overall sound quality. I used to move my mic around a lot, which led to inconsistent audio levels and tonal differences. Once I started anchoring my mic at a fixed position—about 8 inches from my mouth and slightly off to the side—the stability in my voice became much better. Do others have any tips on making mic placement more consistent or routines that help maintain optimal positioning? I also found that using a boom arm really keeps things steady. It’s fascinating how sound quality isn’t just about the gear but also about these small habits and setups. Also, I’m curious—how do you decide when to upgrade your mic versus improving your room acoustics? I’d love to hear your experiences, especially from those balancing tight budgets. Thanks for the insightful post—definitely motivated me to refine my setup further!