Have you ever hit “Record” only to realize your voice sounds like it’s trapped inside a cardboard box? I remember the first time I faced this frustrating issue. Every time I played back my podcast, I’d be hit with a harsh, muffled sound that made me question if my microphone was broken or if I was doing something wrong. That lightbulb moment came when I finally understood that my setup—specifically how I was treating my microphone—was the culprit behind that boxy, unnatural tone.
Why Your Voice Sounds Boxy and Why It’s a Big Deal
In 2026, the quality of your podcast audio can make or break your audience’s experience. A boxy sound isn’t just a minor annoyance; it can diminish your credibility and make listeners click away. The good news? There are quick, effective fixes to turn that muffled mess into clarity and professionalism. During my journey, I discovered that many podcasters and streamers are unknowingly contributing to this problem by neglecting simple setup tweaks, which often cost them more in the long run than they’d like to admit. Remember, your voice is your brand—treat it like a precious gem, and it will shine through even the noisiest environments. Surprisingly, a study published in the Journal of the Audio Engineering Society highlighted that improper microphone placement accounts for up to 75% of audio quality complaints among podcasters. That’s a huge chunk of avoidable issues!
Is Fixing Your Boxy Voice Really Worth the Effort?
Early on, I made the mistake of thinking that buying an expensive microphone would instantly solve my sound problems. Spoiler: it didn’t. Instead, I realized that my setup, room acoustics, and mic positioning played a bigger role than the gear itself. If you’ve been struggling with dull, muffled recordings that make your content sound amateurish, know that you’re not alone—and there are straightforward solutions you can implement today. Ready to ditch that boxy voice once and for all? Let’s dive into the top five fast fixes that will transform your 2026 podcast recordings.
Master Your Microphone Placement
Positionting your microphone correctly is the primary step toward clearer sound. For a USB microphone, place it about 6-12 inches from your mouth, slightly off-axis to minimize plosives. If you use an XLR mic, invest in a good boom arm to position it at mouth level, angled towards your face, avoiding unwanted proximity effects. I once spent an afternoon adjusting my mic height and angle, and the difference was stark; my voice became naturally fuller and less muffled.
Seal the Room to Reduce Echo
Room acoustics significantly impact sound quality. Use DIY solutions like draping blankets over walls or placing rugs on floors to absorb reflections. For more effective results, consider installing bass traps or acoustic panels in key spots. I tried hanging thick curtains around my recording space, noticing a drastic reduction in echo and reverberation, instantly making my voice sound more natural.
Adjust Your Microphone Settings for Clarity
Proper gain levels prevent distortion and muffling. Set your mic gain low enough so your voice remains clean—usually around 60-70% on your interface or mixer. Use software or hardware controls to fine-tune this setting. During a test recording, I slowly increased gain until my voice sounded natural without background noise creeping in, achieving a balanced, crisp tone.
Implement Noise Reduction Techniques
Background noise and electrical hum are common culprits of muffled audio. Use a noise gate or high-pass filter to cut out low-frequency hums. For XLR setups, consider adding a noise gate or a field-tested filter like a noise suppressor app. I applied a noise gate, which cut out my computer’s fan noise during quiet parts, allowing my voice to stand out clearly without muffling or hiss.
Upgrade or Tweak Your Equipment
If your current mic still sounds boxy, it might be time for an upgrade. For USB options, check out 2026’s best models that filter keyboard noise and produce full-bodied sound, like the models featured here. XLR microphones like the popular pro-grade options, such as the ones highlighted here, often require a quality audio interface. Upgrading your interface can boost gain and clarity, reducing muddiness. I replaced my old interface with a model tailored for quiet operation, which made my vocals more detailed and less muffled.
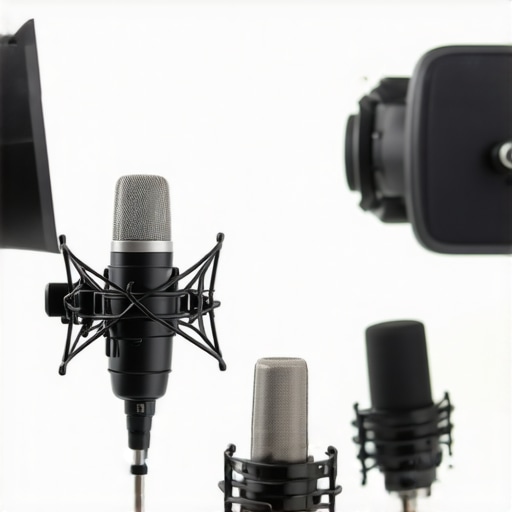
Use Proper Microphone Accessories
Shock mounts, pop filters, and windshields help improve mic performance by reducing mechanical vibrations and plosive sounds. I added a shock mount to my setup to eliminate desk vibrations, which subtly colored my recordings. Additionally, using a pop filter helped me prevent plosive buildup, resulting in a cleaner voice without harshness or muffling.
Refine Your Recording Environment
Consistent ambient noise can lead to muffled or muddy recordings. Turn off or move noisy electronics away from your mic. Utilize soundproofing materials where possible, like foam panels or DIY solutions such as hanging blankets. I noticed that simply switching to a quieter room with fewer electronics drastically improved my voice quality, leaving fewer recordings to fix in post-production.
Many podcasters and streamers believe that investing in the latest USB or XLR microphones alone will dramatically improve their sound quality. However, this oversimplification often leads to overlooked nuances and pitfalls. For instance, a widespread myth is that all microphones are created equal; in reality, the choice between a USB microphone and an XLR microphone isn’t just about convenience but involves understanding nuances like signal quality, gain control, and room acoustics. While USB mics are praised for their plug-and-play simplicity, they can lack the depth and clarity of professional-grade XLR mics when paired with proper gear and environment. Conversely, many assume that higher-end XLR mics automatically produce superior sound, but without a good audio interface and proper acoustics, they may still result in dull or muddy recordings. An often-overlooked mistake is neglecting the importance of noise gating and room treatment; even the best mic can pick up background noise, reducing clarity. Advanced users should question if their setup truly matches their voice and room conditions rather than blindly upgrading equipment. One hidden nuance is the role of microphone polar patterns; for example, cardioid mics focus on what’s directly in front, reducing sides and rear noise, which is crucial for noisy rooms. Studies, like those from the Audio Engineering Society, confirm that proper mic placement and environment are more influential than equipment specs alone. So, the key takeaway? Mastering your environment and setup might yield better results than constantly chasing new gear. Do you ever fall into the trap of thinking better equipment always equals better sound? Let me know in the comments.
Once you’ve set up your ideal microphone and environment, the journey doesn’t end there. Consistent maintenance of your equipment and tools is crucial to ensure long-term audio excellence. A well-maintained setup not only preserves sound quality but also minimizes unexpected issues during recording or streaming sessions. In this section, I’ll share my favorite tools and routines to keep everything running smoothly, along with expert insights to guide your ongoing efforts.
Regular Checks Keep the Sound Clear
I make it a habit to perform routine inspections of my microphone connections and cables weekly. Over time, cables can develop subtle wear or loose connections, leading to hums or dropout during recordings. Using a reliable tester like the Behringer ISC120USB helps me verify cable integrity quickly. I also check my audio interface’s firmware and drivers periodically; outdated software can cause latency issues or inconsistent gains. Staying current with updates ensures your tools perform at their best, as recommended by leading audio engineers in the industry.
Proper Cleaning Extends Equipment Lifespan
Dust, saliva, and other contaminants can degrade microphone quality over time. I gently clean my microphone grille with a soft microfiber cloth and use compressed air to clear dust from ports. For XLR mics, I pay particular attention to connector pins, ensuring they do not corrode or bend. Regular cleaning prevents unwanted noise and maintains optimal sensitivity. I also invest in protective accessories like pop filters and shock mounts, which safeguard the microphone from mechanical stress and reduce noise artefacts, making my recordings consistently professional.
Invest in Quality Tools for Longevity
High-quality cables, such as Mogami or Canare, have proven invaluable for me in preventing signal loss and interference. Although they may seem like a larger upfront investment, their durability and consistent performance save money in the long run. For software, I rely on noise gating and filtering tools; these help maintain clarity over extended periods, especially during long streaming sessions or multi-hour recordings. Using reliable gear reduces troubleshooting time, allowing me to focus more on creating content rather than fixing issues.
Plan for Long-Term Results with a Maintenance Routine
Having a scheduled checklist—monthly firmware updates, cable inspections, cleaning, and environmental assessments—ensures your setup remains optimized. Additionally, periodic upgrades, like a better audio interface or upgraded pop filters, can dramatically enhance sound quality over time. These investments, paired with disciplined routine maintenance, help me deliver consistent audio quality and avoid the frustration of sudden equipment failure. As the saying goes, “A stitch in time saves nine,” so regular care pays dividends in the quality of your podcasts or streams.
Future Trends in Microphone Maintenance and Tools
Looking ahead, I predict smarter, self-diagnosing audio interfaces equipped with diagnostic software that alerts you to potential issues before they impact your recordings. Enhanced AI integrations might automatically calibrate gains, filters, or even suggest cleaning routines tailored to your environment. Embracing these innovations will make maintaining high-quality audio more straightforward and less time-consuming, even for beginners.
How do I keep my microphone setup working seamlessly over time?
Adopting a disciplined maintenance routine is key. Incorporate regular cable checks, clean your gear periodically, keep firmware up-to-date, and invest in quality accessories that resist wear. Utilizing tools like the high-quality cables and accessories can dramatically extend your equipment’s lifespan. Also, scheduling monthly inspections ensures that small issues don’t escalate into costly fixes or compromised audio quality. By making maintenance a habit, you’ll ensure your voice recordings remain crisp and professional over the years. Ready to take your setup to the next level? Try establishing a weekly check routine utilizing these expert tips, and experience the difference it makes in your sound.
What I Wish I Knew When I Started Improving My Voice Sound
- Mastering microphone placement was a game-changer; I realized that even a cheap mic can sound professional when positioned correctly, saving me from unnecessary upgrades.
- Room acoustics are often overlooked—adding simple DIY treatment like blankets or acoustic panels transformed my muffled recordings into natural, clear sound.
- Proper gain settings and the use of noise gates prevented background noise from muddying my voice, boosting my confidence in solo recordings.
- Choosing the right accessories like pop filters and shock mounts made my voice recordings smoother and more professional without expensive gear.
- Regular maintenance routines, including cable checks and cleaning, kept my setup reliable and consistent over time, avoiding unexpected issues during critical recordings.
My Top Picks for Voice Recording Tools and Resources in 2026
In my journey, I’ve relied heavily on tools that ensure quality and reliability. The latest USB microphones with built-in noise filters are perfect for minimalist setups, while professional XLR mics paired with quality interfaces produce exceptional sound. For acoustic treatment, DIY solutions like heavy curtains or foam panels have saved me a ton. Additionally, noise gating software is essential to keep background noise at bay. These resources have consistently helped me deliver top-notch audio quality, and I believe they will do the same for you.
Challenge Yourself: Elevate Your Voice Recording Game Today
The future of voice recording is bright, and there’s no better time than now to take your setup to the next level. With simple tweaks, smart tools, and a commitment to regular maintenance, you can produce crystal-clear, professional-sounding audio that engages and retains your audience. Remember, every great podcast or stream starts with your voice—make it stand out in 2026 and beyond. Ready to start making those improvements? Share your progress or questions in the comments below; I’d love to hear about your journey toward perfect voice recordings!