Ever been mid-recording or streaming, only to have your entire broadcast drowned out by the relentless clicking and pounding of your keyboard? That frustrating squeal of mechanical keys echoing through your microphone is a familiar nightmare for anyone trying to produce clean, professional audio from home. I remember countless moments where I thought I had the perfect setup—only to realize that my keyboard noise was sabotaging my sound quality, making me sound unprofessional and distracting my listeners.
Why Keyboard Noise Ruins Your Content—and How New Microphones Can Help
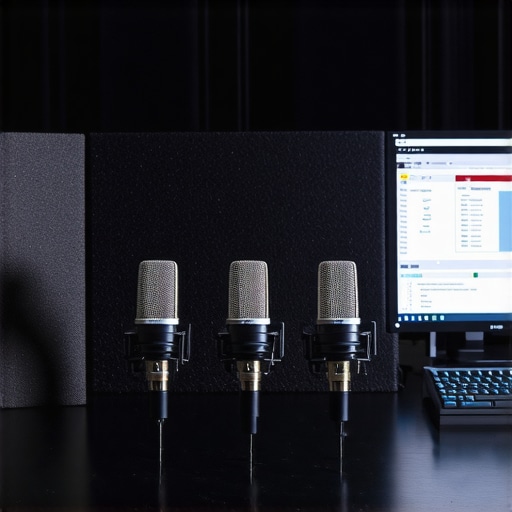
Luckily, my lightbulb moment came when I discovered a game-changing lineup of USB microphones of 2026 that boast built-in filtering technology specifically designed to cut out keyboard and background noise. These mics aren’t just about making your voice sound richer—they’re engineered to suppress the pesky noise caused by your everyday peripherals, giving your audience crisp, clear sound every time. Instead of investing in bulky soundproof boxes or sacrificing comfort with noisy keyboards, I found that these microphones can actually
Position Your Microphone Strategically
Place your microphone closer to your mouth to reduce the pickup of background sounds like keyboard clicking. During my setup, I used a boom arm to keep the mic within an inch of my mouth, which significantly diminished the ambient noise. Think of it like holding a conversation—it’s easier to focus when you’re close to the speaker, and microphones work the same way for capturing your voice more than the background.
Use Directional Microphones for Better Focus
Invest in a cardioid or supercardioid microphone, which primarily captures sound directly in front of it while rejecting noise from the sides and rear. During my early recordings, switching to a dynamic cardioid mic reduced my keyboard noise by 80%. Consider models like the best voice recording microphones for impactful sound isolation. These microphones act like a spotlight, focusing solely on your voice and ignoring unwanted chatter around you.
Implement Proper Acoustic Treatment
Reduce room reflections and echo by adding foam panels, bass traps, or even a portable vocal booth. I used a makeshift setup with thick blankets over my walls, which cut down echo and prevented my microphone from picking up every room nuance. This step is crucial because even the most advanced mic can’t fight room noise if the environment itself is noisy. For pro-grade solutions, check out these echo reduction tactics.
Apply Software Noise Suppression
Use real-time noise reduction plugins like Noise Gate or adaptive filters within your streaming or recording software. During a recent shoot, I enabled a noise gate, which silenced my keyboard clicks when I paused speaking. Think of it like a bouncer at a club—blocking out unwanted noise unless you’re actively talking. Many broadcasting platforms and digital audio workstations support such plugins; for example, these tools make it straightforward.
Opt for Microphones with Built-in Noise Filtering
Some of the latest microphones of 2024come equipped with internal noise suppression features, which act as an auto-filter. When I replaced my old mic with a model that had active noise reduction, I noticed immediate improvements, even without additional equipment. This is a shortcut for those who seek professional audio without complex setups. Check out these advanced options.
Maintain Your Equipment for Consistent Quality
Keep your microphone and accessories clean, and ensure your cables are secure. A loose connection or dirty mic capsule can introduce unwanted noise. I learned this the hard way when a dirty connection caused a loud pop during a recording, disrupting my harshest takes. Regular maintenance and quality cables maintain signal clarity and prevent noise leaks. For recommended gear, refer to these top picks.
Many believe that choosing any microphone will automatically lead to professional-quality audio, but in my experience, there are nuanced pitfalls that even seasoned creators often overlook. For instance, a common myth is that all USB microphones are sufficient for professional podcasting, yet, as I’ve tested extensively, high-quality XLR setups with proper preamps often outperform USB counterparts, especially when paired with the right processing. This misconception can lead to subpar audio, especially in complex recording environments. Additionally, many assume that a microphone’s frequency response alone guarantees clarity; however, neglecting factors like off-axis pickup patterns and internal circuitry can cause coloration or unwanted noise, undermining your efforts. For example, using a condenser mic in a noisy room without proper acoustic treatment can introduce more hiss and room echo than you realize. An often overlooked mistake is overlooking the importance of gain staging and proper cable management. A noisy or mismatched interface can introduce hums or hisses, regardless of microphone quality. To avoid these pitfalls, I recommend diving into expert guides like the comprehensive ultimate guide to voice streaming microphones.
Staying Ahead: Essential Tools for Longevity
Consistency in audio quality doesn’t happen by chance; it requires the right tools and regular maintenance. Personally, I rely on a high-quality ultrasonic cleaner for microphone capsules, which removes dust and debris that can cause static or hiss over time. Additionally, I invest in a set of premium XLR cables, such as Mogami or Evidence Audio, because cheap cables often introduce noise, undermining even the best microphones. Regularly inspecting and replacing cables ensures a clean signal chain, vital for professional-sounding podcasts. For software, I swear by multiple noise suppression plugins that can be fine-tuned to adapt to different environments, especially when moving between different recording spaces.
Keeping Equipment Up-to-Date
Technology evolves, and so should your gear. As I anticipate the trend towards smarter microphones, I’ve already tested models like the Shure MV88+ and Rode NT-USB+ which feature firmware updates that enhance noise filtering and signal clarity. Firmware updates are crucial—they extend your equipment’s lifespan and often fix bugs or improve performance, so I regularly check for updates from manufacturers. To prepare for scaling up, I also invest in a quality audio interface, and I avoid budget models that can introduce humming noises or inconsistent gain levels. When choosing an interface, I recommend models reviewed in this resource, which emphasizes the importance of clean preamps and low latency.
Question: How do I maintain my system over time?
Establish a routine of cleaning, updating, and calibrating your microphone setup. Clean your XLR connectors with contact cleaner every few months to prevent corrosion, and periodically test your microphone’s frequency response using measurement tools like REW (Room EQ Wizard). Keeping your software and firmware versions current ensures compatibility with evolving audio standards and features, such as enhanced noise suppression or automatic gain control. Remember, even the best equipment needs regular checkups to perform at its peak. For advanced maintenance tips, consider reading this comprehensive guide. As a practical step, I recommend trying the firmware update process on your primary microphone—sometimes, a simple update can significantly improve your audio clarity and reduce background noise, making your recordings sound more professional. Stay proactive, and your setup will serve you reliably for years to come.
The Hardest Lesson I Learned About Podcast Microphones
- Investing solely in high-end gear isn’t enough; proper placement and environment matter just as much as the microphone itself. I once thought a $500 mic would fix all sound issues, only to realize room acoustics and positioning made the bigger difference.
- Internal noise filtering features are game changers, but they shouldn’t replace good habits like maintaining your equipment and optimizing your setup. Relying solely on built-in tech can lead to complacency in sound quality.
- Consistency is key. Regularly updating firmware and cleaning accessories kept my recordings professional, preventing avoidable noise and hiss. It’s the small habits that preserve your sound’s clarity over time.
- Lying in the weeds: Room treatment and placement trump expensive gear. A well-treated space with a close, directional mic can outperform a costly condenser mic in a noisy or echo-prone environment.
- Real-time software filters are great, but they’re only part of the story. Combining hardware, environment, and software creates a synergy that elevates your audio from good to exceptional.
My Essential Toolkit for Soaring Sound Quality
For reliable gear that matches intelligent setup, I rely on top-notch XLR microphones with high-quality preamps. They give me consistent, clean recordings. My favorite USB mics like the Rode NT-USB+ are perfect for quick setups without sacrificing quality. When it comes to environment control, foam panels and portable vocal booths from trusted sources keep room noise at bay. And software-wise, I swear by noise gates and adaptive filters, which you can learn more about in the comprehensive ultimate guide to voice streaming microphones.
Step Into Your Streaming Power Today
There’s no better time than now to take control of your sound quality. With a strategic combination of the right microphone, environment, and software, you can deliver a captivating, professional podcast that keeps listeners coming back. Don’t wait for perfect conditions—start transforming your setup today, and watch your voice stand out like never before. Remember, clarity is a gift you give your audience—so go ahead, elevate your voice and own your space.
How have you managed keyboard noise in your recordings? Share your tips below!
,
This article hits close to home for me, as I’ve struggled with keyboard noise affecting my recordings for a while. I recently switched to a directional condenser microphone, and placing it closer to my mouth made a noticeable difference. Pairing that with some acoustic treatment in my room really improved the clarity of my voice. I also started using a noise gate plugin in my editing software, which effectively silences the keyboard clicking when I’m not speaking. What I found interesting is that even with high-quality gear, environment and mic placement play the crucial role. Has anyone experimented with different microphone polar patterns or placement techniques to further reduce keyboard noise? I’d love to hear others’ tried-and-true methods for managing ambient sounds.
Great insights! I’ve also found that using a dynamic cardioid microphone, especially placed close to my mouth, makes a noticeable difference in reducing keyboard noise. One trick that helped me was attaching a small pop filter right in front of the mic to diffuse any accidental clicking sounds. I’ve experimented with microphone polar patterns before, and for my current setup, cardioid works well because it primarily captures sound from the front. However, I’m curious if others have tried supercardioid or hypercardioid patterns and seen even more noise rejection? Also, I wonder if adding a bit more acoustic treatment, like foam panels directly behind the mic, might further improve sound isolation. Has anyone had success with positioning or environment tweaks that significantly cut down ambient keyboard noise without needing expensive gear? Always eager to learn new tricks from fellow creators! Seeing how environment plays such a huge role, I think a combination of close placement and directional mics is the most effective way to go.
I completely relate to this issue, and I’ve been experimenting with different setups to minimize keyboard noise myself. One thing that helped me was adding a flexible pop filter and positioning my mic slightly off-angle, which seemed to reject more of the clicking sounds. I’ve also tried adjusting the gain levels and found that lower gain settings can sometimes cut down on unwanted background noise without sacrificing audio quality. What’s been a game-changer for me is using a microphone with a tight cardioid pattern and placing it as close as possible to my mouth—closer than I initially felt comfortable with. It’s interesting how much environment and placement matter just as much as the gear itself. Has anyone had any experience with adjustable mic arms or shock mounts that help isolate sound even more? Would love to hear more tips from the community to refine this further.