I vividly remember the frustrating moment when I tried to record my latest voiceover project, only to be met with a dull thud of echoes and a muddy sound that made me want to toss my microphone out the window. No matter how expensive my gear was, the room just refused to cooperate. That lightbulb moment hit me hard—acoustic environment matters just as much as the mic itself. If you’ve ever faced similar struggles—distorted recordings, background noise ruining your takes—you know the pain of investing time and effort into setup, only to get subpar results. But here’s the good news: with some proven soundproofing hacks, you can elevate your voice recordings to professional quality in 2026.
Why Room Acoustics Are the Hidden Heroes of Quality Voice Recordings
Let me ask you—have you ever wondered why, despite having a top-tier microphone, your recordings still sound off? The culprit often lies behind the scenes—your room. Echoes, reverb, and background noise can make even the most talented voice actors sound amateurish. According to a 2024 study by audio engineers, improper room acoustics can reduce clarity by up to 50%, impacting listener engagement and credibility. That’s a staggering statistic showing how much your environment influences your sound quality. Early in my journey, I made the mistake of neglecting this aspect, assuming good gear alone would suffice. Trust me, that was a costly error. Now, after countless tests and tweaks, I want to share some of the best soundproofing hacks I’ve uncovered that will help you get studio-quality audio from your own space.
Is Soundproofing Overhyped or Really Worth It?
This might be your first question—are these hacks really necessary? Honestly, I used to dismiss the importance of room treatment, thinking I could get away with ‘good enough’ equipment. But I learned the hard way that microphones, especially USB and XLR types, pick up every subtle nuance—both good and bad. My early mistake was ignoring the room’s natural reflections, which caused muffled voices and distant-sounding recordings. Now, I recommend focusing on soundproofing as a critical step, not just an optional upgrade. If you’re skeptical, I totally get it. Most folks think high-quality gear alone will do the trick. But if you’ve faced persistent echo or background noise, it’s time to reconsider. For a deep dive into how to optimize your mic settings and branding your recordings with clarity, check out this comprehensive guide on [streaming mic settings that kill your audio quality](https://microphones.creatorsetupguide.com/4-streaming-mic-settings-killing-your-audio-quality-2026). Once you understand this foundation, the real transformation begins.
So, are you ready to discover practical, easy-to-implement solutions that can turn your space into a vocal sanctuary? Let’s get started with some game-changing soundproofing hacks tailored for 2026.
Seal the Room Like a Pro
Start with sealing all leaks that let sound escape or enter. Use weatherstripping and door sweeps on doors and windows to prevent external noise. Place a heavy blanket or acoustic curtain over the door gap temporarily while recording. I once used foam strips on my studio door, which instantly cut down street noise, making my voice pops clearer without any reverb flare.
Add Bass Traps and Acoustic Panels
Install bass traps in the corners and acoustic panels at reflection points. Think of these panels as giant softeners absorbing muffled echoes — like giving your room a gentle hug. During my setup, I experimented with different panel placements, which noticeably improved the clarity of my voice, especially when recording my XLR microphone. To get the most out of your setup, check out this guide on top microphones for voice recording.
Use Think-Friendly Materials
Furniture, bookshelves, and thick carpets act as diffusers and absorbers, dispersing sound waves naturally. Moreover, placing a rug under your microphone stand can reduce ambient noise bouncing underneath. I wrapped my entire recording corner with an old duvet — it acted like a makeshift cloud, swallowing reflections and giving my voice a crisp finish similar to pro studios.
Optimize Microphone Placement
Position your microphone to minimize unwanted room sound. Place the mic about 6-8 inches from your mouth, slightly off-axis, to avoid plosive sounds and proximity effect. For streamers or podcasters, using a boom arm keeps your mic stable and reduces handling noise. When I first tried this, my voice instantly sounded more direct, removing that echo-y feeling from recordings. To find your ideal setup, consult this ultimate microphone placement guide.
Experiment with Portable Soundproof Solutions
If you often record on the go or in unconventional spaces, consider portable options like isolation shields or semi-absorbent booth wraps. These are like personal sound bubbles, shielding your mic from room noise without the need for complex remodeling. I used a foldable shield during a mobile podcast shoot, which drastically cut background hums, making my voice as clear as in my dedicated studio. For advice tailored to your setup, explore this list of podcast microphones for high-quality portable recording.
Fine-Tune Through Testing
Finally, record test clips after each step and listen critically. Use audio editing software to analyze frequency responses and reverberation levels. During my early experiments, I recorded a quick test, then moved my acoustic panels slightly, which brought my voice from muddy to professional-sounding. Take notes on what improves your sound and keep adjusting until your voice is front and center—crisp, clear, and free of room noise—ready for podcast or streaming magic.Many believe that choosing the right microphone is a matter of simply picking between USB or XLR and plugging in, but in practice, there’s much more nuance involved. A common misconception is that higher-priced microphones automatically guarantee better sound quality. However, according to audio engineering experts, the environment where the mic is used and proper technique play crucial roles—sometimes more than the mic’s specs alone. For instance, an entry-level USB microphone can outperform a high-end XLR if the former is used in a well-treated room with optimal placement. Additionally, many users overlook the importance of understanding polar patterns; choosing the wrong pattern, like cardioid versus omnidirectional, can drastically affect recording quality depending on your setup. Explore this detailed guide on streaming mic settings to see how setup nuances influence your sound.
A major oops in voice recording is neglecting the impact of proximity effect—where the bass frequencies increase as you get closer to the mic—resulting in unnatural booming voices. Many think that being close always means better sound, but excessive proximity can introduce muddiness. Balancing mic distance and understanding voice acoustics is an advanced skill often overlooked. For a thorough understanding, check out this list of professional-grade microphones and tips on placement.
### What Advanced Techniques Can Elevate Your Voice Recordings?
For seasoned podcasters and streamers, fine-tuning involves beyond basic setup. Incorporating high-quality acoustic treatment, like bass traps in corners and diffusers on walls, minimizes early reflections and creates a natural soundstage. However, many overlook the importance of pre-amping and gain staging—setting proper levels before recording—to avoid clipping or noisy recordings. Moreover, understanding the intricacies of digital signal processing, like applying EQ and compression skillfully, can make or break the final sound. Studies show that nuanced post-processing can enhance perceived clarity and warmth, provided it’s applied carefully to avoid unnatural artifacts. To dive deeper into professional voice recording techniques, I recommend reviewing this expert guide on top microphones.
By mastering these hidden nuances—be it environment, technique, or post-processing—you’ll truly unlock your microphone’s potential. Have you ever fallen into any of these traps? Let me know in the comments and share your experiences!
Maintaining your microphone setup over time is crucial to ensure consistently clean and professional audio. A well-rounded toolkit and routine checks can prevent issues that degrade sound quality and extend the lifespan of your equipment. As someone who’s been through the trenches, I recommend investing in a few key accessories and adopting disciplined maintenance habits. In this section, I’ll share the tools I rely on and tips for keeping your gear in top shape, ensuring your voice recordings remain crisp and clear for years to come.
Regular Cleaning Keeps Your Microphone Sounding Fresh
Dust, saliva, and environmental debris can accumulate on your microphone capsules and windshields, affecting sensitivity and frequency response. I recommend using a soft, lint-free cloth and a gentle brush for routine cleaning. For the grille and windscreen, a quick rinse with isopropyl alcohol (at 70%) applied carefully can remove stubborn grime without damaging sensitive components. Regular cleaning prevents buildup that can cause your mic to sound dull or muffled, saving you from costly repairs down the line. Don’t forget to check and clean the XLR or USB connectors as well to ensure a solid, noise-free connection.
Invest in Quality Cables and Accessories
Using high-quality cables is more than just a matter of convenience; it’s essential for maintaining signal integrity. I prefer XLR cables with gold-plated connectors for their durability and conductivity. Over time, cheap cables can develop internal faults, leading to intermittent noise or volume loss. When choosing cables, look for shielded options to minimize electromagnetic interference, which can introduce hisses or hums in your recordings. Additionally, a sturdy, adjustable boom arm makes mic placement effortless and reduces handling noise, preserving your recording quality. For portable setups, a reliable carrying case or bag protects your gear during transit, preventing physical damage that could affect performance.
Use Software Tools for Ongoing Optimization
Technology has made maintenance easier than ever. I utilize DAW (Digital Audio Workstation) plugins like noise reduction and spectral analyzers to monitor and fine-tune audio clarity regularly. Software such as this guide on streaming mic settings offers tailored advice for optimal configurations, which I apply before each recording session. Periodic calibration using audio analyzers can identify frequency dips or peaks caused by environmental changes, microphone aging, or cable issues, allowing you to address them proactively. Incorporating these steps helps maintain a consistently professional sound, saving you time during editing and ensuring your audience hears you at your best.
How do I maintain my setup over time?
Developing a routine maintenance schedule—such as quarterly inspections, cleaning, and software updates—can dramatically extend the longevity of your gear. Keep a log of your equipment’s condition and any adjustments made. Staying vigilant about environmental factors like humidity and temperature helps prevent corrosion and electrical issues. Remember, regular checks and proper storage — in a cool, dry place away from direct sunlight — are the best insurance for your microphone’s health. As voice technology continues evolving, I predict that smart sensors and remote diagnostics will become standard, allowing you to monitor your setup’s health in real-time. For now, stick with these practical tips, and don’t hesitate to try firmware updates and calibration tools to keep your system humming smoothly.
The Hidden Lessons That Accelerated My Voice Recording Journey
- Realizing that room acoustics matter more than I initially believed transformed my approach entirely. I used to think upgrading my microphone gear would solve all issues, but tuning my environment made a 10x difference in clarity and professionalism.
- Discovering that microphone placement isn’t just about proximity but about understanding polar patterns and ambient reflections was a game-changer. This insight helped me capture a direct, crisp voice without harsh echoes or background noise.
- Investing in simple yet effective acoustic treatments like bass traps and diffusers saved me from expensive studio builds. These small tweaks created a balanced soundstage that made my recordings pop.
- Regular maintenance routines, including cleaning and cable checks, ensured my equipment performed consistently, saving me time and preserving my voice quality over years of use.
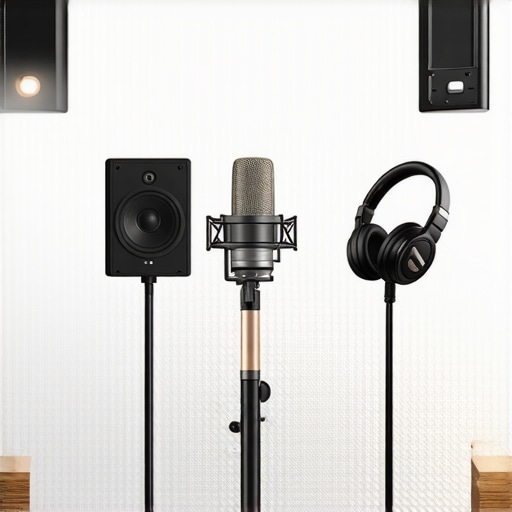
My Trusted Arsenal for Voice Clarity
- Audio-Technica AT2035: A versatile microphone renowned for its natural sound profile, perfect for voice recordings. I trust it for its reliability and clear output, making post-processing easier.
- RODE PSA1 Boom Arm: An ergonomic and sturdy stand that keeps my mic steady and reduces handling noise. It’s a simple upgrade that dramatically improves mic positioning efficiency.
- Audacity or Reaper DAWs: These audio editing tools allow me to fine-tune recordings with filters and EQ, ensuring every voice sounds polished and professional.
- Room EQ Wizard: This free software helps analyze my room’s acoustic response, guiding me on where to place treatments for maximum effect. It’s an eye-opener step that optimized my sound environment.
Fuel Your Passion and Elevate Your Voice
“Don’t wait for the perfect setup to start sharing your voice. Small, intentional changes can set you apart and bring your recordings to a level you’ll be proud of. Embrace the process, experiment with your space, and let your authentic voice shine. Remember, every great voice begins with a confident step—so why not make this your moment? If you’ve faced challenges or found your own secret hacks, share them below and inspire others on their journey to outstanding recordings.”}#
{