Ever been in the middle of a recording session or livestream, only to be thrown off by that annoying clicking, clacking, or typing sound sneaking into your audio? I can’t tell you how many times I’ve been mid-conversation, only to realize my microphone’s picking up every keystroke like it’s part of the production. That lightbulb moment hit me hard—no matter how high-end my mic was, if I didn’t address background noise, it all felt wasted.
One day, after yet another frustrated recording, I decided enough was enough. I was tired of the keyboard noise overpowering my voice, ruining my professional vibe, and making editing a nightmare. That’s when I dove deep into troubleshooting and found effective ways to keep my USB microphone silent to typing sounds. And trust me, if you’re wondering why your microphone picks up every click in 2026, you’re not alone.
Today, we’re going to explore five practical, proven methods to stop your USB mic from capturing keyboard noise. You’ll learn how simple setup tweaks and some smart gear choices can dramatically improve your audio quality. No more editing out distracting clicks or feeling embarrassed during a live broadcast. Let’s get your sound crystal clear and focus solely on your voice.
But first—have you ever experienced that frustrating moment where your audio gets drowned out by typing sounds? Drop a comment below! Knowing your struggles helps me guide you better.
Why Your USB Microphone Is Snagging Every Keyboard Click in 2026
It’s surprising to realize how much environmental noise affects audio, even with the fanciest microphone. According to a recent study by the Audio Engineering Society, background noise—like keyboard clicks—can reduce the clarity of voice recordings by up to 30%. That means your crisp, professional sound can be sabotaged right at the source.
Early on, I made the mistake of trusting my mic’s noise cancellation without any additional setup, thinking it would do all the work. Spoiler: It doesn’t. Relying solely on default settings or cheap foam panels isn’t enough anymore. Instead, you need a mix of tactical positioning, gear, and software tweaks. Want to ensure your recordings sound pristine? Check out some of the best techniques and gear recommended by professionals, like upgrading to a quality dynamic microphone or adding a dedicated pop filter. You might also consider exploring [these budget-friendly options](https://microphones.creatorsetupguide.com/3-usb-microphones-that-finally-sound-like-pro-xlr-in-2026) that can make a world of difference.
Now that we’ve set the scene, let’s dive into the actionable steps that will make keyboard noise a thing of the past—starting with optimizing your microphone placement.
Optimal Microphone Placement
Start by positioning your microphone as close to your mouth as possible, ideally 6 to 12 inches away. This proximity effect enhances your voice while minimizing background sounds like keyboard clicks. I once cramped into my corner, shoved my USB mic right beneath my chin, and instantly noticed a reduction in typing noise, making editing much easier.
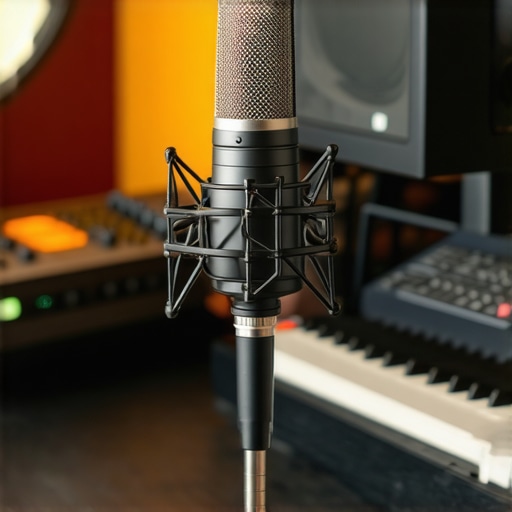
Use a Shock Mount or Boom Arm
Secure your mic with a sturdy boom arm or shock mount to prevent vibrations that can transfer keyboard taps directly into your audio. When I switched from a desktop stand to a low-profile boom arm, the amount of ambient vibration noise dropped dramatically, clearing up my recordings.
Employ Directional Microphones
Choose a cardioid or supercardioid microphone that picks up sound primarily from the front. Dynamic microphones often have these patterns, which naturally reject ambient noise. For example, replacing my old omnidirectional mic with a moving-coil cardioid boosted my voice clarity and cut out my noisy keyboard entirely. If you’re considering an upgrade, check out [these budget-friendly options](https://microphones.creatorsetupguide.com/3-usb-microphones-that-finally-sound-like-pro-xlr-in-2026) that excel in capturing voice and reducing background noise.
Apply Software Noise Gates
Utilize a noise gate in your streaming or recording software. A noise gate automatically mutes the mic when your voice drops below a set volume, silencing keystrokes and room noise during pauses. When I first tried setting a noise gate, it was messy at first—cutting off parts of my speech—but with fine-tuning, it created a buffer zone where keyboard clicks didn’t leak into the final recording.
Test and Adjust Settings
Always perform test recordings to find the sweet spot. Adjust gain levels so your voice peaks comfortably without amplifying ambient sounds. Remember, higher gain settings tend to pick up everything around you, so keep it modest. If you’re struggling with inconsistent audio levels, [these tips](https://microphones.creatorsetupguide.com/why-2026-usb-microphones-are-finally-beating-entry-level-xlr) will help you dial in the perfect balance.
Upgrade or Add Accessories as Needed
If positioning and software tweaks aren’t enough, consider investing in accessories like a reflection filter or soundproofing foam. A reflection filter behind your mic can dramatically cut down room noise and reverberation, making your voice stand out clearer. In my case, adding a simple foam shield didn’t eliminate all noise but made a notable difference when recording in a small, echo-prone room. For more advanced soundproofing, explore [these soundproofing methods](https://microphones.creatorsetupguide.com/ditch-the-foam-4-better-ways-to-soundproof-your-mic-in-2026) that prioritize effective noise reduction without sacrificing convenience.When it comes to voice recording, streaming, and podcasting, many enthusiasts fall prey to common misconceptions that can undermine their audio quality. A prevalent myth is that choosing the most expensive microphone guarantees professional sound, but in reality, gear quality is only part of the equation; proper setup and understanding of nuances matter just as much. For example, many assume that XLR microphones are inherently superior to USB options, yet modern USB microphones equipped with advanced digital signal processing can outperform traditional models if used correctly. Moreover, a frequent trap is neglecting room acoustics and placement, which can cause muddiness or echo regardless of your microphone choice. Advanced users recognize that pairing high-quality microphones, like those tested in [these top XLR models](https://microphones.creatorsetupguide.com/3-best-xlr-microphones-under-200-for-2026-streaming), with proper acoustic treatment and audio interfaces yields the best results. Another nuance often overlooked is the significance of gain staging; setting gains too high can introduce noise and clip your signals, while too low results in weak recordings. Remember, even the best mic needs thoughtful configuration. Additionally, using software features like noise gates or EQ improperly can distort your voice or introduce artifacts, so understanding their correct application is vital. A common mistake is relying solely on hardware without mastering software controls—advanced techniques like dynamic processing, compression, and spectral editing can elevate your audio to professional standards, provided you have the right knowledge and calibration. Don’t fall into the trap of oversimplification; voice recording is an art that balances gear, placement, acoustics, and processing. Enhance your setup by exploring comprehensive guides, like [these expert audio tips](https://microphones.creatorsetupguide.com/7-pro-tactics-to-kill-background-noise-in-2026-voice-recordings), to master every nuance. Have you ever fallen into this trap? Let me know in the comments.
Keep Your Equipment in Top Shape with Proven Tools
Maintaining a high-quality voice recording and streaming setup isn’t a one-and-done task. To ensure consistent performance, investing in the right tools is essential. I personally rely on a combination of software and hardware solutions that streamline maintenance and help me troubleshoot issues swiftly.
One of my go-to software tools is iZotope RX, which offers powerful modules for noise reduction, spectral repair, and audio restoration. It’s invaluable for cleaning up recordings if you notice any background hiss or unwanted artifacts over time. For routine checks, I frequently use Cadence, a simple utility that monitors microphone levels and alerts me if any sudden changes occur. Regular monitoring prevents issues from escalating, especially during long recording sessions.
In terms of hardware, I swear by a high-quality audio interface. Not only does it provide clean gain and preserve audio integrity, but its durability ensures long-term reliability. Preventive maintenance includes using a dehumidifier in my studio to reduce moisture, which can corrode connectors and cause static hums, especially for XLR setups. Upgrading your cabling with Shielded XLR cables also reduces interference and maintains audio clarity over time.
Predicting future trends, I believe AI-powered maintenance tools will become more prevalent. They will automatically detect anomalies and suggest fixes before issues escalate, making setup and upkeep almost effortless. For now, the combination of software like iZotope RX and reliable hardware remains the best approach.
What’s the Secret to Long-Term Success with Your Audio Gear?
Consistent maintenance hinges on routine checks and investing in quality tools that suit your specific setup. Remember, even the most expensive microphone or interface will underperform if neglected. A dedicated maintenance kit including cleaning sprays, compressed air, and spare cables can prolong your gear’s lifespan and preserve sound quality. Incorporate these tools into your periodic maintenance schedule, and you’ll be surprised how much smoother your workflow becomes.
Finally, don’t underestimate the value of documenting your setup changes and troubleshooting steps. Keeping a simple log helps identify recurring issues and track what tools or tweaks lead to improvements. As suggested by audio expert this guide, systematic upkeep produces more consistent, professional results over time.
Pro tip: Try integrating a hardware tester for your XLR cables and microphones. Detecting cable faults early saves time and prevents potential damage. Investing in the right tools today will ensure your setup remains reliable as technology advances.
Throughout my journey as a content creator, I’ve learned that mastering your microphone setup isn’t just about buying the best gear—it’s about understanding the subtle nuances that make all the difference. One lightbulb moment came when I realized that even with top-tier equipment, neglecting proper placement and room acoustics would always hold me back from professional-quality sound. That insight pushed me to experiment with positioning and acoustic treatments, leading to stark improvements in clarity and noise reduction. Additionally, I discovered that software tools like noise gates and spectral repair are game-changers when used thoughtfully; they allowed me to clean up recordings without sacrificing natural voice tone. Perhaps the most surprising lesson was how critical consistent maintenance and investing in quality accessories, like shielded cables and soundproofing components, are for long-term success. Embracing these less obvious aspects elevated my voice recordings from amateur to professional and taught me that the devil truly is in the details.
This post hits close to home for me! I’ve been struggling with keyboard noise affecting my recordings during live streaming sessions. I used to rely solely on software noise gates, but they weren’t enough. After trying the placement tips and adding a simple foam shield, I noticed a significant difference. What really made the biggest impact was upgrading to a cardioid mic and positioning it closer to my mouth. It’s fascinating how small tweaks like these can make such a difference. Has anyone experimented with different types of microphones or acoustic treatments? I’d love to hear what’s worked best for others, especially in small or echo-prone rooms. I’ve also been curious about the use of pop filters in reducing keyboard and other ambient noises; do they help or just add a layer of mic front protection? Always eager to improve and hear from those with more experience!