Ever spent hours tinkering with your microphone setup, only to find your voice sounds flat, distant, or just plain off? I’ve been there. I remember the sinking feeling when I finally realized my cheap mic was holding back my entire podcast. That lightbulb moment led me down a rabbit hole, and let me tell you—picking the right microphone can make or break your voice recordings and streams.
Why Choosing the Right Microphone Matters More Than You Think
When I first started, I thought any mic would do. Just plug in, hit record, right? Wrong. I learned the hard way that not all microphones are created equal, especially if you want professional-sounding audio that keeps listeners engaged. The right mic can capture your voice’s nuances, reduce background noise, and even boost your confidence on camera or during a call. According to a recent study, poor audio quality can reduce viewer engagement by up to 80%, which is staggering when you’re trying to grow your audience.
Today, I’ll help you understand the different types of microphones out there, their strengths, and what to consider before making a purchase. Whether you’re into streaming, podcasting, or voice-over work, the right microphone setup is your secret weapon. If you’ve ever wondered, “Is this mic actually worth the hype?” or felt overwhelmed by the choices, stick around. I’ll guide you through the essential types and help you avoid the rookie mistakes I made early on.
Is All the Microphone Noise Just Hype or Worth It?
One mistake I made early on was assuming that buying the most expensive mic automatically meant better sound. Not true. A high-end condenser might be perfect for a controlled studio environment but disastrous in a noisy room. The key is matching the mic to your environment and goals. Want to learn which microphones excel for streaming and voice recording? Check out this comprehensive guide to the best microphones for podcasters in 2024. Whether you prefer USB simplicity or XLR quality, I’ve got you covered.
Now, let’s get into the different types of microphones and what makes each one special. The right choice can elevate your content, boost your confidence, and make your voice stand out in a sea of competitors. Ready to find your perfect mic? Let’s dive in!
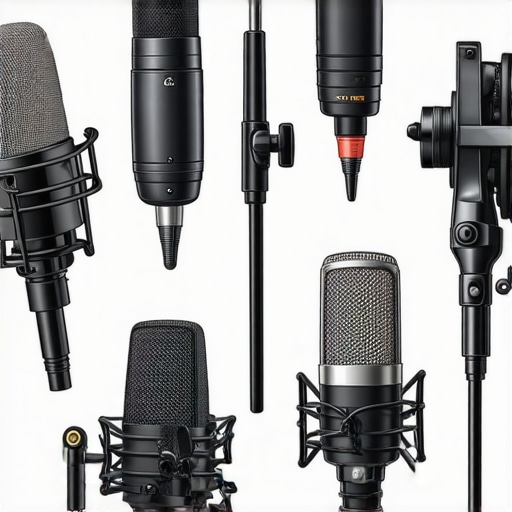
Pick the Right Microphone Type for Your Needs
Start by identifying your primary use case: are you streaming, podcasting, or doing voice-over work? This decision narrows down your options significantly. For beginner-friendly setups, a USB microphone offers simplicity and decent quality. If you aim for professional-grade audio, an XLR microphone paired with an audio interface gives you flexibility and superior sound. Think of it as choosing between a plug-and-play car versus a custom-built vehicle—each serves different needs but can both get you where you want to go.
Assess Your Environment and Setup
Next, consider your recording environment. Is your space noisy or acoustically treated? If you’re in a noisy room, opt for microphones with tight pickup patterns like a cardioid condenser or dynamic mic. These mics are like a focused spotlight, capturing your voice while ignoring background noise. For quiet, well-treated rooms, a condenser mic can pick up more nuances, making your voice sound rich and detailed. I remember trying a condenser microphone in my cluttered office, which initially caused echo issues, but a simple DIY foam panel setup made all the difference.
Match Microphone to Your Technical Skills
If you’re new to audio gear, don’t overcomplicate matters. A USB microphone like the Blue Yeti or Audio-Technica ATR2100x is perfect. They connect directly to your computer, require no extra gear, and are generally more forgiving. On the other hand, if you’re comfortable with audio setups, consider an XLR microphone. While it involves more equipment, it offers better sound quality and durability. I upgraded from a USB mic to an XLR setup after a few months, and the difference in clarity was night and day, especially in streaming sessions with multiple guests.
Prioritize Your Budget and Future Goals
Set a realistic budget based on your ambitions. You don’t need the most expensive gear to start, but investing in a quality microphone now can save you headaches later. For budget-conscious creators, entry-level mics still deliver great results. If you plan to grow your channel, consider a professional-grade microphone that scales with your skills. Remember, a good mic is an investment in your brand’s credibility and quality.
Test and Fine-Tune Your Setup
Once you have your gear, spend time testing different positions and settings. Use a pop filter to eliminate plosives and adjust gain levels for clarity without distortion. Record sample snippets and listen critically. I once recorded a quick intro, realized my mic was too close, causing muffled sound, and moved it back a few inches. Small adjustments like this make a big difference in professional-sounding recordings.
Maintain Your Microphone for Longevity
Proper maintenance ensures your mic stays in top shape. Keep it clean from dust and moisture, store it in a safe place, and avoid dropping or knocking it. Regularly check your cables and connections, and replace any worn parts. This proactive approach prevents issues that could compromise your audio quality during critical streams or recordings.

Many aspiring content creators fall into the trap of believing misconceptions about microphones that can hinder their audio quality, often without realizing it. Let’s dig deeper into some of these myths and uncover the nuanced truths that can make a real difference in your setup.
Why Bigger Is Not Always Better for Microphones
A widespread belief is that larger microphones automatically deliver superior sound. While some large-diaphragm condensers are excellent, size alone doesn’t guarantee quality. The key factors are the microphone’s design, polar pattern, and frequency response. For example, a compact dynamic mic like the Shure SM58 can outperform a large condenser in noisy environments because of its focused pickup pattern. So, don’t judge a mic solely by its size; consider your environment and recording needs.
Another misconception is that expensive microphones are always the best choice. This isn’t true in every case. Many budget-friendly microphones, like certain USB mics, deliver surprisingly good quality for their price, especially for beginners. The real secret lies in matching the mic to your specific use case and environment, rather than chasing the highest price tag.
Beware of the Noise Cancellation Trap
Some believe that high-end microphones with noise-canceling features will magically eliminate background noise. However, noise reduction is more about the microphone’s polar pattern and your environment than about built-in tech. Dynamic microphones with cardioid patterns, for instance, naturally reject sounds from behind, making them ideal for noisy settings. Attempting to rely solely on ‘noise-canceling’ mics without proper room treatment can lead to disappointing results. Proper placement and environment management often outperform technology alone.
As an advanced tip, consider how your microphone’s polar pattern interacts with your space. For example, a hypercardioid pattern can provide even narrower pickup but may be more sensitive to movement, so choose wisely based on your recording style.
Can You Really Over-Improve Your Microphone?
Many think investing in a high-end mic is the only way to get professional sound. But, over-optimizing can lead to diminishing returns. A good microphone paired with proper acoustics, positioning, and post-processing yields the best results. As expert advice suggests, focusing on your environment and technique often does more for quality than a costly mic upgrade alone.
Have you ever fallen into this trap? Let me know in the comments! Remember, understanding these nuances helps you avoid costly mistakes and unlocks the true potential of your gear.
Once you’ve invested in a quality microphone and fine-tuned your setup, the next critical step is maintaining it to ensure longevity and consistent performance. Proper upkeep not only preserves your equipment but also saves you money and frustration over time. In this section, I’ll share the specific tools and methods I personally rely on to keep my microphone gear in top shape, along with insights into how these practices will evolve as audio technology progresses.
How do I maintain my microphone setup over time?
Regular cleaning is fundamental. I use a soft microfiber cloth to wipe down the microphone grille after each session, preventing dust and moisture buildup. For deeper cleaning, I recommend a gentle brush and, occasionally, a small amount of isopropyl alcohol on the grille—be cautious to avoid the internal electronics. Keeping the environment clean is equally important; I use compressed air cans to blow out any dust from cable connectors and ports, which can develop corrosion or cause poor connections over time.
Invest in reliable cable management tools. I prefer high-quality, braided XLR and USB cables, which resist wear and tear better than cheap alternatives. Using cable ties or spiral wraps helps prevent accidental pulls and reduces strain on your connections. Regularly inspecting cables for frays or loose pins saves you from unexpected audio dropouts or static during recordings or streams. When I notice any issues, I replace worn cables immediately, as compromised wiring can degrade sound quality or cause damage to your equipment.
Software tools are equally vital for ongoing maintenance. I rely on audio editing programs like reputable audio editing software to perform noise reduction, equalization, and leveling. Regularly updating your drivers and firmware—if your mic or audio interface supports it—ensures compatibility with new operating systems and patches bugs that might affect performance. I set reminders to check for updates every few months, which helps avoid sudden glitches or driver conflicts.
Looking ahead, I predict that wireless microphone systems will become increasingly smart, offering real-time diagnostics and automatic calibration features. This trend will make maintenance even easier, but it’s essential to stay proactive with manual checks and cleaning routines to prevent digital or hardware failures. As technology advances, combining high-quality tools like dedicated maintenance software with routine physical upkeep will be the key to long-term success.
One effective tip I recommend is setting a monthly maintenance schedule, which includes cleaning, cable inspection, and software updates. This disciplined approach minimizes downtime and ensures your microphone always sounds its best. Try integrating a simple checklist for each session, and you’ll develop a habit that extends your gear’s lifespan significantly.
In summary, maintaining your microphone setup involves a mix of physical cleaning, cable care, software management, and staying informed about emerging tools. By applying these specific techniques, you’ll keep your equipment performing like new, ensuring your recordings and streams remain professional and reliable well into the future.
The Hardest Lesson I Learned About Microphone Choices
Early in my journey, I believed that spending more money on a microphone would instantly improve my sound quality. I was wrong. It turns out that environment and technique matter far more than price tags. That realization was a lightbulb moment, teaching me to focus on matching the mic to my specific needs, rather than chasing the latest hype.
3 Myths About Microphones That Held Me Back
I used to think that larger microphones always provided better audio, but I discovered that size is less important than polar pattern and design. Similarly, I believed noise-canceling features would eliminate background noise entirely, yet I learned that proper room treatment and mic placement are key. Overcoming these misconceptions saved me time and money, and improved my recordings dramatically.
What Experts Won’t Tell You About Microphone Maintenance
Most beginner guides overlook the importance of routine care. I found that regular cleaning, checking cables, and software updates extend my gear’s lifespan and ensure consistent quality. Embracing simple maintenance habits means I can focus more on creating content and less on troubleshooting audio issues. As technology advances, staying proactive with my setup keeps my sound sharp and reliable.
My Essential Toolkit for Microphone Setup and Maintenance
For top-tier quality, I trust the best microphones for podcasters in 2024 because they offer a balanced mix of affordability and performance. I rely on USB mics for quick setup, and XLR options for professional sound. My favorite tools also include a pop filter, good cables, and an organized workspace, which make a noticeable difference in audio clarity and durability.
Keep Your Voice Sharp and Your Gear Happy
Don’t wait until your equipment fails—make routine maintenance a habit. Regular cleaning, cable inspection, and firmware updates are simple yet powerful steps to ensure your microphone sounds pristine long-term. As technology evolves, I look forward to smart, auto-calibrating systems, but manual upkeep will always be a cornerstone of quality. Your voice deserves the best, and with proper care, your microphone can serve you for years to come.
This post really resonated with me, especially the part about not relying solely on noise-canceling features. I used to think a high-end microphone would automatically solve background noise issues, but I found that proper room treatment and placement actually make a bigger difference. I remember experimenting with different microphone positions and realizing how placement can dramatically affect sound clarity. It’s a good reminder that even with the best gear, environment and technique are crucial.
I’ve recently started investing in a cardioid dynamic mic for my home studio, and it’s noticeably better at rejecting unwanted sounds. Has anyone here had success with specific room treatments or DIY solutions? I’d love to hear tips on optimizing space without breaking the bank.