Have you ever sat down to record your latest episode or started a streaming session only to be haunted by your own voice, muffled and indistinct? I remember countless nights where I battled with cheap microphones, scrambling to get that perfect sound, only to be met with crackles, echo, or a voice that sounds like it’s coming from a tin can. That frustrating moment when you realize your setup isn’t just about plugging in a mic; it’s about clarity, quality, and the confidence that your audience hears you at your best. That was my lightbulb moment.
Why Your Voice Deserves Better Than a Run-of-the-Mill Microphone
If you’re serious about podcasting, streaming, or voice recording, you need more than just a decent mic—you need the right one. The difference in sound quality can make or break your content’s professionalism and appeal. I learned this the hard way early on, choosing a cheap USB microphone because it was easy and inexpensive. Turns out, I was sacrificing clarity and warmth that are crucial for engaging audio. Just a small upgrade transformed my recordings from muddy to crisp, boosting my confidence and listener engagement. According to industry experts, investing in quality audio gear is one of the smartest moves podcasters and streamers can make. In fact, a study by Podcast Insights shows that audio quality is the top factor influencing listener retention. Want to find your ideal microphone without wasting time and money? Let’s dive into what really matters for clear, professional sound. Check out this comprehensive guide to understand different microphone types and what suits your needs best.
Will a flashy mic make your voice sound professional?
Early in my journey, I thought the more expensive or popular a microphone, the better my audio would be. Was I wrong. I made the mistake of purchasing a fancy-looking XLR mic without considering room acoustics or proper positioning. As a result, I still sounded distant and dull. It was only after I learned about the importance of microphone characteristics and proper setup that I started to see real improvement. For honest advice, don’t fall for marketing hype; instead, focus on the right mic for your voice and environment. For detailed comparisons, take a look at this top picks in 2024.
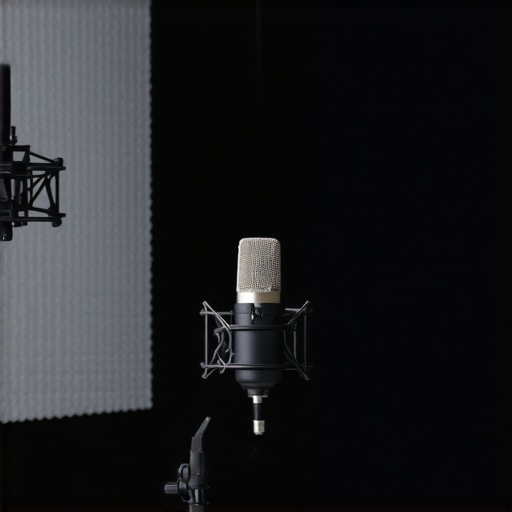
Select the Right Microphone Type for Your Space
Choose between USB, XLR, or hybrid microphones based on your technical comfort, budget, and professional goals. Learn about different microphone types here to match your needs. I once started with a basic USB mic, but upgrading to an XLR setup, despite the initial complexity, provided richer sound and more control, making my recordings sound much more professional.
Assess Your Recording Environment
Room acoustics significantly affect sound quality. Hard surfaces cause echoes, while soft furnishings absorb unwanted reverberations. For example, when I recorded in my echo-prone living room, I added foam panels and moved my setup into a closet with clothes—drastically cutting reverb and clarifying my voice. This is a crucial step in achieving studio-quality audio without expensive equipment.
Fine-Tune Microphone Placement and Settings
Proper placement ensures your voice is captured clearly and avoids background noise. Position your mic about 6-12 inches from your mouth, slightly off-center to minimize plosive sounds. Use a pop filter—like I did—to reduce ‘pop’ noises from pronunciation. Adjust gain levels so your voice isn’t distorted or too quiet. Early on, I ignored these details, resulting in muffled recordings; spending time on placement greatly improved clarity.
Learn Microphone Pickup Patterns
Different mics have various pickup patterns (cardioid, omnidirectional, bidirectional). A cardioid pattern, which captures sound primarily from the front, is ideal for solo recordings. I experimented with a multi-pattern mic, and by switching to cardioid, my voice became more isolated from room noise. Mastering these patterns is vital for clean recordings.
Optimize Audio Interface and Software Settings
If using an XLR microphone, connect it to a quality audio interface—think of it as the mic’s ‘translator’—which boosts and converts the analog signal to digital. Set input levels carefully; too high, and you’ll clip/distort, too low, and you’ll get noise. I used a simple audio interface and adjusted levels in my recording software, which made a noticeable difference in signal quality. For detailed guidance, visit this resource.
Choose the Right Software and Configure Properly
Select recording/editing software that suits your workflow—options range from Audacity to Adobe Audition. Set your input device correctly and enable noise suppression if needed. I once recorded without adjusting my software settings; adding noise reduction improved my clarity even further, giving my voice a polished sound similar to high-end studio recordings.
Implement Effective Post-Processing Techniques
After recording, use equalization (EQ) to enhance vocal frequencies—boosting warmth and clarity—while reducing muddiness. Light compression levels keep your voice even without sounding unnatural. I learned these tricks through trial and error, and now my recordings sound balanced and professional.
Many assume that choosing a high-end microphone guarantees professional sound, but the reality is more nuanced. For instance, it’s a common misconception that premium XLR microphones automatically produce better audio than quality USB microphones. In truth, the microphone’s characteristics, room environment, and setup play critical roles. Relying solely on a microphone’s price or brand can lead to overlooked pitfalls. A well-known mistake is assuming that any microphone will suit every voice or space. Optimal results demand matching the mic’s pickup pattern, frequency response, and sensitivity to your specific environment and vocal style. Many podcasters fall into the trap of prioritizing fancy gear without investing time in proper placement and acoustics—an approach that often diminishes potential quality. For advanced tips, check out this comprehensive guide to microphone setup and selection.
Are budget-friendly microphones really inferior for serious voice work?
Many believe that inexpensive microphones can’t deliver professional sound, but this isn’t always true. The key lies in choosing models with suitable specifications and understanding their quirks. For example, some top affordable microphones offer excellent clarity and noise rejection if configured correctly. It’s essential to focus on microphone features like polar patterns and frequency range, rather than price alone. Neglecting this can result in a false sense of security—thinking a budget mic is enough, only to be disappointed by background noise or dull sound during recording.
Moving beyond the basics, advanced podcasters need to pay attention to room acoustics and software configurations. Many overlook how echo or reverb can destroy even the best mic’s potential. Proper treatment, like foam panels or reflection filters, combined with careful calibration, makes a significant difference. Moreover, the myth that XLR microphones are inherently better than USB ones ignores the fact that some high-quality USB mics have comparable or even superior features, especially in portable or home setups. For a detailed comparison, see this expert guide.
Why then do many producers gravitate towards XLR for professional-grade recordings? It’s mainly because of expandability and control. An XLR setup with a good audio interface allows for adjustable gain, better preamps, and the option to upgrade components down the line. But this added complexity can trip up beginners who underestimate setup needs. A common mistake I see is skipping quality gain staging in the interface, leading to distorted or noisy recordings—a mistake that’s easily avoidable with knowledge of proper gain structure.
Finally, understanding microphone pickup patterns can dramatically improve your voice clarity. Cardioid mics, which focus on sound from the front, are ideal for streaming and podcasting, minimizing background noise. Omnidirectional patterns pick up more ambient sound, which can be a trap if you want isolation. Mastery over these nuances, combined with room treatment and proper gear selection, distinguishes amateur setups from professional ones. So, next time someone recommends a mic based solely on brand or price, consider the full picture. Dive into the detailed resources and avoid falling into the common pitfalls that compromise your audio quality. Have you ever fallen into this trap? Let me know in the comments.
Tools and Techniques for Lasting Microphone Performance
Investing in quality gear is just the beginning; maintaining it over time ensures consistently professional sound. I personally rely on a few essential tools and routine practices to keep my microphone and audio setup functioning flawlessly. A popular choice among podcasters and streamers is the Blue Yeti X for USB microphones, appreciated not only for its sound but for its durable build and user-friendly interface. However, even premium microphones require care and troubleshooting to prolong their lifespan and maintain sound quality.
Essential Maintenance Tools and Practices
First, I swear by a high-quality microfiber cloth for regular dusting of my mic’s grille—dust and grime can degrade sound clarity. For delicate components, a gentle compressed air canister helps remove dust from grille meshes and connectors without risking damage. When it comes to software, updating your audio drivers and firmware regularly is critical; manufacturers often release improvements that fix bugs or enhance compatibility. I make time every few months to check for these updates, ensuring my equipment performs at its best. Additionally, a noise gate plugin in my recording software helps tame background sounds, especially when my environment isn’t perfectly soundproofed.
How do I maintain my gear over time?
The key lies in routine inspections and protective measures. Store your microphone in a dust-free, dry space—preferably using a dedicated case or cover when not in use. Handling with care is vital; avoid yanking cables or exposing gear to extreme temperatures. For my XLR microphone, I regularly check the cable connections for corrosion or fraying and replace them as needed to prevent signal loss. Also, consider using a shock mount or suspension bracket; this reduces mechanical vibrations that can muddy recordings over time. Moreover, periodically testing your microphone with a simple recording helps catch issues before they affect your content quality. These investments in maintenance might seem minor but significantly contribute to durability and consistent professional sound. Looking ahead, as technology evolves, we can expect smarter tools—like self-cleaning contacts or adaptive calibration systems—that will make upkeep even easier. For now, I recommend starting with a routine check of your cables and connectors, and try integrating regular software updates—these small steps can prevent many future headaches.
What the Experts Won’t Tell You About Podcast Microphones
One of the most eye-opening lessons I’ve learned is that gear alone doesn’t make a voice sound professional—it’s how you use it. I once spent so much on an expensive XLR microphone, expecting miracles, only to realize that room acoustics and placement were the real game-changers. That revelation transformed my recordings. The lesson? Don’t fall for flashy marketing; focus on tuning your environment and technique for the best results.
My Go-To Tools for Reliable Voice Clarity
Over time, I’ve trusted specific tools that keep my audio crisp and consistent. For example, a good pop filter is non-negotiable—I’ve tried the cheap ones, and they simply don’t cut it. Analyzing my audio with software like this guide helps me fine-tune my setup. Regularly updating drivers and cleaning cables prevents those pesky noise issues. These small but vital practices ensure I deliver clear voice quality every session.
Your Next Step in Audio Excellence
Investing in quality gear is just part of the journey. Your passion and consistent effort truly elevate your voice. Whether you’re just starting or looking to upgrade, remember that mastering your microphone setup is an ongoing process. Keep experimenting, stay curious, and don’t settle for mediocre sound—your audience deserves the best. Ready to take your voice to the next level? Let’s make it happen together.
What challenges have you faced in setting up your microphone environment, and how did you overcome them? Share your story below!