Ever been mid-stream or recording, only to hear that unmistakable crackle or uneven audio that ruins your vibe? I remember my first live stream when my cheap USB mic suddenly sputtered, making me wish I could just disappear. It was a lightbulb moment—realizing that choosing the right microphone isn’t just about fancy gear but about capturing my voice authentically and clearly. That frustration sparked a quest I’m still on today, trying out countless mics and setups to find the sweet spot for professional-quality voice recordings and streaming in 2024.
Why Your Microphone Makes or Breaks Your Voice
Great content deserves great sound. But let’s be honest—if your microphone doesn’t make your voice sound natural and warm, your listeners might tune out faster than you can say “buffering.” Early on, I made the mistake of thinking all microphones are created equal. Spoiler: They’re not. A subpar mic can make even the clearest voice sound dull or harsh. And with the rise of remote podcasts and streaming, your mic’s quality directly impacts your credibility and growth. According to recent statistics, poor audio quality can reduce viewer engagement by over 20% (source: Creator Setup Guide). So, investing in a good microphone isn’t just a luxury—it’s a necessity for success.
Is All the Hype About XLR Microphones Overblown?
I used to believe that switching to an XLR mic was overkill—just a fancy upgrade for audio geeks. But I learned the hard way that a decent XLR microphone, properly set up, can deliver richer, more dynamic sound. My initial mistake? Skipping the audio interface and thinking a simple cable would suffice. That mistake cost me clarity and warmth I couldn’t get from a USB mic alone. Now, I understand that a top-tier XLR setup, combined with a quality interface, can elevate your voice recordings and streams to professional levels. Curious? Check out this comprehensive guide that breaks down the best options for 2024.
So, if you’re tired of your voice sounding flat or inconsistent, you’re not alone. Many creators face the same challenge. But here’s the good news: selecting the right microphone is easier than you think once you know what to look for. Up next, I’ll share the practical steps I took to find microphones that truly make my voice shine—no hype, just real results. Trust me, your audience will thank you for making the switch.
Prioritize Your Voice: Define Your Equipment Needs
Start by assessing your specific recording environment and goals. If you record in a noisy room or want portability, a high-quality USB microphone like the latest models listed in this guide offers simplicity and decent sound. For professional-grade audio, consider an XLR setup. I once tried to upgrade by skipping this step and bought a flashy USB mic, but it didn’t fit my room acoustics or stream setup, causing constant issues. Knowing your environment saves time and money, guiding you toward the right class of microphone.
Test Microphone Types Through Direct Comparison
Set Up a Controlled Test Environment
Choose a quiet room and clip multiple microphones, both USB and XLR, to your usual recording spot. Use free audio recording software like Audacity to record short test clips, ensuring consistent distance and tone. I did this myself, stacking different mics—like the popular podcast mics for streaming—and listened closely for clarity, warmth, and background noise. This practical comparison highlights what truly suits your voice rather than relying on specs alone.
Choose Your Microphone Style Wisely
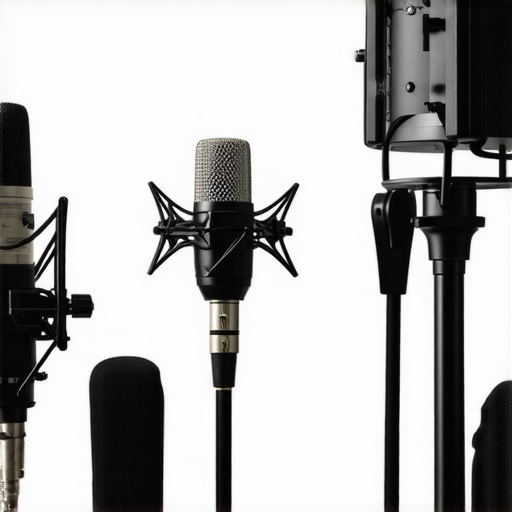
Decide whether you prefer the simplicity of a USB microphone or the versatility of an XLR setup. USB mics are plug-and-play and ideal for beginners, like the best USB-XLR microphones for 2024. They eliminate the need for additional equipment but may lack some refinement. XLR mics, such as the renowned top XLR microphones for professional recording, require an audio interface but deliver richer, more customizable sound. I initially dismissed the XLR option, but after experimenting, I found it provided the warmth and clarity my streams lacked—transforming my audio quality entirely.
Match Your Microphone with Proper Accessories
Regardless of your choice, pairing your mic with a quality pop filter and a sturdy boom arm significantly improves results. When I first tried recording with a basic stand, plosive sounds like “p” and “b” were overwhelming. Adding a pop filter from top microphone types options reduced unwanted noise, making my voice clearer and more palatable. Proper accessories prevent distortions and improve comfort during long streaming sessions.
Calibrate and Fine-Tune Settings
Set the gain level so your voice sounds natural without distortion. Use your recording software’s level meters to avoid clipping—where audio peaks distort—and adjust accordingly. I once recorded a test where I set the gain too high, resulting in harshness. After dialing it down, my voice became smooth and consistent. Additionally, experiment with different proximity levels to find your comfort zone—closer mic distance yields warmer speech, while farther distances can introduce background noise. Remember, small tweaks make big differences.
Iterate and Refine with Experience
Listen back to your recordings critically and adjust your setup accordingly. Record short segments over a few days, trying different mic angles and distances. Over time, I noticed that tilting the mic slightly upward reduced mouth noise and kept my voice balanced. This iterative process ensures you develop a sound profile that resonates with your style and content. Keep refining until the microphone captures your voice authentically and engages your audience.
Many creators assume that simply choosing a high-end XLR microphone guarantees professional quality, but in my experience, the devil is in the details. The most common mistake is believing that more expensive gear naturally produces better sound without proper setup and technique. For example, some think that plugging in a premium microphone automatically fills their content with clarity, but poor placement, incorrect gain settings, or neglecting proper acoustic treatment can sabotage even the priciest equipment. A study from the Acoustic Society of America highlights how environmental factors and setup nuances often outweigh hardware quality in achieving optimal audio. Another misconception is that all streaming mics are equal; this leads many to buy trendy USB models expecting studio-grade results, when in fact, choosing a microphone aligned with your specific environment and voice is crucial. In fact, some creators overlook the importance of proper accessories like pop filters or shock mounts, which can drastically reduce plosives and vibrations, enhancing overall sound quality. And let’s not forget the myth that higher sample rates or bit depths guarantee better audio; while important in post-production, they won’t fix fundamental issues like poor mic placement or inconsistent gain. For advanced content creators, understanding the nuances—such as the impact of polar patterns or the significance of room acoustics—can make or break your audio. For instance, opting for a cardioid microphone helps focus your voice and reduce background noise, but only if positioned correctly relative to your mouth. My advice is to go beyond gear specs: invest time in learning proper mic technique, environmental optimization, and audio processing. Want to elevate your voice recordings? Check out detailed guides on choosing the right microphone type, and be mindful of setup and environment. Remember, even the most expensive microphone won’t compensate for bad habits or a noisy room. So, are you falling into any of these traps? Share your experiences in the comments and let’s refine our audio game together.
Ensuring your microphone and related equipment stay in top shape is crucial for consistent quality. Regular maintenance routines, the right tools, and understanding how to scale your setup as your needs grow can save you time and money. I swear by a few key practices that have kept my gear performing beautifully over the years, even after heavy use.
How do I maintain my microphone over time?
First, always keep your microphone away from extreme temperatures and moisture—humidity can cause corrosion or electrical issues. Using a soft, lint-free cloth to wipe down the microphone body after each session prevents dust buildup, which can muffle sound or damage sensitive components. For XLR mics, I double-check the connectors periodically with contact cleaner—just a spray from a reputable brand like DeoxIT can restore clean connections and prevent static or dropouts. When traveling, I pack my gear in padded cases and avoid stacking heavy items on top. This simple practice extends the lifespan of delicate components and maintains optimal audio quality.
Tools I recommend for long-term upkeep
Invest in a small set of precision screwdrivers to tighten loose mounts or replace internal parts when needed. I keep a portable vacuum with a brush attachment handy for removing dust from vents and ports; it’s surprising how much grime can accumulate unnoticed. A good pair of drying silica gel packs stored near your gear can help control humidity in your storage space. For software maintenance, I regularly update my audio drivers and firmware for my interface—outdated software can cause latency issues or crashes. Consistently calibrating your equipment ensures durability and smooth operation, especially as software and device updates evolve.
Future-proof your setup especially as your needs grow
Thinking ahead, modular gear setups are a game changer. For example, starting with a USB microphone like the best USB-XLR microphones allows flexibility; you can switch to an XLR setup as your recording demands increase. Incorporating a quality audio interface with compatible preamps and phantom power gives you room to expand without needing a complete overhaul. As trends head towards wireless tech and AI-driven audio processing, staying adaptable ensures your voice remains crisp, whether streaming from home or on the go, as predicted by experts in the field of audio engineering. Having a reliable, well-maintained system reduces the risk of unexpected failures—making long-term recording and streaming smoother.
What are the best tools for scaling without hassle?
To handle higher volumes or more complex setups, I upgraded to a multi-channel audio interface like the Focusrite Scarlett series, which accommodates multiple mics and instruments seamlessly. For quick troubleshooting, a portable multimeter helps verify connections and diagnose issues without guesswork. Moreover, software solutions like audio calibration tools ensure your microphone response stays consistent. These tools help maintain stellar recording quality, even as your demands increase or environment changes. The key is to invest in reliable hardware and keep your system clean—just like tuning a high-performance vehicle, regular checks prevent major breakdowns later. Try scheduling monthly check-ins with your gear, and use these tools to keep everything running smoothly; your future self will thank you when your audio remains pristine amidst evolving tech landscapes.
The Hardest Lesson I Learned About voice recording,xlr microphone,streaming mic,usb microphone,podcast microphone
One of the most eye-opening realizations was that even expensive microphones can’t compensate for poor technique or environment. I used to think a top-tier mic would magically upgrade my audio, but neglecting mic placement and room acoustics kept my sound flat. It took experimenting, recording, and listening critically to understand that mastering small details makes a huge difference—like position, gaining, and accessories.
3 Myths About voice recording,xlr microphone,streaming mic,usb microphone,podcast microphone That Held Me Back
- That More Expensive Means Better: Premium gear helps, but setup and technique are king. A cheap mic with good placement can outperform an expensive one if used wisely.
- All Microphones Are Equal: USB and XLR serve different needs. Knowing which suits your environment and goals prevents costly missteps.
- Gear Alone Creates Quality: Without proper environment and calibration, high-end gear won’t shine. Focus on creating a controlled space and learning setup skills first.
What Experts Won’t Tell You About voice recording,xlr microphone,streaming mic,usb microphone,podcast microphone
Many professionals emphasize the importance of room acoustics and proper accessories, yet it’s easy to overlook these. The real secret? Consistent calibration and understanding your equipment’s limitations—like knowing your mic’s polar pattern ensures you focus the sound where it should be. Also, investing in a reliable shock mount and pop filter can take your clarity from acceptable to professional without breaking the bank.
Curated Recommendations Exploding My Results
- Best Microphones for Voice Clarity in 2024: My go-to for clear, natural sound—especially for streaming and podcasting.
- Top Podcast Microphones: A game-changer for that professional tone.
- Ultimate Guide to Streaming Voice Mics: I rely on this to keep up with evolving tech and find the right gear for my style.
- Premium XLR Options for Pros: When I aimed for studio-quality sound, these became essential tools.
Your Turn to Shine with Better Microphone Choices
Remember, your voice is your power—invest in understanding what works for you and your environment. Combining the right gear with proper setup practices will elevate your streams and podcasts from amateur to authentic. Don’t wait for perfect conditions; start experimenting and refining today. Your audience will notice the difference—and so will you.
What’s been your biggest challenge in choosing or setting up your microphone? Let me know below—your journey might just inspire someone else to find their perfect sound!