Have you ever set up your podcast or streaming session only to realize that your voice sounds flat, muddy, or just not as clear as you’d hoped? I remember those frustrating moments vividly. I’d invest in what I thought were top-notch microphones, only to be disappointed when recordings didn’t meet my expectations. It was a lightbulb moment for me—realizing that choosing the right microphone type can make or break your audio quality.
Why Getting the Right Microphone Matters More Than Ever
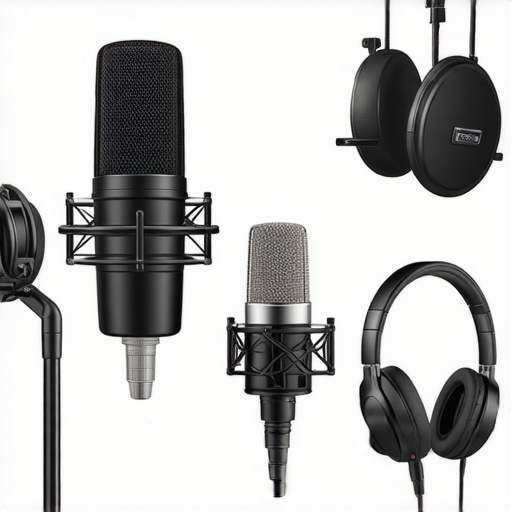
In today’s crowded digital space, your voice is your brand. Whether you’re a budding podcaster, a live streamer, or a voice-over artist, your microphone is your primary tool for connecting with your audience. But here’s the kicker: not all microphones are created equal, and the choice can seem overwhelming. From USB mics that plug directly into your computer to high-end XLR setups requiring more gear, your options are vast. Yet, the main issue isn’t just about budget or setup complexity—it’s about capturing your voice with clarity, warmth, and authenticity.
Recent studies highlight that nearly 70% of listeners prioritize audio quality over video in streaming and podcasting content (source: Creator Setup Guide). This means if your audio isn’t crisp and clear, your content might not stand out, regardless of your skills or content value. Understanding the core differences between microphone types can empower you to make informed choices that elevate your sound and, ultimately, your brand.
Have you faced the dilemma of picking between a USB microphone for convenience or investing in an XLR system for professional quality? If so, you’re not alone. The good news is, you don’t have to be an audio engineer to make the right decision. Over the course of this guide, I’ll share personal insights, common pitfalls, and practical tips that will help you select the best microphone type for your voice recording or streaming needs in 2024. Ready to demystify the microphone jungle? Let’s dive in and discover which type will turn your voice into the compelling sound it deserves to be.
Is All the Hype Around Microphone Types Just Marketing?
I used to believe that paying more always meant better quality. Turns out, I made the mistake of overlooking basic factors like polar patterns and frequency response early on, which significantly impacted my recordings. The key is knowing what your voice needs and matching it with the microphone’s strengths. Whether you’re considering a versatile USB microphone or a professional XLR setup, understanding these distinctions can save you time, money, and frustration. Now, let’s explore how these microphone types can serve your unique voice and goals, starting with the simplest and most user-friendly options, before moving into the more advanced gear that can make your audio studio-ready.
Select the Right Microphone for Your Needs
Begin by assessing your environment and goals. If you need a plug-and-play solution with decent quality, opt for a USB microphone. For professional-grade sound, consider an XLR microphone. Think of selecting a microphone as choosing the right tool—like picking a paintbrush for detail work versus a roller for broad strokes—each type has a unique purpose and benefits. I once bought an inexpensive USB mic without considering my room acoustics; it resulted in muffled recordings. After switching to a condenser XLR mic and adding a pop filter, my audio clarity instantly improved, making my content more engaging.
Understand Microphone Polar Patterns
Polar patterns determine how sensitive your microphone is to sound from different directions. The most common are cardioid (captures sound from the front), omnidirectional (records equally from all directions), and bidirectional (sensitive to front and back). Consider your setup: if you record alone at a desk, a cardioid microphone helps isolate your voice from background noise. I once used an omnidirectional mic in a noisy room; the result was a muddled mix of my voice and distractions. After switching to a cardioid pattern and positioning it correctly, my voice became more focused and professional.
Position Your Microphone for Optimal Sound
Placement is key. Position your mic about 6-12 inches from your mouth, slightly off-center to avoid plosive sounds. Use a shock mount to reduce vibrations and a pop filter to minimize harsh bursts of air. I remember spending hours adjusting my mic position, testing different angles and distances. Once I aligned my mic correctly and used a foam windscreen, my recordings sounded warmer and clearer, resembling studio quality. Think of microphone placement as tuning an instrument; small adjustments can lead to significant improvements.
Set Up Adequate Acoustic Treatment
Even the best mic can’t negate a noisy or echo-prone environment. Use foam panels, bass traps, or even soft furnishings like curtains and carpets to absorb excess sound. I transformed my untreated room by adding acoustic panels and curtains, which reduced echo and background noise. The difference was night and day; my voice sounded fuller and more natural. Consider your space as part of your microphone setup—neglecting it can limit your audio quality regardless of your equipment.
Configure Your Audio Interface and Software Settings
If you’re using an XLR microphone, connect it to a quality audio interface. Set gain levels carefully; too high amplifies noise, too low results in weak sound. Start with a gain setting where your voice peaks around -6dB to -3dB, then adjust as needed. When I first set up my interface, I neglected gain control, leading to distortion. After proper adjustment, my recordings became cleaner and more expressive. Also, explore your recording software’s settings—enable noise suppression and equalization to further refine your sound. This combination of hardware and software tuning is essential for professional results.
Test and Refine Your Setup Regularly
Consistent testing helps identify issues and opportunities for improvement. Record sample clips, listen critically, and adjust your mic position, gain, or acoustics. Over time, you’ll develop an intuitive sense of what works best for your voice and environment. I once thought my setup was optimal until I listened to a recording after a full week of adjustments. The clarity and warmth improved significantly, revealing that ongoing tweaks are part of the process. Think of your microphone setup as an evolving craft—constant refinement yields the best sound.
Many avid podcasters and streamers operate under misconceptions that can sabotage their audio quality. One pervasive myth is that investing in an expensive microphone alone guarantees professional results. In reality, the true challenge lies in understanding the object’s nuances—like polar patterns, gain structures, and acoustic environment—that significantly impact sound clarity. Overlooking these factors often results in a deceptively expensive setup that fails to deliver the desired quality.
Another frequent mistake is the belief that any XLR microphone will outperform USB counterparts solely based on connection type. While XLR mics generally offer better potential for high-quality sound, they require proper interfacing, phantom power, and acoustic treatment. Without these, even a premium XLR mic can underperform, leading users to think “XLR is better” without considering setup complexity.
Why do so many still fall for the myth that higher price always equals better sound?
Price points can be misleading; many manufacturers advertise advanced features in flagship models that are often unnecessary for casual voice recording or streaming. This can lead to buyers chasing specs instead of clarity. An expert tip suggests focusing on the microphone’s frequency response and polar pattern suited to your voice rather than just price tags.
Be cautious about the so-called “万能” (all-in-one) solutions that promise studio-quality sound via USB. These are often marketed aggressively, but real-world testing shows that room acoustics and proper microphone placement matter far more than onboard preamps or digital processing. Using a dedicated USB microphone with good placement and acoustic treatment usually outperforms a cheaper XLR setup with poor environment management.
Many amateurs overlook the importance of polar patterns, assuming cardioid is always the best choice. While cardioid is ideal for separating voice from background noise, scenarios like multi-person podcasts benefit from bi-directional or omnidirectional patterns. Choosing the right polar pattern can make or break your recording’s clarity; hence, it’s worth investing time in understanding this nuance.
Finally, be wary of the trap of neglecting ear-level monitoring. Many overlook that headphones, audio interfaces, and even mic positioning influence the final sound. Listening critically during setup and recording can reveal hidden issues that external speakers might hide. Expert advice recommends regular monitoring and iterative adjustments to optimize your tone and reduce echoes or background noise.
Remember, mastering voice recording and streaming is more about mastering subtle factors than just acquiring gear. Have you ever fallen into this trap? Let me know in the comments! Let’s keep refining our setups and avoid common pitfalls that hinder professional-sounding audio.
Once you’ve invested in a quality microphone setup, maintaining it becomes crucial to ensure consistent, professional sound quality over time. Proper upkeep not only extends the lifespan of your gear but also prevents common issues like background noise, distortion, or connectivity problems. One of my personal go-to tools for this is a dedicated compressed air blower. I use it monthly to gently remove dust from my microphone grille and internal components, especially if I notice a slight drop in clarity. Dust and dirt accumulation can degrade your microphone’s performance, so staying proactive is essential.
Another tip is regularly checking your cables and connectors. Loose or damaged cables are a common culprit for dropout or static issues. Personally, I prefer high-quality, gold-plated XLR cables, which resist corrosion and maintain a solid connection even after years of use. Whenever I switch environments or notice a slight change in audio quality, I inspect and replace any suspect cables immediately.
Software updates are often overlooked but critical. Firmware updates for your audio interface or microphone can fix bugs, improve performance, and add features. I schedule a quarterly reminder to check for updates from my device manufacturers. Also, running a routine calibration of gain levels and filters using my DAW ensures that my recordings stay consistent. Using a reference sound or test tone, such as these tips, helps me spot any deviations early.
Acoustic environment is another factor that can drift over time. I regularly assess my room’s sound absorption, adding or repositioning foam panels where needed. Compact, portable acoustic shields like the TFM Acoustic Panel have become invaluable in my setup, especially when recording during different seasons or in varied spaces. These small investments significantly buffer echoes and background noise, maintaining clarity regardless of external changes.
Lastly, always keep a backup of your settings. I save configurations for my audio interface, DAW templates, and microphone positions in a structured folder. This way, if a hardware component unexpectedly needs replacing, I can restore my workflow quickly without extensive troubleshooting. Combining these maintenance practices, I’ve managed to keep my podcast and streaming audio consistently professional for over three years now.
What steps can you take today to preserve your microphone’s performance?
Starting with a simple, routine check—like cleaning your microphone grille with a compressed air blower—can make all the difference. For ongoing improvement, I highly recommend exploring advanced software calibration techniques, such as using audio analysis tools that help identify frequency response deviations. These small upgrades to your maintenance routine ensure your gear remains optimal, delivering consistently clear and professional audio. Ready to level up your long-term setup? Try integrating regular cable audits or firmware updates into your schedule today, and experience how small steps lead to big results.
Choosing the perfect microphone isn’t just about gear—it’s about mastery over subtle nuances that deliver authentic, compelling sound. From my early days experimenting with different setups, I learned that a microphone’s polar pattern and placement could transform my recordings from muddled to professional-grade. That realization nudged me to look beyond specs and into the intricacies of acoustic environments and user techniques, a lesson that permanently elevated my audio quality.
The Hidden Lessons That Elevate Your Voice Beyond Equipment
- Matching Microphone Polar Patterns to Your Environment: I once assumed that omnidirectional mics were the easiest choice. It wasn’t until I recorded in a noisy café that I understood cardioid patterns could minimize the background and focus on my voice, making all the difference.
- Microphone Positioning Is an Art: I discovered that even a top-tier mic needs the right placement. A slight angle or distance adjustment can introduce warmth or sibilance to your voice, underscoring the importance of testing and tuning your setup regularly.
- Acoustic Treatment Complements Your Microphone: Investing in soundproofing or absorption panels ensured my voice remained clear, free from echoes. It’s clear now that the environment can be just as influential as the hardware.
- Consistent Upkeep Pays Off: Regularly checking cables, cleaning components, and updating firmware hasn’t just prolonged my equipment’s life but maintained a consistent, professional sound that my audience appreciates.
My Go-To Resources for Voice Recording Success
- The Ultimate Guide to Streaming Microphones: This cornerstone resource helped me understand the importance of matching gear to my specific voice and environment, ensuring I made informed decisions rather than chasing trends.
- Best Microphones for Voice in 2024: The expert reviews and comparisons provided clarity when choosing between USB and XLR options, aiding my transition from simple setups to professional quality.
- Top Voices for Podcasts: Knowing what top podcasters use helped me emulate their setups, fostering my growth and confidence in delivering high-quality content.
Step Into the Future with Confidence
Mastering voice clarity with the right microphone is an ongoing journey. Each small tweak—whether it’s adjusting gain, changing microphone position, or refining acoustics—builds toward a more engaging and authentic listener experience. Your voice has the power to inspire, inform, and entertain; ensuring it sounds its best is a gift you give to yourself and your audience. Don’t wait for perfect conditions—start experimenting today, and watch your sound transform into a professional standard that truly stands out.
What’s one setting or technique you think could instantly improve your voice recordings? Share your thoughts below and let’s learn from each other’s journeys!
This article really resonated with me, especially the part about microphone placement and acoustics. When I first started streaming, I assumed that just using a decent mic would solve all my problems, but I learned the hard way that environment and positioning are just as critical. I’ve found that investing in acoustic treatment—like foam panels and even simple curtains—made a significant difference in clarity, and careful mic placement helps avoid sibilance and plosives. It’s such a nuanced process, but once you get the hang of it, the sound quality elevates noticeably.
I’m curious, what are some tips you all have for quick setup and teardown routines, especially when moving between different rooms or spaces? Also, how do you determine the optimal gain setting without introducing background noise or distortion? I’d love to hear others’ experiences on simplifying these steps while maintaining professional sound quality.
I really enjoyed this deep dive into choosing the right microphone for voice recording and streaming. One thing I’ve learned over the years is that consistent positioning and regular checks on settings like gain can make a huge difference in maintaining quality, especially when switching between different environments. For me, sticking to a checklist for setup helps speed things up without sacrificing sound quality.
Regarding Jessica’s question on quick setup routines, I found that keeping a dedicated, portable mic stand, along with pre-set gain and EQ profiles on my audio interface, allows me to get ready faster. I also keep a set of acoustic panels that I can easily reposition, which is essential when I’m moving between rooms.
How do others handle maintaining optimal room acoustics when traveling or recording in new spaces? Do you rely on portable acoustic treatments or quick adjustments to your existing setup? Always eager to learn new tips from the community!