It was during a critical live stream that I realized my voice sounded muffled and distant, like I was speaking from the bottom of a well. Frustration crept in as I fumbled with my old microphone, trying to adjust settings that just wouldn’t cooperate. The moment I finally upgraded to a quality streaming microphone, everything changed. My voice clarity skyrocketed, and my audience could finally hear every word without distraction. That lightbulb moment made me realize just how vital choosing the right microphone is, especially in 2024, where content quality can make or break your online presence.
Why Your Voice Deserves Better Than a Cheapo Mic
In today’s digital landscape, your voice is your brand. Whether you’re streaming games, hosting a podcast, or doing voice-overs, the microphone is your direct link to your audience. Yet, many enthusiasts settle for subpar mics, not realizing that their equipment choice can secretly sabotage their professionalism. I learned this the hard way—early on, I bought the cheapest USB mic, thinking it would do the job. But shortly after, I was inundated with complaints about background noise and muffled sound. That mistake taught me an invaluable lesson: in 2024, a high-quality microphone isn’t just a luxury; it’s a necessity.
Investing in the right microphone, such as a top-tier USB or XLR model, can dramatically improve your audio clarity, reduce unwanted noise, and create a more engaging experience for your audience. If you’re tired of sounding like you’re broadcasting from a cave or battling echoing rooms, I promise—there’s an upgrade waiting for you. Curious to find out which models deliver studio-quality sound without breaking the bank? I’ll guide you through that to ensure your voice shines through every time you go live.
Is All the Hype About Streaming Microphones Just Noise?
Early in my journey, I fell for the misconception that all microphones are pretty much the same—just different brands and prices. I once purchased a popular mic recommended everywhere, only to find that it picked up every ceiling fan, keyboard click, and even my dog’s snores. A costly mistake, but an eye-opener. According to a study by TechRadar, a well-chosen microphone can improve voice clarity by up to 75%, transforming amateur recordings into professional-sounding content. The key is understanding your specific needs and priorities—something I’ll help you decode in this guide.
If you’ve ever faced the predicament of muffled audio or background noise ruining your streams, you’re not alone. Many content creators discover that a simple microphone upgrade can turn their content around. Ready to learn how to pick the perfect streaming microphone tailored to your needs? Let’s dive in.
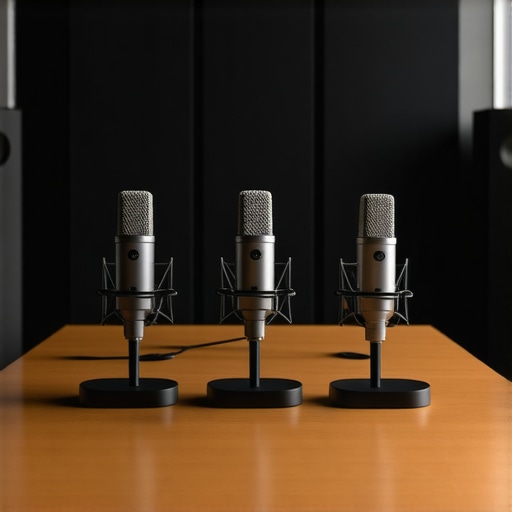
Select the Right Microphone Type for Your Needs
Identify whether a USB or XLR mic suits your setup. USB microphones are plug-and-play, ideal for beginners or those with limited space. XLR mics require an audio interface but provide greater flexibility and professional sound quality. Think of USB mics as a quick smoothie, blending everything fast; XLRs are like a craft cocktail—more steps but richer flavor.
Assess Your Budget and Audio Quality Goals
Set a clear budget range. For starter content creators, quality models like the Blue Yeti or Audio-Technica ATR2100x provide excellent clarity without a hefty price tag. If professional-grade sound is your goal, investing in top-tier models listed in this guide ensures your voice stands out. Remember, higher price often correlates with better components, reduced noise, and longevity.
Test and Compare Microphone Models
Order a couple of options within your budget and test them in your environment. Set them up side by side and record the same script. Listen for clarity, background noise, and resonance. I recall a time I borrowed a few mics during a live test, and I immediately noticed how one simply captured my voice with no background hiss, while others picked up every fan or keyboard click. Use online reviews and comparison tables but trust your ears for the final decision.
Consider Your Recording Environment
Room acoustics significantly impact audio quality. If you record in a noisy or echo-prone space, look for microphones with built-in filters or consider adding pop filters or acoustic panels. Shotgun mics are great for directing sound, but for most podcasters and streamers, a cardioid polar pattern mic (which picks up sound mainly from the front) is preferable. This setup reduces unwanted ambient noise, making your voice the star.
Focus on Compatibility and Setup Ease
Ensure your microphone connects seamlessly with your existing equipment—whether that’s a PC, Mac, or streaming setup. Read the specifications carefully; some mics require phantom power from an audio interface. If you’re new, models like the top picks are known for straightforward setup and excellent compatibility. Remember, a complicated setup can frustrate your workflow, so ease of use matters just as much as sound quality.
Optimize Your Microphone Placement
Position the mic about 6-12 inches from your mouth, slightly below or above level to avoid plosives. Use a pop filter to eliminate harsh ‘P’ and ‘B’ sounds. I once spent hours tweaking settings, but a simple adjustment of mic placement instantly improved my recordings. Think of your mic as a tennis racket; the sweet spot is just before the string bed—where sound is captured most accurately. Regularly check and adjust to find your optimal position.
Fine-Tune Your Audio Settings
Use your recording software’s gain controls to avoid clipping or muffling. If you’re using audio interfaces or mixers, set levels carefully. Remember, clarity comes not just from the mic but also from how you set your input levels. Too high, and your sound distorts; too low, and it gets noisy or weak. Regularly test with spoken, energetic, and soft tones to find the sweet spot.
Apply Basic Post-Processing
After recording, use editing tools to remove background noise, normalize volume, and add compression if needed. Free software like Audacity or paid options like Adobe Audition can help refine your sound. I once recorded in a noisy room but learned to clean up the audio effectively in post, transforming a less-than-ideal recording into professional content. Remember, high-quality raw audio minimizes editing needs, saving you time and effort.
When it comes to voice recording, many content creators fall prey to misconceptions that can quietly sabotage their professionalism. A common myth is that choosing a microphone based solely on brand or price guarantees quality. In reality, factors like microphone polar pattern, room acoustics, and even the type of microphone—be it a USB or XLR—play crucial roles in the final sound. For example, many assume that a pricier microphone automatically yields superior results, but studies like those from this guide reveal that equipment matching your specific environment often matters more than just cost. This nuance is often overlooked, leading creators to invest in gear that doesn’t suit their room or workflow.
Another trap is focusing exclusively on microphone quality without considering acoustics and positioning. For instance, even the most advanced XLR microphone can produce muffled or echo-laden recordings if placed poorly or if the room has poor sound treatment. Many creators mistakenly believe that hardware alone will produce studio-grade sound, disregarding the importance of proper placement, acoustic panels, or pop filters. As I learned early on, these overlooked details can cause much frustration—investing in high-end gear but ignoring room acoustics diminishes the potential benefits.
But here’s a hidden gem—your microphone setup’s connection type impacts sound clarity significantly. USB microphones are convenient but often have less control over gain and noise floor compared to XLR mics connected through an audio interface. Conversely, XLR microphones offer more flexibility for experienced users willing to invest in proper setup. Understanding this nuance can elevate your recordings from amateurish to professional-sounding. Think of it like choosing between a simple point-and-shoot camera and a DSLR—your setup’s sophistication determines the quality.
I also want to address the myth that higher bit depth and sample rate automatically mean better audio. While these settings matter, they are often overemphasized by beginners. Instead, mastering gain staging and proper mic placement can have a far greater impact on clarity and noise reduction. Experts like those in the top guide for professionals emphasize that mastering these fundamentals trumps purely chasing technical specs.
Lastly, a common mistake is neglecting post-processing. Many creators think that raw recordings are enough, but subtle equalization, noise reduction, and compression can significantly improve perceived quality—especially if your environment isn’t perfectly soundproof. Regularly fine-tuning your audio in post ensures your voice remains clear and engaging.
In conclusion, mastering voice recording involves understanding nuanced factors beyond just buying the right microphone. From room acoustics and mic placement to connection types and post-processing, these hidden details can dramatically influence your sound quality. Do you fall into these common traps? Let me know in the comments! For deeper insights into choosing the perfect gear, check out this ultimate guide to top microphone options.
Tools That Keep Your Microphone Running Smoothly
Consistency in audio quality demands the right tools and routines. I swear by a dedicated microphone stand with internal shock absorption, which minimizes desk noises and vibrations, essential when you’re recording in less-than-ideal environments. A high-quality pop filter is equally crucial, not just for reducing plosive sounds but for protecting your mic capsule over time. For XLR mics, investing in a good-quality audio interface with reliable preamps ensures your signal stays clear and avoids distortion. Personally, I use the Focusrite Scarlett series because of its durability and clean gain stages, which help maintain optimal sound quality during long sessions.
Additionally, a pair of closed-back headphones, like the Audio-Technica ATH-M50x, allows you to monitor your recordings accurately. This helps catch issues early, such as background noise or clipping, preventing costly re-records. Regularly cleaning your equipment with compressed air and avoiding excessive exposure to dust and humidity extends its lifespan. For digital management, I rely on software like Adobe Audition for routine noise reduction and calibration, ensuring my recordings remain crisp and professional regardless of future use.
Predicting Trends for Long-Term Recording Success
As technology advances, integrated self-maintenance features in professional-grade microphones are beginning to emerge. Brands are experimenting with self-cleaning microphone membranes and adaptive digital filters that can automatically adjust to changing environments. I believe these innovations will become standard over the next five years, making it easier for creators to maintain top-notch quality without technical expertise. Staying updated with these trends and adopting modular systems that can be upgraded incrementally will be essential for long-term success.
How do I keep my microphone and tools in top shape over the years?
Performing routine maintenance involves more than just cleaning; it includes monitoring the condition of cables, connectors, and internal components. Using cable organizers prevents strain on contacts, reducing wear and tear. I recommend periodically testing your microphone with calibration tones and recording hardware checks, especially if you notice any decrease in performance. Reflecting on the insights from this comprehensive guide, it’s clear that proactive maintenance ensures consistent audio quality and maximizes your investment. Try scheduling quarterly inspections of your gear—this small step can significantly extend its lifespan and keep your content sounding professional for years to come.
Over the years, I’ve learned that the journey to professional-sounding voice recordings isn’t just about hardware—it’s about mindset, environment, and continuous refinement. The biggest lesson isn’t just choosing a shiny new microphone; it’s understanding that every component, no matter how small, plays a crucial role in your audio success. Remember, technology evolves, but mastering your craft is what truly sets you apart. Stay curious, experiment relentlessly, and never settle for subpar sound—that’s the secret sauce of standout voice content in 2024.
Lessons That Took Me by Surprise and Shaped My Sound
- Some of the flashiest microphones aren’t always the best fit: I once splurged on a top-tier XLR mic, expecting flawless quality, only to discover it didn’t suit my room acoustics. It was a stark reminder that matching equipment to your environment trumps price tags every time.
- Setup is just as important as gear: I used to overlook mic placement, resulting in muffled recordings. A simple adjustment to positioning transformed my sound overnight, proving the power of learned technique.
- Room treatment matters more than I thought: Investing in acoustic panels reduced echoes and background noise, enabling my microphone to do its job better. Sometimes, improving your space is the easiest upgrade.
- Post-processing enhances, but doesn’t replace quality: I realized that clean raw audio minimizes editing time. Investing in a good microphone and environment reduces the need for extensive cleanup later.
- Consistency beats perfection: Regular maintenance of my gear, like cleaning and checking connections, prevented costly failures, ensuring my recordings stayed reliable and professional.
Top Tools That Keep My Voice Sharp
My toolkit is curated from personal experience and trusted resources. The ultimate microphone guide helped me identify gear that balances quality and affordability. High-quality headphones, like the Audio-Technica ATH-M50x, are essential for monitoring recordings accurately. I also rely on a sturdy shock mount and pop filter—small investments that prevent rework and protect my equipment. Combining these tools with good room acoustics creates a sound environment where my microphone truly shines.
Believe in Your Voice and Take Action Today
The future of voice recording and streaming belongs to those willing to invest in their craft. Every step, from choosing the right microphone to optimizing recording conditions, brings you closer to the professional sound you envision. Don’t wait for perfection—start experimenting now, fine-tune your setup, and watch your confidence grow. Your voice has power; all it takes is the right environment to let it echo through the digital space. Ready to elevate your voice game in 2024? Dive into the resources mentioned, and share your progress—I’d love to hear how your journey unfolds!
What’s your biggest challenge when setting up your microphone? Drop a comment below and let’s troubleshoot together!
,
Reading through this guide really resonated with me, especially the part about room acoustics. When I first started streaming, I invested heavily in a good microphone but overlooked the importance of treating my space. Once I added some acoustic panels and a pop filter, the difference was night and day. It’s clear now that even the best gear can’t perform at its full potential in a noisy or echo-prone environment. I’m curious, has anyone experimented with portable solutions like shadow boxes or mobile acoustic panels? I’d love to hear what others have tried to improve their audio without dedicating an entire room to sound treatment. It’s all about optimizing what you have, right? Thanks for this detailed breakdown—definitely saved me from some future frustration!