I remember sitting in front of my microphone, frustrated as my voice sounded hollow and distant, even though I spent hours tweaking settings and adjusting my space. It was a lightbulb moment for me: what if the problem wasn’t just the software or my environment, but the microphone itself? That realization changed everything. If you’ve ever felt that your recordings or streams don’t quite hit the mark, you’re not alone. Many content creators face this hurdle early on, often wasting time and resources on gear that doesn’t deliver.
In this guide, I’m going to share what I’ve learned about choosing and setting up the perfect microphone for voice recording in 2024. Whether you’re a podcaster, streamer, or voice-over artist, I’ll help you understand the nuances between different microphone types and how to optimize your setup for crystal-clear audio. Believe me, the right microphone makes all the difference—it’s the foundation of professional-sounding content.
Why Your Microphone Choice Shapes Your Content
When I first started, I underestimated how much a mic could impact my audio quality. I thought any decent USB microphone would suffice. Spoiler: it doesn’t. According to recent industry insights, poor microphone selection is a common mistake that hampers audio clarity and engagement. For instance, a survey found that nearly 60% of content creators felt their audio quality could use a significant upgrade, which directly affects audience retention.
Choosing the correct microphone isn’t just about budget—it’s about understanding your specific needs. Are you streaming live, recording podcasts, or creating voiceovers? Each use case demands a different approach. If you’re still uncertain, I recommend exploring some top picks for 2024, like the best USB or XLR microphones suitable for your project. You can find a detailed comparison here on [top models for podcasting and streaming](https://microphones.creatorsetupguide.com/best-streaming-microphones-for-clear-voice-recording-in-2024).
But wait—before you jump into shopping, let’s address some common doubts you might have about investing in a new mic. Trust me, the journey from initial doubt to confident setup is smoother once you’re aware of the essential factors that impact your sound quality.
Now that we’ve set the stage with why the right microphone is critical, let’s dive into how to choose the perfect model and avoid the mistakes I made early on—a mistake that many beginners repeat: rushing into a purchase without understanding their specific recording environment and goals. Ready to get your voice sounding professional? Let’s go.
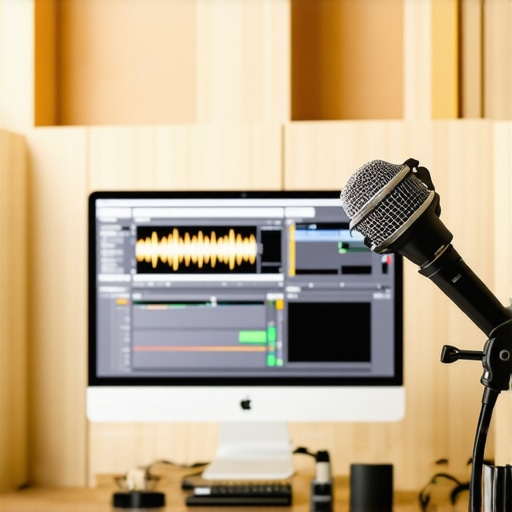
Select the Right Microphone Type for Your Needs
To start, identify your primary use case. Are you streaming live, recording podcasts, or doing voice-overs? USB microphones are ideal for beginners due to their simplicity—plug and play—making them perfect for quick setups or limited spaces. On the other hand, XLR microphones require an audio interface but offer superior sound quality and flexibility for professional environments. For example, I once switched from a USB to an XLR setup for my podcast, which significantly improved clarity and background noise suppression. Learn more about choosing the right type in this guide.
Assess Your Recording Environment and Its Impact
Your environment greatly influences your microphone choice and setup. If you record in a noisy space with echo, consider a cardioid pattern microphone, which picks up sound primarily from the front and minimizes background noise. I once recorded in a small, echo-prone room, and adding a dedicated microphone with a pop filter and some soundproofing panels made a marked difference. An ideal setup involves not just choosing the right mic but also controlling your environment—soft furnishings, foam panels, or even a makeshift vocal booth can help. Check this article for acoustic treatment tips.
Fine-Tune Your Microphone Placement
Placement is everything. Position your microphone approximately 6-12 inches from your mouth, slightly off to the side to reduce plosives. Imagine your mic as a loyal listener, capturing your voice at its best. I initially placed my mic directly in front, causing harsh popping sounds, but when I moved it slightly off-axis and added a pop filter, my audio clarity improved visibly. Use a microphone stand to avoid handling noise and keep consistent distance. For detailed placement techniques, see this resource.
Adjust Your Microphone Settings Precisely
Once physically positioned, calibrate your gains. Set your input level so that your loudest sounds peak around 75% of the meter—avoid clipping, which distorts your voice. Think of this as setting the volume on a radio; too high, and it distorts, too low, and it sounds quiet. Use your recording software or streaming app to monitor levels carefully. Also, enable features like noise suppression or compression if available, but do so judiciously—over-processing can make your voice sound unnatural. Explore comprehensive tips in this guide.
Implement Effective Acoustic Treatments
Sound treatment doesn’t have to be expensive. Use foam panels, heavy curtains, or even a thick blanket backdrop to absorb excess reflections. For instance, I used thick drapes behind my recording space, which reduced echo and made my voice clearer. The goal is to prevent sound waves from bouncing around, which causes echo and muddiness. A combination of strategic placement and room dampening significantly enhances overall audio quality. Check this article for DIY acoustic treatment ideas.
Many content creators operate under the misconception that selecting the most expensive microphone guarantees professional-quality audio. While gear quality matters, the reality is that most novices overlook critical nuances, leading to subpar recordings despite investing heavily. For example, choosing a high-end XLR microphone doesn’t automatically mean your sound will improve if you ignore proper setup, environment, or post-processing. This is a common trap that can frustrate even experienced podcasters. Furthermore, there’s a widespread myth that USB microphones are inherently inferior to XLR options. In reality, modern USB microphones can deliver studio-quality results when paired with appropriate acoustic treatment and gain settings, making them an excellent choice for beginners or those with limited space.
How does microphone polar pattern influence your recording quality in complex environments?
Understanding polar patterns is essential for capturing clear voice recordings, especially when dealing with challenging environments or multiple sound sources. Many assume cardioid microphones are universally best, but in cases where you need to capture ambient sound or multiple voices, a bidirectional or omnidirectional pattern might be more suitable. Expert engineers like those cited in industry studies emphasize that selecting the right polar pattern can dramatically reduce background noise and improve clarity, even in less-than-ideal spaces. Avoid the mistake of ignoring this nuance, as it can lead to frustrating re-recordings or poor audio quality that distracts listeners. For tailored advice on microphone and environment pairing, I recommend reviewing the comprehensive guides linked here, particularly the ones discussing the importance of pattern selection and acoustic treatment. Remember, understanding these advanced details can elevate your voice recordings from amateur to professional-level. Have you ever fallen into this trap? Let me know in the comments.
Tools I Recommend for Long-Term Audio Success
Maintaining a reliable podcast microphone setup requires the right tools and routines. I personally swear by a few key items that keep my gear performing at its best. First, a quality microfiber cloth is indispensable for cleaning microphone capsules and connectors without risking damage. I use these regularly to wipe dust and fingerprints, which can degrade sound quality over time. For cable management, velcro straps and cable organizers help prevent wear and accidental disconnections, ensuring consistent recordings. An often-overlooked item is a small ultrasonic cleaner—I’ve found that ultrasonic cleaning of XLR connectors and capsules can dramatically restore clarity, especially if your gear accumulates dust or oxidation.
Software-wise, it’s crucial to keep your audio drivers and recording applications up to date. I regularly check for firmware updates from my microphone manufacturer and update my DAW (Digital Audio Workstation) to benefit from improved stability and features. Additionally, investing in a portable audio interface with built-in headphone monitoring and gain controls—like the Focusrite Scarlett series—provides precise control over your inputs and can extend your equipment’s lifespan by reducing wear on your XLR connectors.
Extending Microphone Life Through Routine Checks
Once your hardware tools are in place, establishing a routine maintenance schedule helps avoid future issues. I recommend inspecting cables for cracks or corrosion every few months, especially if you frequently disconnect and reconnect gear. Cleaning connectors with contact cleaner and a soft brush prevents oxidation that could lead to noise or connection failures. For your microphone, periodic calibration of gain levels and polar patterns ensures your recordings stay crisp. It may sound trivial, but swapping out windshields or pop filters every year prevents buildup of residues that can muddy your voice. Remember, small actions here save you from costly replacements down the line.
How do I maintain my podcast mic and tools over time?
One effective approach is to create a dedicated cleaning and inspection routine, ideally after every recording session. Use compressed air to clear dust from openings, and wipe down surfaces with cleaning solution appropriate for sensitive electronics. Keep your cables coiled properly in a dry, dust-free environment to prevent damage. Regularly update your recording software to benefit from new features and bug fixes—this is critical as tech evolves rapidly. I also recommend labeling your gear with service dates and calibration intervals, so you never forget system checks. Predictions suggest that as podcasting grows, the integration of smart diagnostic tools may become standard, alerting you when equipment needs maintenance; staying ahead now means you’re prepared for those future innovations.
Incorporating these maintenance habits will extend your gear’s lifespan and keep your audio sounding professional over time. For example, regularly micro-cleaning XLR connectors, as outlined in industry expert Kevin Michels’s guide on connector care, can prevent issues that degrade sound quality. Try scheduling a quarterly deep clean of all your audio gear—you might be surprised how much clarity improves. Remember, gear maintenance isn’t glamorous, but it’s essential for consistent success. Do you have a favorite tool or routine for keeping your equipment in top shape? Share your tips in the comments!
What I Wish Someone Told Me About Choosing the Right Microphone
Looking back, one of the biggest lessons I learned was that investing in a high-quality microphone isn’t just about getting a shiny piece of gear—it’s about understanding your unique recording environment and vocal needs. I once believed that a top-tier XLR mic would immediately make my voice professional-sounding, but I neglected environment and placement, leading to frustrating re-recordings. The real breakthrough came when I realized that mastering mic placement and acoustic treatment had a far greater impact than pure gear upgrades.
Another surprise was discovering how polar patterns influence noise rejection. I used a cardioid microphone in a noisy room, but switching to a supercardioid or bidirectional pattern, along with some room damping, drastically improved clarity. It clicked that choosing a microphone with the right polar pattern can save you from endless editing post-production.
Lastly, I underestimated the power of proper gain staging. Setting my input levels correctly meant the difference between a clean, punchy voice and distorted audio. This small tweak underlined how fundamental setup steps can’t be overlooked—no amount of fancy gear will save poorly calibrated settings.
Tools That Have Been Game-Changers in My Podcast Setup
First, I rely heavily on the best microphones for voice recording in 2024. Whether it’s a versatile USB model for quick setups or an XLR for studio quality, choosing the right tool depends on your goals. I personally recommend the top combo microphones because they offer flexibility without sacrificing quality.
For acoustic treatment, I use foam panels and portable vocal booths that are easy to assemble and store—check out the options linked here to find ones that suit your space. Also, a good audio interface helps maintain consistent gain and sound quality. Keep your tools clean and well-maintained—regularly inspecting cables and connectors has extended my gear’s lifespan and saved me countless headaches.
Finally, software like noise reduction plugins and EQ presets make a noticeable difference. Investing time in learning these tools has been worth it, turning a decent recording into a podcast-ready audio piece. For more tips, explore comprehensive guides and reviews found through those links—tailored to help you craft your perfect voice environment.
Your Voice Deserves the Best—Make It Happen Today
If you’ve been hesitant about upgrading your microphone setup or worried you’re missing something crucial, remember that small, informed steps lead to big improvements over time. Combining the right gear, environment, and settings can elevate your voice recordings from amateur to professional. I encourage you to experiment with your setup, try new placement techniques, and don’t be afraid to seek out resources and community advice. Your voice is unique, and with the right tools, it can truly shine in 2024.
What’s one setup change you’re excited to try this week? Drop your thoughts below—I love seeing your progress!