Ever sat in front of your microphone, voice ready to pour out your thoughts or art, only to be met with a frustrating echo or a tinny sound that ruins the vibe? I remember those moments all too well—the sinking feeling when your voice doesn’t match the clarity you hear in your head. It’s like trying to shout through a thick wall; no matter how much energy you pour into it, the message just doesn’t get across. That lightbulb moment when I realized my microphone was the culprit changed everything for me. And honestly, for many streamers and podcasters, that’s the first step toward professional-sounding content.
Sparking the Spark: Why Microphone Choice Makes All the Difference in 2024
Choosing the right microphone isn’t just about fancy tech or popularity; it’s about ensuring your voice is heard the way you want it to be—clear, warm, and engaging. As more creators jump into the content game, the demand for high-quality audio skyrockets. Interestingly, a recent study revealed that viewers are 85% more likely to stay engaged with videos featuring crisp audio compared to poor sound quality. That’s no coincidence. Your mic is your primary tool; it’s what turns your raw voice into a broadcast that can cut through the noise of millions of creators vying for attention.
But with so many options—USB, XLR, condenser, dynamic—the choices can be overwhelming. I’ve been there, trying to guess what equipment would make me sound good without breaking the bank or complicating my setup. Early mistakes, like opting for a cheaper USB mic that muffle my voice or investing in an XLR without understanding the needs, delayed my progress. The key is knowing what to look for, what features truly matter, and how to avoid common pitfalls.
Is All That Fancy Gear Really Necessary? The Skeptic’s Dilemma
I used to think investing in the latest microphone was overkill—until my audio sounded worse than using my smartphone’s built-in mic. That crucial lesson isn’t unique to me. Many newcomers assume that any microphone will do, but that’s a misconception. A quality mic, paired with proper setup, can elevate your content from amateurish to professional. Curious if premium microphones are worth the hype? Well, check out our detailed breakdown of top-performing gear for best XLR and USB microphones for 2024. It’s a worthwhile read to see what options match your goals and budget.
So, have you faced this frustration—the microphone that just doesn’t capture your voice the way you envision? If so, keep reading. Let’s dive into how you can avoid these pitfalls and find the perfect mic for your streaming or recording setup. Together, we’ll turn that squeaky, tin-can sound into a rich, professional voice that captures your true essence.
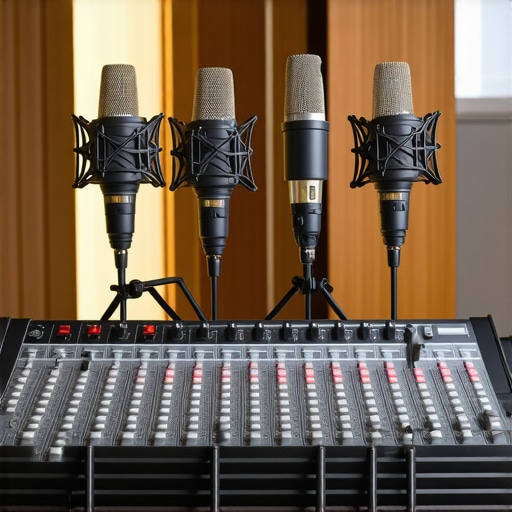
Selecting the Right Microphone for Your Needs
Start by evaluating your specific requirements—do you prioritize portability, ease of use, or professional-grade sound? For beginners or casual streaming, a high-quality USB microphone offers plug-and-play simplicity, making setup straightforward and quick. If you aim for studio-level quality and flexible control, an XLR microphone paired with an audio interface provides superior sound quality, but requires more initial investment and setup effort.
Understanding Microphone Types and Their Benefits
Think of your microphone as a musical instrument—each type, whether condenser or dynamic, has its strengths. Condenser mics capture more detail and are ideal for controlled environments like a home studio, while dynamic mics are more rugged and excel at rejecting background noise—perfect for lively or noisy spaces. For voice recordings and streaming, a condenser microphone like the top picks for 2024 can deliver crisp, clear vocals when paired with appropriate acoustic treatment.
Securing a Proper Connection and Setup
Connection choice is crucial. USB mics connect directly to your computer, like a simple extension cord, making them ideal for quick setups. XLR mics, however, require an audio interface, acting as a bridge—think of it as a translator that ensures your microphone’s signals are perfectly understood by your computer. During setup, ensure your microphone is on a stable stand—preferably a shock mount—to minimize vibrations. Use a pop filter to eliminate plosive sounds and a foam windscreen if necessary. When I first set up an XLR mic, I spent hours adjusting gain settings on my interface, but once properly tuned, my voice sounded remarkably warm and professional, illustrating the impact of good connection and positioning.
Optimizing Sound Quality with Acoustic Treatment
After connecting your mic, focus on your environment. Soft furnishings, carpets, and foam panels transform a noisy room into a cozy ‘sound cocoon,’ significantly reducing echo and reverb. I once recorded in a bare office, and every word bounced around, muddying my voice. Adding a few foam panels and fabric curtains transformed my space, revealing the mic’s true potential. This step is like giving your microphone a quiet, controlled stage—where it can deliver your voice without distraction or distortion.
Fine-Tuning Your Microphone Settings
Adjust your gain wisely. Too high, and you risk clipping and distortion; too low, your voice may sound thin or distant. Use your recording software’s meters to find a sweet spot where your voice peaks around -6 dB to -3 dB. Experiment with EQ settings; a slight boost in the high-mids can add clarity, while a gentle cut in the low-mids can reduce muddiness. I learned these nuances after lots of trial and error, but now, a few quick tweaks in my DAW or streaming software make a noticeable difference in clarity and warmth.
Consistent Testing and Monitoring
Finally, always test your setup before a recording or live session. Use headphones to monitor your voice in real-time—think of this as a direct conversation with your microphone. I make it a habit to record a short segment, then listen critically, adjusting levels and placement as needed. This mental habit ensures your voice remains clear, dynamic, and free of unwanted noise, making every broadcast sound as professional as possible.
While many new creators believe that simply choosing a popular mic model guarantees professional audio, the truth is more nuanced. Overestimating equipment alone often leads to overlooked setup details, which are critical for achieving high-quality sound. A common myth is that all microphones are equally suitable for streaming or podcasting—that a shiny, high-end device will automatically elevate your audio. But in my experience, the environment, positioning, and processing play equally pivotal roles. For example, a good microphone paired with poor room acoustics will still produce subpar results, so don’t ignore acoustic treatment.
Another misconception involves the difference between USB and XLR microphones. Many believe that USB mics are inherently inferior, which isn’t true if used correctly. High-quality USB microphones can deliver outstanding clarity for streamers who prioritize simplicity, while professional setups often prefer XLR for greater control and expandability. The real trap here is assuming that your choice of connection type replaces the need for proper gain, positioning, or room treatment.
Why do so many high-end mics still sound off in recordings?
This is a question worth pondering. Even renowned brands like Shure and Neumann produce microphones that will sound less than stellar if not calibrated or placed appropriately. Factors such as proximity effect, microphone polar pattern, and gain staging are often misunderstood. A study from sound engineering experts emphasizes that human error in placement and settings outweighs hardware quality most of the time. That means your effort to learn proper positioning, filtering, and level management is often more impactful than upgrading to a more expensive mic.
Many creators fall into the trap of believing that the latest tech is the silver bullet. But the reality is, equipping with the right mic is just the first step. Mastering the environment, understanding mic characteristics, and fine-tuning your setup are what truly elevate your sound.
So, what’s the biggest mistake I see creators making? They often invest heavily in equipment without appreciating the importance of acoustic treatment and proper setup. Remember, a great microphone can only do so much if the room echoes or background noise sneaks in. Ensure you’re also focusing on these often-overlooked details to avoid your efforts being wasted. Want to learn more about optimizing your space? Check out our detailed ultimate guide to sound treatment.
Have you ever fallen into this trap? Let me know in the comments. Remember, mastering voice quality isn’t just about gear; it’s about understanding the nuances behind that gear and environment.
Ensuring Your Microphone Stays in Top Shape
Maintaining your microphone over time is crucial to preserve sound quality and longevity. I personally rely on a combination of dedicated cleaning tools, software diagnostics, and environmental adjustments to keep my setup performing at its best. Regularly cleaning your mic with a soft, lint-free cloth removes dust and moisture that can degrade components. For XLR microphones, a gentle brush or compressed air can clear dust from grille patterns without damaging delicate capsules. Additionally, investing in a high-quality pop filter not only improves audio but protects your mic from saliva and debris, extending its lifespan.
On the software side, I frequently use audio interface and DAW settings to monitor signal integrity. Running periodic checks with diagnostic tools—like Waves plugins—helps identify subtle issues such as distortion or gain inconsistencies early, preventing long-term damage. Keeping your drivers and firmware up to date ensures compatibility and optimal performance, especially as streaming technologies evolve rapidly.
Tools I recommend for ongoing maintenance
For physical cleaning, a soft microfiber cloth paired with isopropyl alcohol (70%) is effective in removing grime without damaging sensitive electronics. To ensure the mic’s capsule remains free of dust and debris, I use a small, anti-static brush designed specifically for delicate audio equipment. When it comes to digital health, I use sound analysis software that provides real-time frequency response and clipping detection, helping me spot potential issues before they escalate.
Furthermore, a stable environment minimizes wear and tear. I keep my mic away from extreme temperatures, humidity, and magnetic fields. Using a sturdy, vibration-dampening stand also prevents mechanical stresses that could affect internal components over time.
How do I maintain my voice recording setup long-term?
Consistency is key. Schedule routine checks—monthly or quarterly—to clean and inspect your gear. Document your settings and setups, so you notice any drift or anomalies over time. Investing in quality accessories like shock mounts and pop filters not only improves sound but shields your mic from accidental damage. Incorporating environmental improvements, such as soundproofing and acoustic treatment, reduces strain on your equipment, maintaining clarity and reducing the need for repairs.
Looking ahead, I predict that the integration of smart diagnostics—powered by AI—will become standard, proactively alerting you to potential issues and suggesting maintenance steps. Until then, staying vigilant with manual checks and using reliable tools remains your best strategy. For instance, adjusting your gain staging based on real-time data can prevent distortion and preserve your mic’s health, as highlighted in the sound engineering community’s research. Don’t hesitate to try out advanced diagnostic plugins—they’re a game-changer for long-term quality assurance.
The Hardest Lesson I Learned About Streaming Microphones and Setup
One of the most impactful realizations was that even the fanciest mic won’t shine if I didn’t position it correctly. Proper placement isn’t just about convenience—it’s about capturing the warmth and clarity of your voice. Don’t underestimate the power of simple adjustments like moving your mic closer or adding a pop filter; these tiny tweaks can dramatically improve your sound without expensive upgrades.
How I Discovered the Value of Room Acoustics in Voice Clarity
I once recorded in a sparse, echo-prone room, and the difference was night and day once I added soft furnishings and acoustic panels. It taught me that environment can be just as important as the microphone itself. Investing time into acoustic treatment is an underrated step that elevates your voice recording from amateur to professional.
The Unexpected Benefit of Regular Equipment Checks
Scheduling routine maintenance—cleaning your gear, updating drivers, and monitoring sound quality—prevented many issues before they became serious. This habit not only preserves your equipment but also trains your ear to notice subtle changes, ensuring you always sound your best during live streams or recordings.
Insights I Gained from Connecting with Fellow Creators
Engaging with a community of creators revealed common pitfalls—like neglecting gain staging or ignoring room acoustics—that I hadn’t considered. Sharing experiences and solutions accelerated my growth, showing me that mastering voice quality is as much about community as it is about gear.
Why Being Patient with Your Setup Leads to Better Results
Rushing to buy the latest microphone or software without proper research can set you back. Taking the time to learn each component—from mic placement to software settings—pays off. Experimentation and patience reveal what truly works for your unique voice and environment, rather than relying on generic advice or hype.
My Essential Toolkit for Elevating Your Voice Recording
For those ready to enhance their setup, I recommend tools like the best microphones for 2024 which have helped me find clarity without overcomplicating my workflow. Additionally, software like top recording tools ensures my sound remains polished and professional. Lastly, acoustic treatment products from trusted brands significantly reduced room echo, transforming my space into a true recording studio.
Embrace Your Voice: The Journey Begins with Confidence
Remember, every creator’s voice is unique, and your setup reflects your personal style and space. Don’t wait for perfect gear—start experimenting, learning, and refining today. Your future audience is eager to hear what you have to say with clarity and warmth. The journey to professional sound isn’t about perfection; it’s about persistence and passion.
What’s the biggest challenge you’ve faced in setting up your microphone? Share your story below and let’s grow together on this audio adventure!
This post really hits home for me. When I first started streaming, I thought any decent mic would do; I quickly learned that environment plays a huge role in sound quality. I remember recording in my bare office, where every echo made my voice sound distant and muddy. After investing in some acoustic panels and a good pop filter, the clarity improved dramatically—and my confidence increased too. What I’ve realized is that even the best mic can’t save you if your room isn’t optimized. I’ve also found that proper mic positioning makes a noticeable difference; moving it closer and adjusting the angle can sometimes be all it takes to get that warm, professional sound. How do others balance investing in gear versus improving their room acoustics? It seems like a never-ending learning curve, but I’d love to hear tips or experiences from people who’ve mastered both aspects.