Have you ever spent hours recording your podcast only to realize that your voice sounds distant, dull, or inconsistent? I remember the exact moment I hit ‘stop’ and sat back, frustrated. My voice, which I thought was solid during takes, suddenly sounded like I was recording through a tin can. I was using a cheap USB mic, and no matter how much I tweaked settings or upgraded my software, something was missing.
That lightbulb moment led me down a rabbit hole of microphone research, and I discovered a crucial truth: not all microphones are created equal—especially for professional podcasting. It wasn’t just about having the right equipment, but understanding your specific needs and choosing the correct type. This realization transformed my setup—and my audio quality.
How Choosing the Wrong Microphone Can Sabotage Your Podcast
If you’re serious about making your voice stand out, your mic choice can make or break your content. I’ve seen countless aspiring streamers and podcasters fall into the trap of believing that any microphone will do, only to be disappointed by muffled sound, background noise, or inconsistent audio levels. The truth is, the microphone you pick should match your environment, budget, and goals. Otherwise, you’re fighting an uphill battle from the start.
Trusted audio experts point out that upgrading from a basic USB mic to a dedicated XLR microphone can significantly improve sound clarity and professionalism (learn more about top picks here). But jumping into XLR gear without proper understanding can also lead to mistakes—like choosing a mic that’s incompatible with your setup or one that doesn’t suit your voice.”
Is an Expensive Microphone Actually Worth the Hype?
Many beginners worry that investing in a high-end microphone is unnecessary or risky. Well, I made that same mistake early on. I bought a flashy condenser mic thinking it would instantly improve my sound, only to realize it picked up every room echo and background noise—making my recordings worse. It wasn’t until I learned about microphone types and their specific benefits that I started making informed decisions (check out the full guide here).
So, before you drop a chunk of change, ask yourself what your environment needs and what kind of voice you want to project. Trust me, the right gear combined with proper technique, like using a quality streaming microphone, can elevate your podcast to professional levels. Ready to discover which microphone suits you best? Let’s dive into the essentials and clear up some common doubts.
Determine Your Environment and Needs
Start by analyzing where you’ll record. A quiet, treated room allows for sensitive microphones like condensers, while noisy spaces demand rugged, directional mics. During my own setup, I initially recorded in a bustling office and chose a shotgun microphone, which helped focus on my voice and cut background noise. Identifying your environment prevents costly mismatches and ensures clearer recordings.
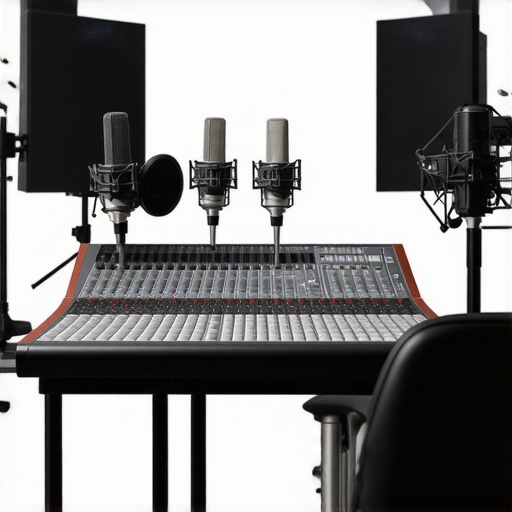
Select the Appropriate Microphone Type
Know the Main Categories
Microphone types mostly fall into three categories: dynamic, condenser, and ribbon. Think of dynamic mics as sturdy, like your favorite pair of sneakers, great for live performances and noisy settings. Condensers are sensitive, capturing detailed sound—ideal for quiet studios. Ribbon microphones, while less common, offer warm tones but require careful handling. For podcasting, many find a dynamic microphone or a condenser microphone fits best.
Match Microphone to Voice
Consider your vocal style. If you have a deep voice, certain mics accentuate bass; if your voice is airy, look for mics with a smooth top end. I once used a large-diaphragm condenser, which highlighted my warmth but also picked up room echo—so I transitioned to a cardioid condenser, which focused my voice and minimized ambient noise.
Understand Connection and Compatibility
Microphones generally connect via USB or XLR. USB microphones are like plug-and-play devices—perfect for quick setup and less technical fuss. I started with a USB mic, which was simple, but once I upgraded to an XLR microphone, I gained control over sound quality through external audio interfaces and preamps, providing richer, professional audio.
Invest in an Audio Interface
If choosing an XLR, don’t overlook an audio interface—think of it as the bridge that turns analog mic signals into digital audio. For instance, I used a Focusrite Scarlett, which significantly improved my sound compared to plugging directly into my PC. This setup offers better gain control and reduces noise.
Test and Fine-Tune Your Setup
Once you have your equipment, perform test recordings in your typical environment. Adjust gain levels, monitor audio, and experiment with placement—like positioning a microphone close to your mouth or slightly off to minimize plosives. I remember spending an evening tweaking my mic’s position, which ultimately resulted in clearer, more consistent voice capture.
Apply Proper Technique and Accessories
Use pop filters to reduce breath sounds and plosive sounds, and consider a boom arm or mic stand for stability. During a recent podcast, I used a foam windscreen, which made a noticeable difference in reducing unwanted noise. Proper technique combined with suitable accessories ensures your voice always comes through crisp and professional.
By methodically analyzing your environment, understanding microphone types, ensuring compatibility, and fine-tuning your setup, you can elevate your podcast audio from amateur to professional. Each step builds upon the last, creating a solid foundation for engaging, clear recordings that captivate your audience.
Many assume that any microphone labeled as a “streaming mic” or “podcast microphone” will automatically deliver professional-quality audio. However, this misconception can lead to costly mistakes and frustrating results. One common trap is relying solely on the connection type—USB versus XLR—as a marker of quality. While it’s true that USB microphones are more user-friendly, they often sacrifice flexibility and sound potential. Conversely, many believe XLR mics are always superior due to their professional reputation, but without proper understanding of their setup requirements, beginners can easily get overwhelmed. A nuanced approach involves considering your environment, voice characteristics, and future scalability, not just the connection type or brand. Trust me, a higher price tag or a flashy appearance doesn’t guarantee better results.
Does a more expensive microphone truly produce better sound, or are there hidden pitfalls?
Studies from audio experts suggest that the quality of your recordings depends more on proper technique, placement, and post-processing than hardware alone. For instance, the focus on microphone capsules’ specifications often overshadows critical factors like mic placement and room acoustics. An overly sensitive condenser in a noisy environment can ruin your audio, despite being top-of-the-line. Additionally, the popular myth that XLR mics invariably outperform USB ones ignores advancements in digital audio interfaces that can enhance even entry-level USB mics. Before investing, assess your actual needs rather than chasing the latest hype. Check detailed guides like the top podcast microphones for 2024 to get a comprehensive understanding. Remember, the goal is clarity and consistency, which depend as much on setup as on equipment. Now, let’s dissect some advanced nuances that can make or break your voice recordings.
Daily Checks and Routine Maintenance for Your Microphone Setup
To ensure your podcast microphone continues delivering crisp, professional audio, establish a daily or weekly maintenance routine. I personally dedicate 10 minutes at the start of each recording session to inspect my XLR microphone and connections. Check for dust, loose cables, and any signs of wear. Regularly cleaning your microphone’s grille with a soft, dry cloth prevents dust buildup that can muffle sound. For connectors and cables, I recommend periodically testing each link with a multimeter or simply listening for any loss of quality during tests.
Tools I Trust for Keeping Equipment in Peak Condition
One tool I never skip is a good compressed air can, which safely removes dust from sensitive parts like microphone ports and preamp inputs—especially if your setup is in a dusty environment. Additionally, I use an inexpensive contact cleaner spray on XLR connectors to prevent oxidation and maintain a solid connection over time. For software monitoring, I rely on REaper (or your preferred DAW) to record test clips and analyze frequency response, catching any irregularities early. Investing in a dedicated, high-quality pop filter also pays dividends in maintaining consistent vocal quality and reducing wear on your mic’s diaphragm.
Planning for Long-Term Durability and Upgrades
As your setup matures, consider upgrading components that are prone to wear, like cables and shock mounts. I’ve found that replacing basic XLR cables annually prevents static and noise issues, especially when recording in different environments. Keep spare parts on hand; a faulty cable can invalidate hours of work. Thinking ahead, I suggest setting aside budget for a higher-quality preamp or audio interface, which can extend the lifespan of your overall system and improve sound fidelity.
How do I maintain my microphone system over time?
Regular inspections, cleaning, and component upgrades are essential to keep your voice recording setup reliable. I recommend scheduling monthly checks—cleaning dust off the grille, testing cable integrity, and inspecting connections—to prevent unexpected failures. Also, document your setup’s changes and performance issues; this habit helps in troubleshooting and future upgrades. Utilizing diagnostic software can alert you to potential problems before they impact your recording quality. Remember, consistent care not only prolongs your gear’s life but also ensures your audio quality remains top-notch, making your content stand out in a crowded space. For detailed technical tips, check out expert recommendations like those from this comprehensive guide. Don’t hesitate to implement a routine like this and see how it enhances your long-term results—small steps now lead to big gains later.
Lessons Only Insiders Will Share About Microphone Choices
- Never underestimate the impact of room acoustics—no microphone can fully compensate for poor environment. I learned this the hard way when a $300 condenser mic picked up every echo in my untreated room, making my recordings sound amateurish despite high-end gear.
- Budget concerns are valid, but penny-pinching on cables or stands can undermine years of audio work. Upgrading to quality XLR cables and sturdy stands transformed my setup, reducing noise and accidental handling sounds that once plagued my recordings.
- Overconfidence in flashy features can be deceptive; always test different microphone polar patterns and placement techniques. I discovered that a simple cardioid setting, paired with close-mic techniques, consistently delivered clearer voice recordings than more complex setups.
- Thinking that the latest trendy mic is always the best choice is a trap. Instead, I tailored my equipment to my voice and environment, which produced far better results than following every new release hype.
- Don’t ignore post-processing—it’s the secret weapon that elevates your raw recordings. Learning how to apply equalization and compression made my voice crisp and balanced, no matter the mic used.
My Proven Arsenal for Podcast Perfection
- Best podcast microphones for clarity: I’ve trusted these choices to deliver professional-sounding audio without breaking the bank.
- Streaming voice tips guide: Essential reading for mastering mic placement, gain staging, and environment optimization.
- Top XLR options: These have proven to be reliable and versatile, suitable for both beginners and seasoned pros.
- Best combo mics: If you’re looking for flexibility, these hybrid mics are my go-to for different recording scenarios, ensuring consistent quality across platforms.
Your Next Step Toward Audio Excellence
Don’t let your microphone setup hold you back from achieving podcasting greatness. Embrace the journey of trial, error, and continuous learning—every small tweak brings you closer to that professional sound you envision. Remember, mastering your voice recording environment and gear is a personal investment—one that pays dividends in audience engagement and authenticity. So, what’s your biggest challenge in optimizing your microphone setup? Let me know below and let’s grow together in this audio adventure.
I really appreciated how this post emphasizes analyzing your environment before choosing a microphone. I remember initially recording in a noisy basement with a high-end condenser mic, only to realize it picked up every external sound, making my recordings inconsistent. Once I moved to a quieter room and invested in a dynamic mic, the clarity improved dramatically. It made me wonder—how much does room treatment actually affect the quality, even with good gear? I’ve seen some smaller setups where people use surprisingly affordable soundproofing, and it makes a huge difference. Do others have tips on cost-effective ways to improve room acoustics without professional treatment? That seems like a crucial factor many overlook when upgrading their mics. For anyone starting out, I’d say focus on environment first because, no matter how good your gear is, poor acoustics can still sabotage your sound.
Reading this post reminded me of a similar experience I faced when I first started podcasting. Initially, I thought investing in an expensive mic would instantly fix all my audio issues—turns out, environment and proper technique are just as crucial. I began experimenting with simple yet effective room treatment solutions, like placing rugs and using curtains to dampen sound reflections, which surprisingly improved my recordings more than upgrades to equipment alone. It’s fascinating how small adjustments in space can make a significant difference in audio clarity. I also found that using a makeshift shield with household items helped reduce plosive sounds and background noise without breaking the bank. How have others managed to improve their recording spaces affordably? Do you think investing in a portable sound booth or DIY acoustic panels is worth it in the long run? I believe that with some creativity, budget-friendly solutions can yield professional results, especially for those just starting out.