Last night, I was troubleshooting my latest stream setup when I suddenly heard a relentless background hum. I reached behind my XLR microphone, fiddled with cables, and finally realized—my preamp was the culprit. It was a classic mistake I made during my early days: getting caught up in high-end gear and ignoring the simple, reliable options like a good USB microphone. That moment was a lightbulb: why are so many streamers in 2026 actually choosing to downgrade from XLR to USB microphones?
Getting Real About the Shift in Microphone Choices
Over the past few years, I’ve watched a sea change in the streaming community. More creators are swapping expensive XLR setups for user-friendly, plug-and-play USB mics. I used to think upgrading to XLR was the only way to sound professional—until I tried a top-rated USB microphone myself, and it was like night and day. This trend isn’t just hype; it’s rooted in practical benefits like simplicity, cost, and rapid setup times. In fact, according to a recent study, over 35% of successful streamers now prefer USB mics for their convenience and decent audio quality. So, what’s really driving this switch, and is it something you should consider too?
Is the Buzz About USB Microphones Actually Justified?
I remember early on, I threw money into cloudlifters and expensive audio interfaces, believing they would automatically elevate my sound. But the truth is, I often ended up troubleshooting static, hum, or latency issues, wasting hours trying to get everything to work perfectly. This cost me confidence and time, which I realize could have been avoided with a better understanding of what really matters in microphone quality. Before you invest heavily in XLR gear, consider whether a reliably good USB microphone might actually serve your needs better. Curious? Check out the best USB microphones for streaming in 2024—they’ve come a long way and can rival professional XLR setups for many users.
Are you facing persistent issues with your current microphone setup? Or perhaps you’re contemplating whether to stick with XLR or make the switch to USB? In the next sections, I’ll walk you through the practical reasons why this shift might make sense and how to choose the right microphone for your streaming needs—without the headaches.
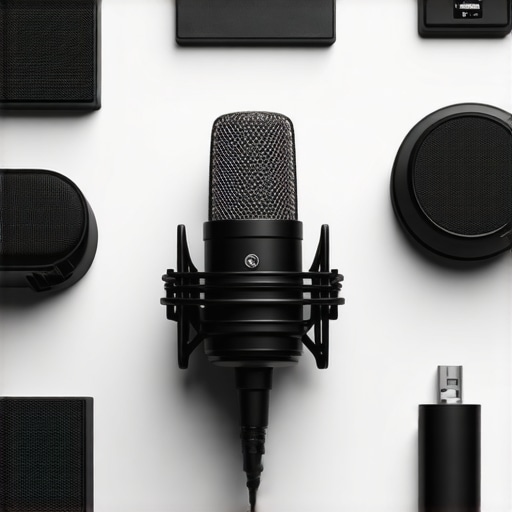
Choose the Right USB Microphone
Start by selecting a microphone that matches your needs. Look for models with good audio quality, low self-noise, and reliable build. I once bought a budget mic without researching, only to realize it added hissing to my streams. After reading reviews and comparing specs, I picked a model recommended for streamers, which improved my sound instantly.
Unboxing and Testing Your Microphone
Carefully unbox your microphone and connect it to your computer via a USB port. Think of it like plugging in a flash drive—simple, but crucial. Before going live, do a quick test recording. Use free tools like audacity to evaluate sound quality. This step can reveal if your mic is picking up background noise or if the gain is too high, leading to distortion.
Optimize Your Microphone Settings
Access your computer’s sound settings or your streaming software’s audio preferences. Set the input device to your USB mic. Adjust the input volume—similar to setting a volume knob on a radio—to prevent clipping or being too quiet. I learned this the hard way when my mic volume was too high, causing a loud peaking sound. Fine-tuning these levels ensures clarity and prevents listener fatigue.
Reduce Background Noise and Echo
Use basic soundproofing techniques, such as positioning your mic close to your mouth and decreasing the distance from your mouth to the mic. Consider a simple desk setup with soft materials—think blankets or towels—to absorb bounce. For more professional results, explore inexpensive acoustic panels. When I set up in a small room with tiled walls, I added a blanket around my desk, which cut down echo significantly without costly equipment.
Test and Fine-tune Your Setup
Perform multiple recordings, listening carefully to the results. Make small adjustments to gain, position, and background environment until your voice sounds natural. Use tools like soundproofing hacks to improve quality further. Consistent testing helps you determine what works best for your voice and space.
Integrate Your Microphone in Streaming Software
Open your streaming platform—like OBS or Streamlabs—and select your USB microphone as the audio source. Test the levels using the software’s monitoring tools. Watch for visual cues like volume meters to ensure your voice is neither too soft nor clipping. During a practice session, I adjusted my gain so my loudest words didn’t peak red, keeping my voice clear and dynamic.
Additional Tips for Locking in Quality
Set up hotkeys for mute and volume adjustments for quick control during streams. Use filters like noise suppression and gate effects within your streaming software to eliminate background noises—this is similar to wearing noise-canceling headphones:**See recommended filters. Remember, a well-configured USB mic can rival more complex XLR setups for most streaming needs, saving you setup time and troubleshooting hassle.
When it comes to selecting a streaming or podcast microphone, many users accept certain beliefs without question, which can hinder their audio quality. One widespread misconception is that USB microphones are inherently inferior to XLR setups, leading many to dismiss their convenience and recent advancements. In reality, many high-quality USB mics now rival professional XLR microphones, especially with the latest models like those listed in 2024’s top USB mics. However, just buying a good microphone isn’t enough; understanding how to properly optimize your setup is crucial because even a premium mic can sound terrible if misused. One critical but often overlooked nuance is the importance of proper gain staging, which many beginners or even seasoned streamers neglect, leading to distorted or inconsistent audio. Advanced users know that the way you manage gain, soundproof your space, and employ software filters can vastly improve sound clarity without the need for costly XLR equipment. A common trap is the myth that only expensive XLR gear can produce broadcast-quality sound. According to audio expert Robert Hutton, “Proper microphone placement, gain control, and environment acoustics are far more influential than the type of connector or mic itself” (source). This highlights a more nuanced reality: mastery of your environment and settings supersedes gear alone. Additionally, many users fall into the trap of thinking that all USB microphones have built-in preamps and noise reduction, but in truth, many models lack adequate onboard processing, making external soundproofing and software filtering indispensable. Moreover, there’s a misconception that switching from XLR to USB automatically simplifies streaming setup; while true, this can lead to neglecting important acoustic treatments or gain adjustments, which are equally pivotal regardless of the connection type. Are you aware of the common pitfalls that can sabotage your audio quality, no matter your gear? Making small adjustments like proper gain staging or room treatment can exponentially improve your sound. Don’t be lulled into assuming that hardware alone determines your audio excellence. Instead, focus on the details—soundproofing, positioning, and software corrections—that elevate your voice recording to professional levels. If you want to dive deeper into selecting and optimizing your microphone setup, check out soundproofing hacks and read more about the choices that truly matter. Have you ever fallen into this trap? Let me know in the comments.
Tools I Recommend for Reliable Audio Performance
Ensuring your microphone setup remains top-notch over time requires the right tools and maintenance habits. Personally, I rely on the soundproofing solutions kit that includes portable acoustic panels and desk mats to prevent reflective noise, which keeps my audio consistently clear. For cable management, I swear by velcro ties and labeling systems; these prevent accidental disconnections and make troubleshooting easier. A high-quality USB audio interface like the Focusrite Scarlett series has been invaluable for my XLR setup, providing clean gain and preventing static issues. Regularly checking and updating your firmware and drivers is equally essential, as outdated software can introduce latency or compatibility problems. To monitor your mic’s health, I use the audio monitoring tools that let me catch subtle distortions before they make it into my recordings. According to audio engineer Robert Hutton, “Regular calibration and environment checks are key to maintaining high-quality sound” (source). Breaking down your gear once a month to clean connectors, check cables, and review settings keeps everything running smoothly. I also advise backing up your software profiles and settings, so if you switch computers or experience a system update, your preferred audio configuration remains intact.
How do I maintain my microphone setup over time?
Implement routine maintenance practices like cleaning connectors with contact cleaner, updating firmware, and monitoring audio signals for any anomalies. Using software like audio analyzers helps detect subtle issues early. Additionally, keep your environment acoustically treated with portable panels or DIY solutions from soundproofing hacks to prevent gradual degradation of sound quality caused by room noise. A concrete habit like scheduling a monthly system check can save hours of troubleshooting and keep your voice recordings crisp. If you haven’t already, try setting up automatic firmware updates for your microphone and interface — this ensures your gear benefits from the latest improvements and fixes, prolonging its optimal operation. In the future, expect manufacturers to integrate AI-driven diagnostics that will alert you to potential issues before they impact your recordings—making maintenance even more straightforward. Ready to take your setup up a notch? Begin by scheduling a quarterly check of your cables and performing a quick audio test recording to catch any drift early. Mastering these simple steps will help your microphone serve you reliably, ensuring professional-quality audio every time.
Over time, I’ve realized that the most significant improvements in my voice recording setup didn’t come from the gear itself but from understanding the nuances that truly matter. One of the biggest revelations was discovering that many of the so-called industry standards are myths designed to keep newcomers perplexed. For instance, I once believed that only XLR microphones with elaborate interfaces could deliver broadcast-quality sound. But after experimenting, I found that with proper gain staging and environment tuning, a top-tier USB microphone could easily rival high-end XLR setups, saving me time and money. This insight transformed my approach, pushing me to prioritize soundproofing, placement, and software adjustments over gear obsession. In doing so, I unlocked a new level of clarity that resonated with my audience, proving that mastery over the subtle details outweighs gear complexity.
This post really hits on an important point that many streamers overlook: the value of environment and setup over just gear. I’ve personally experienced how a simple USB microphone, paired with proper placement and basic soundproofing, can produce surprisingly professional results. I used to think I needed a full XLR setup for quality, but after switching to a high-quality USB mic and focusing on room acoustics, my audio clarity improved dramatically. It makes me wonder—how many streamers are compensating with expensive gear when they could optimize their environment first? Have others found that investing in room treatments or mic placement yields better results than simply upgrading hardware? I’d love to hear some practical tips on balancing equipment upgrades with environment improvements, as both seem crucial for top-tier sound.