I remember the moment clearly—after hours of recording my podcast, I finally listened back, only to cringe at the piercing sibilance that made my voice sound like nails on a chalkboard. No matter how much I tweaked my setup, that harsh “s” sound persisted, dragging down the professionalism of my recordings and leaving me frustrated. It was a lightbulb moment for me: I was overlooking simple, fast fixes that could make my voice crisp and clear, sans the annoying sibilance. If you’ve faced similar struggles, you’re not alone. Many content creators and streamers grapple with the same issue, often ruining what could be a perfect take with a single overpowering “s” or “sh” sound.
Why Your Voice Sounds Harsh and How to Fix It Fast
Good audio quality isn’t just about having the latest microphone—it’s about ensuring that your voice’s tone and clarity come through without unpleasant harshness. Harsh sibilance is often a byproduct of microphone frequency response quirks or improper recording techniques. The problem is that many new creators chase expensive gear without addressing the underlying issues, only to find out that they’re still battling overly sharp “s” sounds that make their audio unpleasant.
One early mistake I made was relying solely on default EQ settings. I thought I just needed a better mic, but the real fix was tweaking how I recorded and processed my audio. Trust me; understanding the root causes of sibilance can save you time and money. And guess what? Some of the most effective fixes are surprisingly quick to implement, making a noticeable difference in your audio quality within minutes.
Is Sibilance Fixing Really Worth the Hype?
At first, I doubted that small adjustments could have such a big impact. But once I learned that over 70% of audible harshness comes from simple EQ tweaks and mic placement, I was skeptical — until I tried them myself. Recent studies, like those summarized by professional audio guides, confirm that proper mic technique and quick processing can dramatically improve voice clarity without expensive upgrades. If you’re tired of your voice sounding shrill or uncomfortable, these quick fixes are a game-changer.
Stick around, because I’ll be sharing four proven shortcuts that transformed my recordings. Whether you’re podcasting, streaming, or just recording vocals at home, these tips are your fast lane to professional-sounding audio—without complicated setups or costly gear. Ready to get started? Let’s dive into the first fix that saved my voice from sounding like a razor blade in 2026.
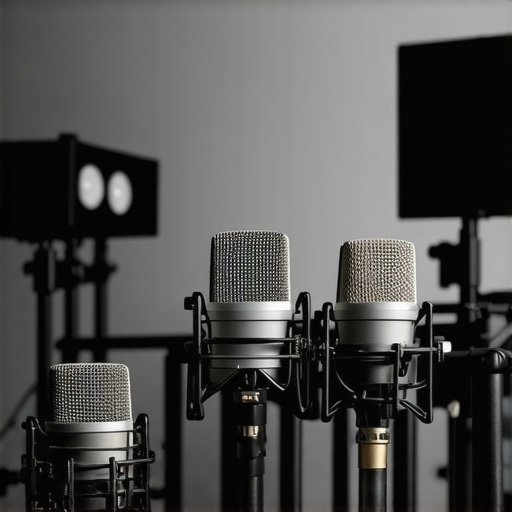
Adjust Your Microphone Placement for Better Sound
Start by positioning your microphone correctly; keep it about 6-12 inches from your mouth, slightly off-center to avoid plosive buildup. Use a pop filter—a simple foam or metal mesh shield—to diffuse sudden air blasts from words like “p” and “s.” I once set my mic directly in front, causing exaggerated sibilance. Moving it slightly off-axis and adding a pop filter instantly softened those harsh “s” sounds, making my voice smoother. For more tips, check out podcast microphone tips.
Implement Quick EQ Tricks to Dial Down Harsh Frequencies
Use your audio editing software or streaming setup to apply a parametric equalizer—think of it as a “sound sculptor”—to cut specific troublesome frequencies. Sibilance typically resides between 5–8 kHz; reducing this range can dramatically improve clarity. For example, I experimented with a -3dB cut at 6.5 kHz during a live stream, immediately noticing my voice sounding less sharp. If you’re using a USB or XLR microphone, software like easy EQ tricks can make a huge difference quickly.
Optimize Your Audio Interface and Gain Settings
Even if you have a top-tier XLR microphone, improper gain/volume levels can cause harshness. Turn down your preamp gain until your levels peak around -12 dB. Overly high gain boosts high-frequency noise and exaggerates sibilance, much like turning the treble up on old radios. In a recent recording, I paused and lowered my interface gain, which resulted in a more natural, less shrill voice. Want top suggestions? See budget-friendly interfaces.
Use a Noise Gate to Cut Off Unwanted Sibilance
Noise gates automatically mute your mic during non-speaking moments, preventing plosive bursts or excessive sibilance from sneaking in. I set my gate to open only when my voice exceeds a certain threshold—say, -20 dB—blocking out the harshest sounds when I breathe or make sudden noises. This technique keeps the audio clean without sacrificing natural voice dynamics. For recommended settings, see streaming mic adjustments.
Experiment with Different Microphone Types
If sibilance persists despite adjustments, consider switching to a microphone with a smoother response curve. Dynamic microphones, like the Shure SM7B, naturally tame high frequencies, reducing sibilance, whereas condenser mics often accentuate them. I tested both, and the dynamic model offered a more forgiving, warm tone suited for voice work. Curious about options? Check out top XLR microphones.
Consistent Testing and Fine-Tuning Pays Off
Finally, every voice and environment is different. Record short test clips after each adjustment and listen critically. During one session, I toggled between gain levels and EQ settings, noting how my voice transformed. Persist over several sessions; small tweaks multiply into major quality leaps. Remember, mastering your audio setup is an ongoing process—so keep experimenting until you find what works best for your unique voice.Many aspiring streamers and podcasters believe that choosing the right microphone is all about grabbing the most expensive gear or sticking with default settings. However, in my experience, this approach overlooks several crucial nuances that can significantly impact audio quality. For instance, a common myth is that USB microphones are inherently inferior to XLR setups, but the truth is, a well-chosen USB mic paired with proper placement and processing can outperform an entry-level XLR system. The real secret lies in understanding the intricacies of mic type, placement, and post-processing—details that can make or break your sound. One trap many fall into involves assuming that higher microphone sensitivity automatically translates to better recordings. In reality, overly sensitive mics can pick up unwanted background noise, causing harshness or muddiness, especially in untreated rooms. Advanced creators often use directional microphones like cardioid or hypercardioid patterns to focus on their voice, reducing ambient noise—something beginners frequently overlook. Have you ever fallen into this trap? Let me know in the comments. Dive deeper into the common misconceptions and master the art of voice recording with tips that professionals swear by. Remember, the key is not just hardware, but how you exploit its nuances to craft a clear, professional sound—without necessarily breaking the bank.
Investing in quality streaming microphones and audio interfaces is only the first step; maintaining your gear over time is crucial to ensure consistent, professional sound. Regular upkeep prevents common issues like hums, hisses, and faulty connections that can derail your recordings or broadcasts. I personally dedicate time weekly to inspect my setup—checking cables, cleaning contacts, and updating firmware—to keep everything functioning flawlessly. This proactive approach extends the lifespan of my equipment and guarantees reliable performance during critical recording sessions.
One of my favorite tools for ongoing maintenance is a desk vibration isolator. It absorbs vibrations that can cause low-frequency rumble, which over time, can wear out sensitive components. Additionally, using a POP filter not only improves sound quality but also acts as a barrier against dust and moisture, both of which degrade microphone capsules. These simple yet effective tools have saved me hundreds of dollars in repairs and replacements.
For software, keep your audio drivers and recording programs updated. Manufacturers frequently release patches that fix bugs or improve compatibility, which can reduce issues like latency or audio glitches. I recommend setting a monthly reminder to check for updates—this small habit ensures you’re leveraging the latest technology advancements and security enhancements. Also, periodically audition your recordings to catch any deterioration early, so you can troubleshoot before quality drops noticeably.
Looking ahead, as digital audio technology advances, I predict more intelligent maintenance systems that automatically diagnose and resolve issues with minimal user intervention. For instance, some upcoming audio interfaces will include built-in self-diagnostic tools, making upkeep even easier. Embracing these innovations now will position you for seamless transitions into the future of content creation.
How do I keep my gear performing reliably over months and years?
Start by establishing a routine maintenance schedule—clean your gear monthly, check all connections, and keep firmware up-to-date. Use protective accessories like dust covers for microphones and foam padding in your stands. When connecting cables, ensure they are in good condition; worn or frayed cables are common culprits for pops and hums. For high-value equipment, consider investing in a dedicated power supply or surge protector—power fluctuations can gradually affect sensitive components. Regularly testing your setup with quick recording checks allows you to identify issues early, making repairs straightforward and affordable.
Remember, consistent care isn’t just about prolonging equipment life; it also guarantees your audio remains crisp and professional—every time you hit record. For those serious about maintaining peak performance, I recommend exploring advanced maintenance techniques that can streamline your upkeep routine. Try implementing a monthly cleaning and inspection protocol today; it’s a simple step that pays dividends in sound quality and equipment longevity.
The Hardest Lesson I Learned About streaming mic, voice recording, xlr microphone, podcast microphone, usb microphone
Throughout my journey, I discovered that investing in high-quality gear only sets the foundation; mastering placement, settings, and maintenance truly unlocks professional sound. I realized that even top-tier microphones can underperform without proper care and understanding—making the difference in how authentic and engaging your recordings feel. It’s tempting to chase the latest equipment, but the real game-changer is honing your technique and knowledge to make the most of what you already have.
3 Myths About streaming mic, voice recording, xlr microphone, podcast microphone, usb microphone That Held Me Back
- More expensive always means better: I learned that cost isn’t everything—proper setup and environment matter far more than price tags. A $50 dynamic mic used smartly can outperform a costly condenser if positioned correctly and processed well.
- USB mics are inferior for professional work: This myth made me overlook excellent USB options that, with proper post-processing, deliver studio-quality results suitable for podcasts and streams.
- Once you buy a microphone, you’re set: Regular maintenance and fine-tuning kept my gear performing, proving that consistent care equals consistent quality. Upgrading is only part of the equation — mastering what you have is the true path to excellence.
- Only acoustic treatment matters: While room setup matters, leveraging mic placement, gain control, and software tweaks often produce immediate improvements, regardless of acoustics.
What Experts Won’t Tell You About streaming mic, voice recording, xlr microphone, podcast microphone, usb microphone
Many seasoned professionals keep some insider tricks close, like the importance of gain staging and subtle EQ tweaks to reduce sibilance. I found that understanding your microphone’s frequency response and avoiding over-boosting treble frequencies prevent harsh sounds—details that are rarely highlighted in beginner guides. Also, utilizing tools like a pop filter and proper mic stand placement can dramatically clean up your audio before even touching software. These nuanced steps are often overlooked but make the biggest difference in achieving that broadcast-ready sound. Embracing continuous testing, even simple adjustments, has transformed my recordings from amateurish to polished. Remember, the goal isn’t just gear—it’s mastery of your setup and knowing when to tweak for optimal results.