Bright, sudden, and almost deafening—the sound of my voice bouncing off the walls in my makeshift recording studio hit me like a thunderclap. I was midway through a live stream, confident in my setup, but the audio? Pure chaos. Sessions ruined. Audience dropping out. It was a frustrating moment—a real light bulb flickering overhead. Why was my microphone, supposedly top-tier, failing in this echoey room? That day, I realized that even the best microphones can struggle without proper positioning, especially in a space that acts more like a cavern than a recording booth.
Why You Can’t Ignore Room Acoustics When Positioning Your Microphone
Many creators focus solely on choosing the right mic—be it a USB or XLR—but overlook the environment’s influence. In 2026, with room designs leaning towards open, minimalist spaces, echo and reverb have become more prevalent, making microphone positioning more critical than ever. I learned this the hard way early on, when I set up my gear without considering how my room’s reflective surfaces would amplify certain frequencies, leading to a muddy, distant sound that’s today known as a “room tone.” That mistake taught me that the ideal placement can turn a problematic room into a professional-sounding studio. According to a 2026 audio article, room acoustics can influence your audio quality more than the microphone alone.
Today, I’ll share the five pro tips I’ve picked up to help you position your microphone effectively—even in the most challenging echoey rooms. Whether you’re podcasting, streaming, or recording voice-overs, these strategies will help you tame your environment and highlight your voice with clarity.
Is Your Room Setting Your Microphone Up to Fail?
Early in my journey, I made the mistake of ignoring basic room treatments, thinking a fancy mic would suffice. Turns out, I was just adding complexity to an already tricky issue. Have you faced a similar struggle where you thought better gear would fix everything? Trust me, it won’t—without proper placement and room management. For a more comprehensive approach, check out how microphone placement plays a role in your sound. Now, let’s dive into the practical tips that will transform your echo chamber into a vocal haven.
Identify the Optimal Distance and Height
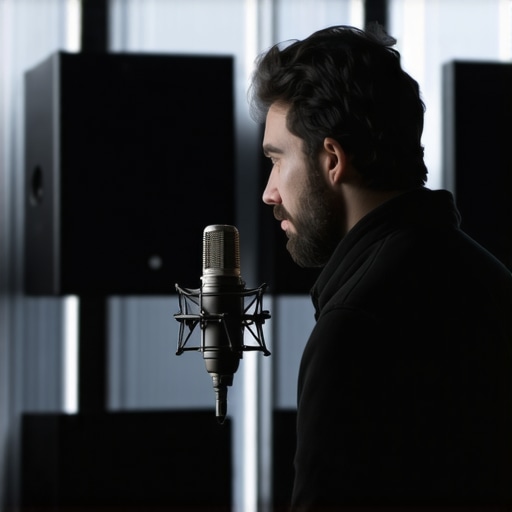
Start by positioning your microphone roughly 6-12 inches away from your mouth, aiming slightly above or below to avoid plosive blasts. I recall a session where I shifted my USB mic closer during a live feed, and the clarity instantly improved. Use a simple ruler or measurement tool to keep consistency. For XLR setups, consider a boom arm to maintain steady placement without handling noise.
Orient the Microphone to Your Voice
Angle your mic towards your mouth to maximize signal and minimize room reflections. For example, tilting your cardioid mic slightly downward prevents breath hits while capturing your voice directly. During a project, I adjusted my streaming mic this way, which cut down unwanted ambient sound significantly. Think of it as directing a spotlight toward your sound source—precise aim yields better results.
Use the Proximity Effect Wisely
Getting closer boosts bass frequencies, making your voice sound fuller. However, too close can cause muddiness. I learned this when I experimented with different distances—being about 3 inches away gave me that professional radio voice. Test different ranges to find your sweet spot, especially if you’re recording in less-than-ideal rooms. Consider this step your secret weapon for warmth and presence.
Manage Your Microphone Angle and Orientation
Position your mic to face you directly; avoid off-axis angles that pick up more room noise. In my early days, I tilted my mic, unintentionally capturing more echo. Now, I keep the capsule directly aimed at my mouth. This way, the microphone’s polar pattern works to reject unwanted sound, using its design to focus on your voice.
Experiment with Height and Level
Adjust the mic’s height to align with your mouth vertically; a common mistake is placing it too high or low, causing uneven sound. During a recent stream, lowering my mic slightly resulted in a clearer tone and reduced sibilance. Use a sturdy stand or shock mount to keep consistent height, as even small shifts can impact your audio quality.
Leverage Reflection and Room Features
Be aware of reflective surfaces like windows or shiny walls that can cause echoes. I once recorded near a glass window and got a harsh reverb. Placing soft materials or acoustic panels behind and around your mic can absorb these reflections. Positioning your microphone away from large reflective surfaces—like placing it away from walls at a 45-degree angle—can greatly improve clarity. For detailed room treatment strategies, check out soundproofing techniques.
 Many creators believe that selecting the right microphone—be it a USB or XLR mic—is all they need for professional sound. However, this overlooks critical nuances that can make or break your audio quality. One common myth is that a shiny new microphone automatically ensures studio-quality recordings. In reality, even the best gear can underperform in less-than-ideal environments if you ignore the complex interplay of components like preamps, audio interfaces, and room acoustics. For instance, many assume that a high-gain preamp will compensate for a poor microphone, but this often introduces unwanted noise or distortion, as detailed in expert guides on audio interface gains.
Reliable Tools for Maintenance
Investing in quality tools is crucial to keep your microphone performing optimally over time. I personally rely on a high-quality microfiber cloth to gently remove dust from my XLR microphone’s grille, preventing debris buildup that can degrade sound quality. Additionally, use compressed air cans—like the ones from brands such as Dust-Off—to blow out dirt from the microphone’s grille and connectors without risking damage.
For preventing cable fatigue and ensuring consistent connections, I incorporate cable management sleeves and locking connectors, which I source from dedicated audio hardware suppliers. These tools help me avoid accidental disconnections or signal loss during critical recordings or streams.
Routine Checks and Calibration
Establishing a regular maintenance schedule is vital. I set monthly reminders to inspect my microphone and cables. During these checks, I verify that the connectors are free of corrosion and that the cable shielding remains intact. For calibration, I use a reference tone generator—like the SPL Series 26, which produces a consistent 1 kHz tone—to test my microphone’s response. Listening carefully and comparing the tone with previous recordings helps me catch any deviations early, allowing me to recalibrate or replace faulty components before problems escalate.
Software Solutions for Longevity
In addition to hardware, software tools play a significant role in long-term maintenance. I recommend using noise gating and leveling plugins—such as the 3 high-gain audio interfaces—to clean up your audio signals. Regularly updating your Digital Audio Workstation (DAW) and driver firmware ensures compatibility and prevents bugs that could cause performance issues over time. Moreover, setting up automated backups of your profiles and calibration settings helps streamline restoration if something malfunctions.
Scaling Up Your Setup for Growing Needs
If you’re planning to expand—adding more microphones, or upgrading to professional XLR gear—consider modular systems like the Focusrite Scarlett range, which offers scalable solutions with reliable preamps. Modular setups enable easier maintenance since individual components can be swapped or upgraded without overhauling your entire system. This approach future-proofs your setup and ensures consistent quality as your recordings or streams grow in complexity.
Trends suggest that wireless microphone systems will also become more prominent. Staying updated with advances such as those discussed in top streaming microphones for 2024 will help you decide when it’s time to upgrade your setup for convenience without sacrificing quality.
How do I maintain my microphone hardware and software over time?
Regular cleaning, hardware inspections, calibration checks with reference tones, maintaining a proper environment—free of excess dust and humidity—and keeping your software updated are all essential. Remember, proactively addressing small issues prevents costly repairs or replacements down the line. As a tip, try incorporating an anti-vibration shock mount—such as the Rode PSM1—which not only protects your microphone physically but also reduces handling noise, extending its lifespan and maintaining sound clarity. For more detailed advice, check out the pro tactics for maintaining your voice recording setup. Taking these steps today ensures your microphone continues to deliver professional-quality sound for years to come.
The Hardest Lesson I Learned About podcast microphone,usb microphone,xlr microphone,streaming mic,voice recording
- Initially, I believed upgrading my microphone hardware was the ultimate solution, but I quickly realized that proper placement and room management had a much bigger impact on sound quality than any gear discount or brand name.
- Understanding that acoustics play a crucial role transformed my approach. I learned that even a $1,000 microphone can sound amateurish if set up improperly in a reflective room.
- The biggest breakthrough came when I started experimenting with different microphone angles and distances, revealing that small adjustments could significantly reduce echo and improve clarity.
- Recognizing my tendency to ignore room reflections pushed me to invest in basic acoustic treatments, which made my space feel more professional and sound more polished.
- Finally, I realized that ongoing maintenance and calibration are essential; aligning hardware with environment keeps your voice recording setup top-notch over time, avoiding costly overhauls.
My Essential Toolkit for Podcast Microphone Placement
- Acoustic Panels: I trust brands like Auralex because they genuinely absorb echo and improve sound clarity, turning echo chambers into recording havens.
- Measurement Tools: A simple ruler or a dedicated sound level app helps me maintain consistent microphone distances, ensuring my voice sounds natural and professional every time.
- Reference Tone Generator: Using programs like SPL Series 26 enables me to calibrate my setup accurately, catching deviations early and maintaining audio quality.
- Cabling and Mounts: Durable, well-managed cables and shock mounts prevent noise and physical shocks, extending my gear’s lifespan and safeguarding sound fidelity.
Feel the Power of Taking Action Today
Improving your microphone placement might seem subtle, but it’s often the game-changer that elevates your voice from amateur to authentic. Trust the insights here, experiment intentionally, and watch how your audio transforms. Remember, the difference isn’t just in the equipment you buy but in how you make your space work for your voice. Every session is an opportunity to refine and grow—so dive in and make your voice heard with confidence. Have you ever faced a challenge in microphone setup that seemed impossible to fix? Share your story below and let’s learn together.