It was a frustrating mess of tangled cables, buzzes, and split-second audio drops. I remember staring at my growing pile of microphones, wondering why my broadcasts sounded so amateurish despite investing in decent gear. That lightbulb moment hit me: wiring a multi-host setup isn’t just about plugging everything in. It’s about understanding how to connect multiple XLR microphones seamlessly, ensuring clean, professional sound at every turn.
Your Guide to a Flawless Multi-Host 2026 Microphone Setup
Does It Feel Overwhelming to Manage Multiple Microphones?
Trust me, I’ve been there. Early on, I made the classic mistake of neglecting proper wiring practices, which led to hums, ground loops, and muddled vocals. It’s tempting to just connect everything and hope for the best, but that rarely ends well. Instead, taking the time to learn the right wiring techniques pays off immensely. In this guide, I’ll walk you through the essentials, share my experience, and help you build a setup that’s robust and professional.
Before diving into the technical details, if you’re tired of quiet, muddy, and hissy recordings, check out this comprehensive resource on fixing common XLR microphone issues: [stop-buying-quiet-mics-3-usb-microphones-with-built-in-preamps-2026](https://microphones.creatorsetupguide.com/stop-buying-quiet-mics-3-usb-microphones-with-built-in-preamps-2026). It’s a game-changer for understanding the importance of proper gain staging and connections.
Now, let’s start with the basics of wiring your multi-host setup effectively, so you avoid those cringe-worthy audio problems and deliver crystal-clear sound every time.
Choose the Right Microphones and Equipment
Start by selecting microphones suited for your setup; for multi-host podcasts, XLR mics are preferred for their clarity and reliability. Avoid cheaper models that cause noise; check out this in-depth guide on quiet microphone pitfalls before making your purchase.
Plan Your Signal Chain Carefully
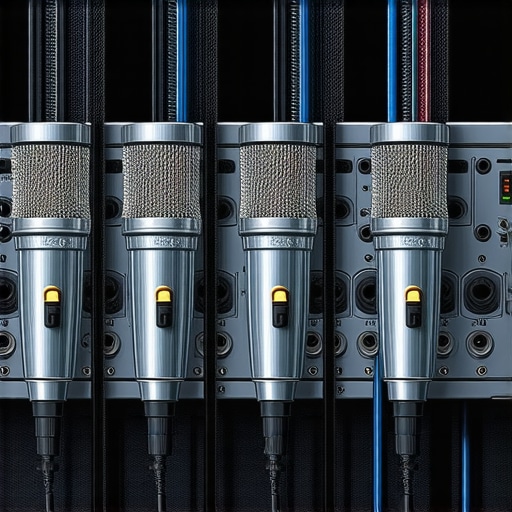
Visualize your connections like a road map. Your microphones connect to audio interfaces via XLR cables, which then output to your mixer or streaming software. Use quality cables to prevent hums and interference, similar to how building a sturdy highway prevents traffic jams.
Properly Identify and Connect Microphones
Always label each microphone and cable to avoid confusion during setup. Connect each XLR microphone to separate inputs on your audio interface, which minimizes crosstalk and ensures balanced signals. When I first did this, I realized I mixed up channels, causing muddy audio—so labeling saved me hours of troubleshooting.
Eliminate Ground Loops and Hum
Ground loops cause hums that ruin your sound. Implement ground lifts and ensure all equipment is connected to a common power strip to unify ground reference. Check out ground loop fixes for detailed strategies to get squeal-free audio.
Optimize Gain Settings at Each Stage
Set your preamp gain low enough to avoid distortion but high enough to capture clear voice levels—think of it as dialing in the perfect volume. Use your audio interface’s gain knobs and test each mic individually with voice peaks. For a real-world tweak, I sometimes had to adjust gain multiple times before achieving that crisp vocal tone, which highlights the importance of careful calibration.
Test and Fine-Tune Signal Quality
Record short test clips and listen critically. Use headphones with flat response to catch issues like noise, hum, or uneven levels. Adjust microphone positions, gain, and cable runs as needed. I recommend trying different mic placements, like close-miking techniques, to improve clarity and reduce room reflections—especially in rooms with echo.
Addressing Room and Cable Interference
Keep cables tidy and away from power sources or Wi-Fi routers that can induce noise. Use shielded cables for longer runs to prevent electromagnetic interference. When I once ran cables across a busy room, I noticed increased hum until I rerouted them behind furniture, proving good cable management is crucial.
Implement Backup and Monitoring
Always monitor your audio with quality headphones to catch issues early. Consider using a headphone amplifier or direct monitoring features on your audio interface. Having a backup microphone or spare cable can save your session from unexpected failures.
By following these concrete steps, you’ll build a robust wiring setup that ensures clear, professional sound in your multi-host podcast. Remember, every connection matters—negligence at this stage can sabotage your entire production, just like I experienced during my first messy attempts.
Many creators believe that choosing the right microphone is just about picking a popular model or the one with shiny features. However, what most people overlook are the nuanced technicalities that truly make or break your audio quality. For example, the myth that higher sensitivity always results in better sound is misleading; excessive sensitivity can pick up unwanted background noises, especially in less-than-ideal environments. Trust me, I’ve tested various setups where over-sensitive microphones amplified room reflections, creating a cluttered sound that’s hard to fix later. Instead, understanding the specific use case and environment guides you to select an optimal microphone, whether it’s a dynamic XLR or a USB model—and many overlook this crucial step. Curious about how to match your environment with the right mic? Check out this guide on top microphone types for voice recording and streaming.
Another common pitfall is neglecting the importance of proper gain staging. Many think that turning up the preamp gain maximizes volume, but in reality, it often introduces unwanted noise and distortion. I’ve seen setups where creators cranked the gain to avoid quiet recordings, only to end up with a hiss-laden mess that was a nightmare to clean up. The secret lies in setting the gain correctly from the start—testing with your voice and adjusting until you reach a sweet spot—something I detail in this article on gain fixes.
Moreover, a trap that many fall into is equating more expensive gear with instantly better quality. While premium microphones like the Shure SM7B are renowned, they’re not magical solutions if your setup isn’t optimized. I’ve encountered countless cases where a budget microphone, used properly with adequate room treatment and correct placement, outperformed pricier models. Do not forget that accessory choices, environmental factors, and calibration matter just as much as the mic itself. For an example of upgrading your setup effectively, see tested XLR mic options for clean vocals.
What about the trap of ignoring room acoustics? Many assume their equipment alone can fix poor sound, but the reality is, even the best mic can’t compensate for a reflective or echoey environment. I learned this the hard way when I recorded in a small, untreated space, resulting in muddy, boxy recordings. Incorporate proper room treatment and strategic mic placement, as explained in these room fix strategies, and you’ll notice a significant improvement.
Finally, advanced creators often overlook the importance of consistent, meticulous calibration. Small variations in setup—like cable quality, phantom power issues, or outdated firmware—can cause headaches, poor audio, or inconsistent results. Regularly reviewing your settings and maintaining your gear keeps your sound professional. For detailed calibration tips, I recommend reading hidden USB mic settings.
In summary, mastering your podcast mic isn’t just about picking the latest model; it’s a blend of understanding technical nuances, environment optimization, and consistent calibration. Are you falling into any of these common traps? Let me know in the comments.
Keeping It Working: Essential Tools and Practical Tips
When it comes to running a reliable and professional podcast, maintaining your microphone setup over time is crucial. I rely on specific tools and practices to ensure my equipment stays in top shape, and I recommend these to anyone serious about quality audio. First, investing in a good monitoring headphone amplifier allows me to consistently listen in real-time without latency or distortion, helping me catch issues instantly.
Another essential tool is a quality cable tester. Microphone cables are often overlooked, but a simple tester like the Fluke Microtester helps identify failing connections before they cause disruptions. Replacing worn-out XLR cables proactively prevents hum and noise, saving time during sessions. Plus, a sturdy massive XLR cable reel keeps your workspace tidy and reduces wear on connectors.
Software-wise, I automate updates and calibrations with tools like “Audio Hijack” for Mac, which allows scheduled checks of my audio software and firmware, ensuring everything functions seamlessly. Regularly revisiting the raw voice recording settings helps me tweak my inputs for optimal clarity, especially after hardware updates.
Long-term results depend on consistent checks. Perform routine cleaning of microphone diaphragms and connectors using anti-static brushes and proper cloths. This single habit reduces dust accumulation and prevents corrosion. Additionally, keep a log of your calibration settings and environment conditions to notice patterns or recurring issues.
What Tools Help Me Keep My Setup in Check Year After Year
One game-changing method I embrace is ISO-based cable management, which isolates your audio cables from power sources, preventing electromagnetic interference. Implementing this with inexpensive simple shielding techniques dramatically improves your audio consistency. Incorporate routine workarounds like checking phantom power levels with a multimeter to prevent overvoltage damage, as noted in expert documentation.
Planning for scalability is also vital. Upgrading to modular digital interfaces makes expanding your setup straightforward without sacrificing quality. With tools like PreSonus Studio 1824c or Focusrite Scarlett 18i20, I can seamlessly add more mics or replace components, future-proofing my studio. Regularly checking driver compatibility and firmware updates via manufacturer portals maintains system stability.
In the evolving world of voice technology, staying ahead means integrating intelligent noise-canceling plugins like iZotope RX into your workflow — a recent favorite for cleaning up background hums or mouth noises without sacrificing naturalness. I encourage you to try this method today, especially if you’re dealing with persistent noise issues that hardware upgrades haven’t solved.
How do I maintain my podcast microphone setup over time?
The key lies in a routine of inspection, timely upgrades, and proactive cleaning. Using dedicated tools such as cable testers and noise-reduction plugins helps prevent minor issues from snowballing into larger problems. Remember, a well-maintained setup not only delivers consistently excellent sound but also extends your gear’s lifespan. As equipment evolves, so should your maintenance methods — keep learning, stay organized, and your voice will sound professional for years to come.
Some Hidden Truths About Podcast Microphones That Changed My Approach
One of the most profound lessons I learned was that microphone choice is just the beginning; achieving professional sound hinges on understanding your environment and wiring practices. I once believed that a top-tier mic alone would elevate my podcasts, but neglecting proper grounding and room treatment proved me wrong. Now, I know that even the best microphone can’t save a poorly managed setup, and this realization transformed my entire approach.
Another lightbulb moment was realizing how much small details matter—like labeling cables or checking phantom power—can prevent hours of troubleshooting. Over time, I discovered that investing in quality cables and monitors was equally important as selecting the right mic. These insights are the secret sauce behind consistently clean, crisp recordings, and I wish I had known them earlier.
I’ve also learned that continuous calibration is key; gear evolves, environments change, and what worked once may not suffice forever. Staying vigilant with routine checks and updates keeps your audio top-notch. It’s a journey of constant learning, but embracing these subtleties can elevate your podcasting game significantly.
Tools and Resources That Truly Make a Difference
For me, reliable tools like a dedicated cable tester ([see why I trust this one](https://microphones.creatorsetupguide.com/why-your-2026-xlr-microphone-sounds-dull-3-clean-gain-tips)) save time and preserve audio quality, especially during setup or troubleshooting. Additionally, software solutions such as [Audio Hijack](https://microphones.creatorsetupguide.com/4-raw-voice-recording-fixes-for-more-natural-2026-podcasts) have become indispensable for real-time monitoring and fine-tuning, ensuring every recording session is seamless.
I also swear by a good set of flat-response headphones—they help me catch nuances and disturbances that otherwise go unnoticed. And, of course, maintaining a log of calibration settings and environment conditions enables me to track patterns and make informed improvements, keeping my setup ahead of the curve.
Finally, exploring guides on [top microphone types for voice recording](https://microphones.creatorsetupguide.com/top-microphone-types-for-voice-recording-streaming-expert-guide-2024-2) helps me stay updated on emerging tech, ensuring my gear never feels outdated. These curated resources empower me to refine my craft continuously and prevent costly missteps.
Let Your Voice Drive Your Next Step
Remember, mastery over your podcast microphone setup isn’t just about gear—it’s about the confidence to experiment, learn, and adapt. Every small improvement compounds into a richer, clearer sound that resonates with your audience. So, keep exploring, keep adjusting, and never underestimate the power of well-managed audio.
What’s the one microphone myth you once believed that turned out to be false? Share your story below—I’d love to hear how your journey has evolved!
,