I remember the first time I recorded a podcast episode with my new 2026 XLR microphone. I was excited—ready to sound professional, confident, and crisp. But when I listened to the playback, my heart sank. The voice sounded flat, dull, lacking the vibrancy I heard during the recording. It was a lightbulb moment: despite investing in top-tier gear, my audio still didn’t have that professional punch. Have you ever faced this frustrating silence after all the setup?
This problem isn’t unique. Many creators, even with reputable microphones, struggle with dull, uninspiring sound quality. The good news? You’re not doomed to accept mediocrity. Today, I’m going to share three essential gain tips that can breathe life back into your 2026 XLR microphone, making your voice crisp, clear, and vibrant.
Why So Many Microphones Sound Bland and How You Can Turn It Around
Before jumping into solutions, let me be honest about a mistake I made early on: I assumed that buying a fancy microphone was enough. I skipped the basics of proper gain staging and overlooked room acoustics. It wasn’t until I read an authoritative guide on voice recording that I realized how crucial proper gain settings are—setting the right gain can make or break your audio’s clarity. You might want to check out the [ultimate guide to streaming microphones](https://microphones.creatorsetupguide.com/ultimate-guide-to-streaming-microphones-voice-recording-tips-2024) to understand how gain impacts your sound.
The core issue? Many people are using their microphone’s gain knob as a volume control instead of a tweak for optimal sound quality. Turning gain too high can introduce hissing and distortion, while too low makes your voice sound distant and lifeless. Finding that sweet spot is vital.
So, how exactly do you set your gain for a vibrant, professional tone? Let’s explore three straightforward but effective gain tips that transformed my recordings and could do the same for you. Are you ready to give your microphone a new lease on life? Let’s get started.
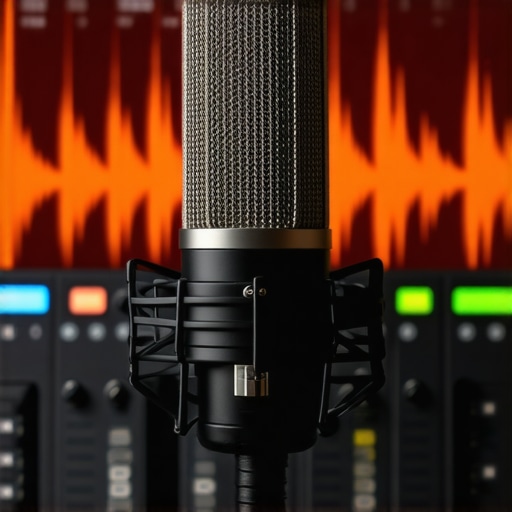
Start With the Right Hardware Setup
Your journey begins with choosing a quality microphone suited for voice recording, such as the best XLR microphones for podcasting. Ensure your microphone matches your recording environment—dynamic mics work well in noisy rooms, while condenser mics excel in treated spaces. Connect your microphone to an audio interface or mixer, and set your audio levels to ensure no distortion occurs during your actual recording.
Identify Your Desired Sound Level
Imagine your voice as a wave: you want it to sit comfortably in the middle—loud enough to be clear without clipping or distortion. To find this sweet spot, speak naturally into the mic at your normal voice volume. Watch your recording software or audio interface’s level meters; look for peaks around -12dB to -6dB. This range provides headroom for dynamics without risking distortion, much like setting volume on a stereo for optimal listening without distortion.
Adjust the Gain with Precision
Turn your microphone’s gain knob slowly while speaking at your typical voice volume. Your goal is to have the level meter peak around the target range without hitting 0dB. Remember: higher gain isn’t always better; too much introduces hiss and distortion, akin to turning up a radio until it’s fuzzy. During my own sessions, I once cranked the gain to 11, thinking louder is better, only to be drowned in background noise and hiss. Dialing it back to a moderate level cleared up my audio significantly.
Use Your Software to Fine-Tune
Once hardware gain is roughly set, use your recording software’s input levels. Most platforms display a visual indicator—aim for levels that fluctuate just below the red zone. If your software allows, enable hardware monitoring to hear how adjustments affect your voice in real-time, similar to how a musician tunes their instrument before recording. Applying EQ tricks can further enhance clarity after leveling.
Mitigate Room and Plosive Effects
Your environment plays a pivotal role. Use acoustic treatment like foam panels or portable vocal booths—think of it as giving your microphone a quiet, reflective space. Additionally, mask plosive sounds (those harsh pops from ‘p’ and ‘b’) with a pop filter—like a windshield for your voice. This simple device prevents sudden bursts of air from causing distortion, ensuring your gain remains stable and your audio crisp.
Test and Tweak Repeatedly
The key is iterative testing. Record several short clips at different gain settings, then listen critically. Notice which setting produces a warm, clean tone without hiss or distortion. When I first adjusted my setup, I took dozens of small tests, gradually narrowing down the perfect gain point. Over time, this practice became second nature, and I could set levels swiftly and confidently. Remember, consistent testing reinforces good habits and leads to professional-sounding results.
Many aspiring streamers and podcasters believe that selecting a high-quality microphone is enough to guarantee professional sound. However, a common misconception is that all microphones perform equally across various setups, which isn’t true. The truth is, most people overlook the critical nuances that influence audio quality, such as proper gain staging, room acoustics, and the specific characteristics of mic types like USB versus XLR. For example, many assume that a USB microphone can match the clarity of a well-calibrated XLR setup, but neglect the importance of preamp quality and room treatment in achieving professional results. Moreover, a persistent myth is that louder gain settings always produce better audio, but in reality, excessive gain introduces hissing and distortions, especially in dynamic environments. Advanced users understand that the real secret lies in nuanced gain adjustments, understanding microphone polar patterns, and tailoring your environment accordingly. A common trap is to rely solely on default settings or hardware presets without fine-tuning for your specific voice or space. According to Bob Katz, a renowned mastering engineer, “Getting the right gain and acoustic environment is more crucial than the choice of microphone itself.” So, are you aware of how your microphone’s frequency response interacts with your voice? Adjusting EQ post-recording can compensate, but it’s far better to optimize at the source. Don’t fall into the trap of thinking ‘more is better’ when it comes to gain; precise, expert adjustments can make a dramatic difference. Are you still making these mistakes? Let me know in the comments! For an in-depth look at optimizing your setup, check out our quick EQ tricks to improve your mic tone and elevate your recordings.
Investing in Durable Tools and Accessories
To maintain high-quality audio over time, selecting reliable equipment is essential. I personally swear by budget-friendly XLR microphones that, with proper maintenance, outperform their pricier counterparts. Additionally, a sturdy audio interface like the Focusrite Scarlett 2i2 ensures clean, hiss-free recordings over months and years. Regularly inspecting cables, connectors, and adapters prevents unexpected failures and preserves sound integrity.
Maintaining Software and Firmware Updates
Keeping your recording software and firmware on audio interfaces or mixers up-to-date is crucial. Updated firmware often fixes bugs, improves stability, and enhances compatibility with new systems. I set monthly reminders to check for updates on my equipment, ensuring I benefit from the latest optimizations. For voice clarity, I recommend periodically revisiting our guide on voice recording tips to refine your setup and stay current with evolving best practices.
Long-Term Results Require Routine Checks
Consistency is the foundation of professional audio. I schedule a quick soundcheck before each recording session, checking for hiss, background noise, or signal drops. Over time, this routine catches issues early, saving me from major rework later. Using tools like distortion analyzers or spectrum analyzers — for instance, ReaFIR in ReaPlugs — can help identify frequency anomalies that degrade clarity. According to the technical documentation from Focusrite, regular calibration of your setup also preserves the high fidelity of your recordings.
How do I maintain my podcast or streaming setup over time?
Beyond hardware and software, environmental factors impact long-term results. Proper room treatment with foam panels, bass traps, and even portable vocal booths like those detailed in our ultimate guide on room acoustics helps sustain clean recordings. Also, avoid neglecting cable management; tangled or frayed cables can lead to signal interference and noise. Routinely test your entire chain—microphone to computer—to catch potential issues early. By integrating these maintenance practices, your setup remains reliable and consistently delivers crisp, professional sound. Bring one of these expert tips into your routine today, such as calibrating your audio interface with the recommended tools, to ensure your voice stays sharp for months or even years.
What I Wish I Knew When I Started Tuning Microphone Gain
One of my biggest lightbulb moments was realizing that proper gain adjustment isn’t just about volume; it’s about crafting a sound that captures my voice’s true essence. I used to crank the gain, thinking louder equals better, only to discover a hiss-filled mess. It taught me that subtlety and patience in gain staging are fundamental to professional-quality recordings.
Another lesson was understanding the importance of room acoustics—no matter how good your mic is, a reflective or echo-prone environment can sabotage your clarity. Once I invested in simple acoustic treatments and learned to position my mic carefully, the difference was night and day, demonstrating that environment is just as critical as hardware adjustments.
The third realization was that continuous testing and listening are irreplaceable. I used to set it and forget it, but by regularly revisiting my levels and adjusting as I went, I developed an ear for what sounds professional. This iterative process kept my recordings consistently crisp and vibrant, emphasizing that good audio is an ongoing practice, not a one-time setup.
My Go-To Resources for Perfecting Microphone Gain
For me, the ultimate guide to streaming microphones and voice recording tips is essential—it laid the foundation for understanding how gain interacts with room acoustics and microphone types. Top XLR microphones for professional voice recording helped me choose gear that matched my voice, while quick EQ tricks showed me how post-process adjustments can enhance clarity. These resources collectively empower me to make informed decisions, saving time and enhancing quality.
Believe in Your Voice and Take Action Today
Adjusting microphone gain might seem technical, but at its core, it’s about sharing your authentic voice with confidence. When you invest time mastering gain staging, you’re not just improving audio—you’re elevating your entire content creation journey. Don’t let a simple misstep hold back your message. Embrace learning, experiment relentlessly, and watch your sound transform from dull to dazzling. Your voice deserves to be heard professionally, and now’s the perfect time to refine your setup and unleash your true potential.