Ever had that frustrating moment during a live stream or recording session where your voice suddenly sounds thick, muffled, and just plain muddy? I remember the exact feeling—facing my microphone, expecting crisp vocals, only to be greeted with a garbled mess that made me want to toss my gear out the window. It was a real lightbulb moment when I realized that my audio quality was more about those tiny setup tweaks than expensive gear. Sound familiar?
The Power of Clean, Clear Voice in 2026
In today’s content creation world, your voice is your brand. Whether you’re streaming, podcasting, or recording vocals, muddy audio can sabotage your message and turn off listeners faster than you can say “buffering.” The good news? Fixing muddiness isn’t about spending a fortune or becoming a tech wizard. It’s about making a handful of quick, effective adjustments that can transform your audio. And trust me, I’ve been there—early on, I made the mistake of thinking that more expensive equipment would solve everything. Spoiler alert: it doesn’t. For example, I used to blame my USB mic, but I later discovered that proper positioning and settings could have saved me a lot of headache. If you’re curious about how to get the most out of your gear, check out this guide on why most 2026 streamers are downgrading to USB microphones.
Is Fixing Your Microphone’s Muddy Sound Really Worth It?
When I first started, I thought that if my mic wasn’t expensive, it wouldn’t sound muddy. Turns out, I was wrong. Even premium mics can sound dull without proper setup. I learned this the hard way—by neglecting simple fixes that could have saved my recordings from sounding like I was recording in a tin can. Early on, I believed I needed an elaborate XLR setup, but I discovered that understanding the nuances of microphone placement and room acoustics made all the difference. For a beginner, it can be tempting to think you need a high-end XLR or a specialized podcast mic to sound professional. However, many creators are surprised to learn that you might not even need an XLR to achieve clear vocals—especially if you’re just starting out. Addressing these foundational issues early will save time and money, and get your voice sounding better in no time.
Ready to dive into the five fast fixes that can clean up your muddy voice and make your recordings shine? Let’s get started with straightforward steps you can implement today.
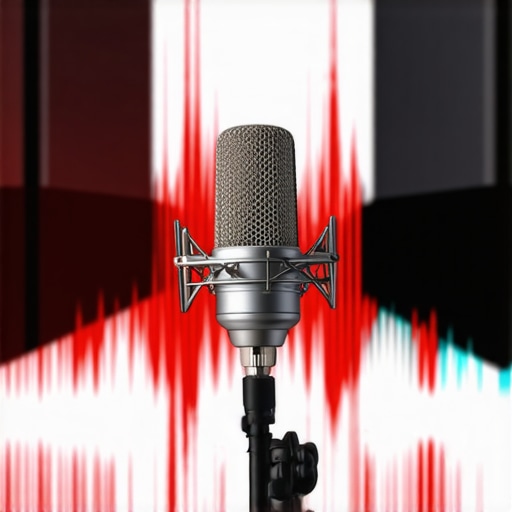
Position Your Microphone Correctly
Think of your microphone like a laser pointer; aim it directly at your mouth, about 2-3 inches away, pointing slightly upward. I once had a messy recording where I placed my USB mic off to the side—sound was dull and muddy. Moving it directly in front of my mouth instantly brightened my voice. For XLR microphones, use a boom arm or a low-profile mount to keep the mic steady at this position; this prevents unwanted handling noise and maintains consistent sound quality. Proper placement minimizes room reflections and captures your voice clearly, crucial for eliminating muddiness.
Adjust Your Gain and Input Levels
Setting the right gain is like turning the volume of a radio—turn it too high, and you get distortion; too low, and your voice sounds weak. For USB mics, access your computer’s sound settings or microphone control panel; set the gain so your peaks don’t cause clipping, usually indicated by a red light or digital meter. For XLR setups, your audio interface most likely has gain knobs—test by speaking normally and watch the meters. My early mistake was setting gain too high on my XLR interface, causing harsh sounds. Dialing it down and doing a quick test recording dramatically improved clarity, reducing muddiness caused by overly hot signals.
Optimize Your Room Environment
Your environment plays a massive role—think of your room as the acoustics lab. Use soft furnishings, rugs, or foam panels to absorb reflections; this prevents sound waves from bouncing around and creating a muddy, echoey mix. I used to record in a bare room and thought my mic was to blame, but adding a few DIY foam panels transformed my recordings. For quick fixes, place a duvet or blankets behind and around your mic to dampen room echoes. Remember, a controlled environment ensures your microphone captures pure vocal signals.
Choose a Microphone That Fits Your Needs
Not all mics are created equal, and choosing the right one can save you headaches. For example, dynamic mics like the Shure SM7B excel at rejecting background noise, making them ideal for noisy rooms—perfect for muddy vocals. Meanwhile, some USB microphones offer plug-and-play simplicity with decent clarity—check out why streamers prefer USB. Your choice impacts your final sound, so pick a mic that balances your environment, budget, and voice type.
Use Equalization to Clean Up the Sound
After recording, apply a quick EQ tweak to reduce muddiness. Focus on cutting around 200-400Hz, where boomy sounds linger, and boost the presence range (4-6kHz) for clarity. I often use simple audio editing tools and compare before-and-after clips; this step makes a noticeable difference. If you’re unsure, check out easy EQ tricks designed for 2026 to get started.Even seasoned creators sometimes fall for common myths about microphones. Many believe that an XLR setup automatically guarantees superior sound, but the truth is far more nuanced. In reality, many creators overinvest in complex setups without mastering the fundamentals—like proper placement, room acoustics, or gain staging. This oversight often results in muddy or harsh audio, regardless of the mic’s price tag. Conversely, some streamers think USB microphones are inherently inferior, yet with the right environment and settings, they can deliver professional-quality recordings — check out why most 2026 streamers are downgrading to USB microphones for a full breakdown.
A common trap is assuming that equipment alone will elevate your audio. The real magic lies in mastering your gear’s nuances. For example, even a high-end XLR microphone can produce dull sound if placed incorrectly or if your gain is set too high, causing clipping and distortion. Advanced users often neglect the importance of room treatment or proper gain staging, which can severely compromise audio clarity. An insightful study from audio expert Ethan Winer emphasizes how acoustic environment affects vocal quality more than the microphone’s quality itself. So, instead of focusing solely on gear upgrades, invest time in understanding microphone dynamics, gain control, and acoustics.
Ever wondered about the best choice for a professional broadcast voice versus a casual streamer setup? It’s not just about XLR versus USB. Dynamic mics, like the best XLR microphones in 2026, excel at rejection of background noise—crucial in noisy environments—while condenser mics might pick up every ambient sound, muddying your vocal. Choosing the right microphone depends on your specific recording environment, not just budget or reputation. Remember, the “best” mic is the one that matches your room, voice, and workflow.
Are you still falling into the trap of believing that expensive gear alone can fix poor recording habits? Mastering the nuances—like mic placement, room treatment, and gain management—will dramatically improve your sound quality. So, before rushing to upgrade your microphone, consider these advanced pointers. Have you ever fallen into this trap? Let me know in the comments!
Maintaining a reliable microphone setup is crucial to ensure your voice recordings and streams stay crisp and clear over time. One of the most effective ways to do this is to invest in toolkits that help you troubleshoot and fine-tune your gear regularly. I personally rely on a combination of hardware and software to keep everything in top shape.
Invest in Quality Cables and Connectors
First, use high-quality XLR or USB cables, depending on your setup, and replace them periodically. Cheap or frayed cables can cause static, dropouts, or inconsistent volume levels, which deteriorate your audio. For my own studio, I prefer balanced XLR cables for XLR mics because they effectively reduce noise and interference, especially in longer runs. If you’re using a USB mic, ensure your connection isn’t exposed to external electrical interference by avoiding USB hubs or long cables that can introduce signal loss. Checking and replacing cables annually has significantly reduced my static issues and improved long-term longevity.
Regularly Calibrate Your Equipment
Calibration isn’t a one-time task; it’s an ongoing process. Software-based tools like USB microphone calibration guides or dedicated audio interfaces come with gain and EQ settings. I recommend doing a quick calibration session before every recording or streaming session. Adjust your gain levels to prevent clipping, and always set your input levels to match the optimal range—this avoids distortions that cause muddiness or harshness in your voice. Over time, equipment can drift from its ideal settings, so periodic recalibration keeps your audio consistent.
What is the Best Way to Maintain Your Microphone Environment?
Acoustic treatment, like foam panels and bass traps, plays a vital role in maintaining clean sound quality. Even the best microphone will produce muddy recordings if your room introduces echoes or background noise. I’ve found that sealing gaps, positioning my microphone away from reflective surfaces, and using portable reflection filters considerably improve clarity. These low-cost solutions can dramatically extend the usable life of your existing gear by preventing unnecessary stress and wear caused by environmental issues.
Use Monitoring and Recording Software Effortlessly
Stay on top of your setup by utilizing tools such as zero-latency monitoring apps and audio editors to listen to your recordings in real-time. Monitoring helps detect issues immediately rather than after the fact. I regularly review my recordings, especially after software updates or moving to a new environment, ensuring consistent quality. Additionally, software like noise gates and EQ plugins can catch and fix problems before they reach your audience, extending the life of your microphone and saving on costly repairs or replacements.
Plan for Upgrades and Long-Term Improvements
As technology evolves, so should your toolkit. The trend toward affordable USB microphones with integrated noise filtering (like tested models for 2026) suggests that future-proofing your setup may involve blending hardware and smart software. Keep an eye on firmware updates, new connectors, or modular components that can extend your current equipmentâs lifespan. Regularly revisiting your setup ensures it remains effective, even as your needs or tech standards change.
For best results, I recommend adopting a routine check before each session: test your connections, calibrate your input levels, and ensure your environment is acoustically optimized. Consistent maintenance not only prolongs hardware life but also guarantees that your audience always experiences your content at its best. Want to take a step further? Start by testing your gain staging today with the tip from gain staging guide—it’s a quick win for clearer, more professional audio output.
The Unsuspected Truths About Microphone Magic
One lesson I wish I had grasped earlier is how crucial microphone placement is—it’s often the difference between muddy and crystal-clear vocals, yet many overlook this step. I once believed my expensive microphone would automatically deliver quality, but manual adjustments and understanding mic directionality changed my results entirely. Additionally, neglecting room acoustics cost me countless hours of tweaking; a simple DIY reflection setup transformed my recordings and saved money. Lastly, I learned that consistent gain staging prevents muddy sounds and clipping—small, deliberate check-ins make a big impact. These lessons reveal that mastering fundamental setup principles beats rushing to upgrade equipment every time.
Toolbox for Sound Success in 2026
Amongst my most trusted resources are the comprehensive guides like the ultimate guide to XLR and USB microphones. I rely on this article explaining why many streamers prefer USB, which debunks myths and clarifies choices based on actual environment and goals. For quick fixes, tools to eliminate static and strategies to combat echo have been game-changers. These resources combine technical depth with practical advice, making them essential companions for any creator seeking professional-quality sound.
Make Noise, Not Worry: Your Voice Matters
Remember, your voice is your power—embrace the process and don’t fear the learning curve. Consistent experimentation and incremental improvements will lead to consistently better recordings. The journey to perfecting your voice setup is ongoing, but with patience and the right tools, you’ll see remarkable progress. Your voice deserves to be heard with clarity and confidence—so go ahead, take that first step today, and let your authentic sound shine through. The future of your content creation starts now—why not make every word count?