I remember the frustrating moment when I hit record for an important podcast episode, only to realize that my voice sounded muffled and distant. The silence in my home studio was deafening—not because of lack of noise, but because of poor microphone setup. It was a lightbulb moment for me: even the best voice can be lost in translation without proper microphone techniques. If you’ve ever been there, fumbling with your gear, wondering why your audio doesn’t sound professional—you’re not alone. Many home studio creators face the same challenge: mastering the art of microphone setup to achieve crystal-clear sound, especially in 2026 when audio quality standards are higher than ever.
Why Your Microphone Setup Can Make or Break Your Audio in 2026
As someone who’s spent years experimenting, I can tell you that the right microphone tips transform your recordings. You might have a top-tier XLR microphone, but if it’s not set up correctly, your sound will suffer—causing recordings to sound dull, muddy, or overly harsh. Especially in silent home environments, passive noise issues and technical glitches can sabotage your audio quality. According to research, poor microphone placement and inadequate gain settings are among the biggest culprits for unwanted noise and distortion—yet they’re easily fixable with a bit of expert guidance (source). So, what can you do to ensure your microphone performs at its best and your voice truly shines in the quietest conditions?
Is It Worth Investing in Pro Microphone Tips When You’re Just Starting?
This is a common fear I hear from beginners: “Will mastering these tips really make a difference?” Early on, I made the mistake of ignoring basic setup principles. I thought just plugging in would do—until I realized audio quality isn’t about the gear alone, but how you use it. Spending a little time learning from experts has saved me countless recording sessions and retakes. Proper technique and understanding can turn even an affordable microphone into a studio-grade experience. If you want your voice to cut through the silence like a professional, mastering these four pro tips is essential—let’s dive into how they can revolutionize your setup and make every recording count in 2026.
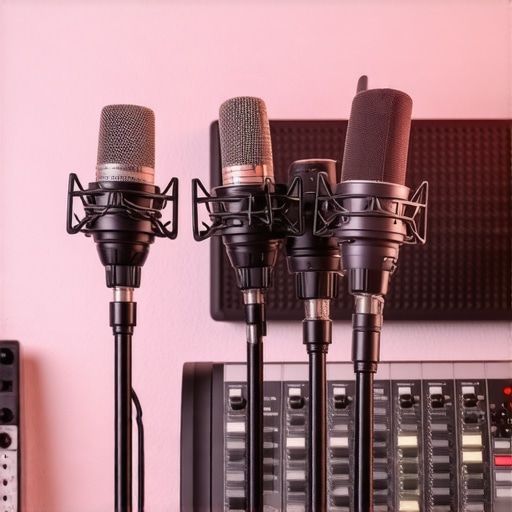
Proper Microphone Placement
Place your microphone correctly to capture your voice clearly. For a USB microphone, position it about 6-12 inches from your mouth, slightly below speaking level, to avoid plosives. With XLR microphones, use a boom arm or desk stand to keep the mic steady and at a consistent distance. I once set up my first XLR mic on a cluttered desk, resulting in inconsistent sound. After switching to a boom arm and positioning it at mouth level, my recordings instantly became more professional, demonstrating the importance of deliberate placement.
Optimize Your Gain Settings
Adjust the gain on your audio interface or mixer to prevent clipping and background noise. For USB mics with auto-leveling (like many 2026 models), check if the software allows manual gain control. For XLR setups, start with gain at 12 o’clock and increase gradually while speaking at normal volume. I recall testing a new interface by slowly increasing gain until I heard unwanted hiss, then dialing back just enough to keep my voice clean. This fine-tuning is essential for a crisp, clear sound.
Use the Right Accessories
Invest in a pop filter or foam windscreen to reduce sibilance and popping sounds. For XLR mics, I once used a DIY foam cover, but a proper pop filter made a noticeable difference. When streaming or recording, a shock mount can prevent vibrations from desk noises. I remember recording in a lively room, and after attaching a shock mount, the background vibrations vanished, enhancing clarity.
Control Room Acoustics
Minimize reflections and echoes by treating your space. Bookshelves, blankets, or foam panels absorb sound waves. I initially recorded without any treatment, resulting in a muddy tone. Adding heavy curtains and a few foam panels improved my speech intelligibility instantly. Even in small rooms, strategic placement of soft materials can make your voice resonate professionally.
Test and Refine Your Setup
Consistently test your system by recording short snippets and listening critically. Use headphones to monitor in real-time, so you catch issues like background noise or harsh sibilance. I once recorded an hour-long episode, only to realize mid-way that my mic was picking up keyboard clicks. After repositioning and adjusting levels, my next take sounded infinitely better. Regular testing ensures your setup remains optimized for high-quality output.
Implement Noise Reduction Techniques
Keep ambient noise to a minimum—turn off fans, close windows, and silence phones. Use noise gates or specific soundproof hacks like hanging blankets around your mic area. For example, I once used a noise gate plugin during editing, which cut out background hums that weren’t audible during recording. Combining physical quieting measures with software tools yields the best results for a pristine sound.
Many enthusiasts assume that choosing between a USB microphone and an XLR setup is just a matter of budget or convenience, but the real nuances often go unnoticed. A common misconception is that modern USB mics are universally plug-and-play, negating the need for advanced setup knowledge. In reality, without understanding detailed settings like gain structure or internal preamp quality, you might end up with audio that sounds thin, harsh, or cluttered, even with high-end models. Meanwhile, some believe XLR microphones always deliver superior sound quality, yet neglect the importance of proper wiring, grounding, and room acoustics—factors that can cause humming, buzz, or muddy recordings. These oversights can sabotage what appears to be professional gear, leading to frustration and costly retracking.
Tools I Trust for Consistent Performance
To keep my microphone gear running smoothly, I rely on high-quality contact cleaner like DeoxIT to maintain XLR connectors and prevent corrosion, ensuring clear audio signals over time. Additionally, I use a portable digital multimeter to regularly check cable continuity and grounding issues, which can cause hum or buzz if left unchecked. For software, I recommend using the latest versions of digital audio workstations (DAWs) like Reaper or Audacity, which offer detailed gain monitoring and noise reduction tools that are crucial for long-term maintenance.
Regular Inspection and Calibration
Set a quarterly schedule to visually inspect all cables and connectors for wear or damage, replacing any that show signs of corrosion or fraying. I also calibrate my audio interface’s gain levels periodically, referencing benchmark recordings to ensure consistent sound quality. Incorporating routine checks prevents small issues from snowballing into major problems, keeping your recording environment reliable and professional.
Upgrading Tools for Better Automation
As technology advances, so do the tools that help us maintain our setups. An example is the use of AI-powered calibration software that adapts to changing room acoustics, automatically adjusting gain and EQ settings during recordings. These tools are predicted to become standard by 2028, allowing creators to focus more on content rather than technical tweaks. For now, I suggest experimenting with plugins like iZotope RX suite, which can automatically identify and repair issues such as sibilance or background noise, prolonging the lifespan of your equipment by reducing unnecessary wear caused by over-manipulation.
How do I keep my microphone setup working long-term?
Ultimately, maintaining your microphone and audio gear involves a combination of regular physical inspections, using the right cleaning and testing tools, and staying updated with compatible software. Establishing a maintenance routine prevents unexpected failures and ensures your voice remains clear and professional for every stream or recording. Remember, staying proactive is key to long-term success—so schedule your quarterly check and start using a contact cleaner today.
If you’re serious about future-proofing your setup, consider integrating AI-based calibration tools into your workflow, which can adapt to environmental changes automatically and extend the lifespan of your gear.
The Hardest Lesson I Learned About Microphone Setup
One of the most profound realizations I had was that even premium equipment can underperform without proper knowledge. I once invested in a top-tier XLR mic, only to find my recordings still sounded mediocre until I learned the importance of consistent placement and gain control. The difference was night and day, proving that understanding the nuances of microphone setup isn’t just for pros—it’s essential for anyone serious about crystal-clear audio in 2026.
The Myth That All USB Mics Are Plug-and-Play
Many newcomers believe that plugging in a USB microphone automatically guarantees studio-quality sound. I used to think so too, until I discovered that manual gain adjustments and room acoustics drastically influence audio clarity, even with modern auto-leveling features. Learning to tweak settings and treat my space made my USB mic sound professional, dispelling the myth that hardware alone can solve every challenge.
The Secret Power of Room Acoustic Treatments
Initially, I thought a good microphone was all I needed, but I overlooked the room’s influence. After adding soft furnishings and strategic placement of soundproofing materials, my voice recordings gained warmth and clarity. Small adjustments in my environment dramatically improved my sound, showing that mastering mic techniques also means mastering room acoustics in 2026.
Curated Resources That Transformed My Approach
I rely on expert guides for troubleshooting noise issues, which have saved me countless hours. The professional tips in these articles helped me refine my setup, especially on gain calibration. Using tools like recommendation lists for gear ensures I invest wisely. These resources have become my go-to for sustained audio quality improvements.
Embrace the Challenge and Elevate Your Voice
Your journey towards mastering microphone techniques in 2026 can truly transform your content. Remember, every expert started with basic knowledge and made mistakes along the way. By consistently testing, learning, and refining your setup, you unlock the potential to produce professional-grade audio that resonates with your audience. Now is the time to take action and elevate your voice above the silence.
What part of your microphone setup do you find most challenging? Let me know below and start your path to better sound today!