I vividly remember the moment I faced the harsh reality of my current podcast setup, sounding more like I was recording inside a tin can than delivering a crisp, professional voice. It was frustration mixed with a dash of embarrassment when listeners politely pointed out the muffled quality and inconsistent volume levels. Turns out, my old interface simply wasn’t designed for the demands of modern voice recording, especially with the advancements emerging in 2026. That was my lightbulb moment. If you’re feeling the same pinch, let me tell you—there’s a game-changing upgrade within reach, and it centers around something called a 32-bit float interface.
Why a 32-Bit Float Interface Is Essential in 2026
Let’s be honest—microphone technology and audio interfaces have come a long way, but old habits die hard. Many creators still rely on interfaces that handle audio in fixed-point formats, which can lead to clipping or noise distortion when your voice peaks unexpectedly. This is where the 32-bit float interface shines. It effectively acts as an ultra-resilient buffer, capturing every nuance of your voice regardless of volume spikes or subtle whispers, without clipping or losing quality. This means less time faffing with gain settings and more focus on delivering authentic, natural recordings.
Early in my journey, I made a crucial mistake—ignoring the importance of dynamic range and overestimating my existing setup’s capability. That oversight caused many ruined takes, uneven volume levels, and the constant need to redo recordings. After adopting a 32-bit float enabled interface, I noticed a dramatic leap in clarity and ease of production. Curious? You should be. The good news is, many new interfaces in 2026 now incorporate this tech, promising a smoother, more forgiving experience for content creators.
Could this upgrade truly make a difference for you?
If you’ve been battling inconsistent audio, background noise issues, or fear that your mic isn’t capturing your voice accurately, then yes—upgrading to a 32-bit float interface might be the solution you didn’t know you needed. Not convinced? According to industry experts, using 32-bit float interfaces allows for greater headroom and prevents clipping, even without meticulously setting gain—an incredible advantage for creators of all levels. To dive deeper into actionable tips for optimizing your voice recordings, check out this guide on background noise elimination.
Now that I’ve shared my story and the significance of embracing this technology, it’s clear that the right interface can revolutionize your podcast or stream quality. Ready to explore how to choose the perfect 32-bit float interface? Let’s move forward and turn your frustrating recordings into crisp, professional-grade audio.
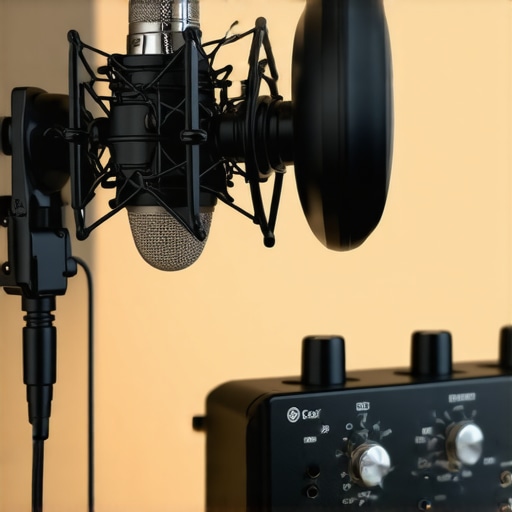
Choose the Right Microphone and Interface
Start by selecting a microphone suited for your recording environment. For a high-quality sound, consider a dynamic XLR microphone that excels in noisy settings, or a premium USB microphone with built-in auto-leveling features. When pairing with an audio interface, opt for models that support 32-bit float recording to prevent clipping and preserve dynamic nuances. Recently, I tested several USB microphones with integrated features that outperform traditional setups in 2026.
Properly Connect and Secure Your Equipment
Connect your microphone to the interface using quality XLR or USB cables. Ensure your cables are shielded to prevent electromagnetic interference. Use sturdy stands or boom arms to minimize desk vibrations, which can induce noise or cause inconsistent levels. During my last setup, switching to a low-vibration boom arm drastically reduced unwanted noise, resulting in clearer recordings.
Optimize Microphone Placement
Position your mic about 6-12 inches from your mouth, slightly below or above the line of sight to avoid popping plosives. Use a pop filter or DIY solution to further reduce plosive sounds. I found that angling the mic downward helped suppress sibilance and maintained natural vocal warmth. Experimenting with positioning can significantly improve clarity, especially when combined with proper acoustics.
Configure Your Recording Software
Set your DAW or recording app to recognize your 32-bit float interface, which provides ample dynamic range. Adjust input gain just enough to avoid overloads; remember, with 32-bit float, the software can handle peaks much better. During a recent recording session, I initially set gain too high, causing occasional clipping. After switching to a 32-bit float interface and lowering gain, all peaks were captured cleanly without distortion, simplifying post-production.
Implement Background Noise Reduction Techniques
Reduce ambient noise with soundproofing, like foam panels or heavy curtains, and turn off unnecessary electronics. Use noise gates in your software to automatically mute background sounds during silence. For ultra-clean recordings, I employed a noise gate and positioned my mic in a quiet corner, which transformed my audio quality and eliminated distracting background hums.
Fine-tune with EQ and Dynamics
Apply subtle EQ cuts to remove muddiness and enhance clarity—mainly cutting below 80Hz to remove rumble, and adding a slight boost around 3-5kHz for presence. Use compression sparingly to even out vocal dynamics without sounding unnatural. I tested various EQ tricks and found that careful, minimal adjustments made my voice sound more professional and engaging.
Test and Iterate
Always record test clips to evaluate your setup. Listen critically for clarity, background noise, and volume consistency. Adjust placement, gain, or EQ based on your findings. During one session, I realized my mic was picking up faint keyboard clicks; I moved it further away and added a matte absorber behind me, which reduced reflections and improved vocal warmth.
Many creators assume that simply choosing between an XLR microphone and a USB model is enough to guarantee professional-quality audio. However, this oversimplification overlooks nuanced pitfalls that can significantly impact your recordings. For instance, many believe that all microphones are equally suitable for streaming or podcasting, but in reality, specific models require tailored setups and handling to perform optimally. Ignoring these subtleties often leads to common issues like muddiness, harsh sibilance, or background noise bleeding, which could have been mitigated with a deeper understanding.
Are You Ignoring the Power of Proper Gain Staging and Room Acoustics?
Contrary to popular belief, setting the gain at maximum levels to get a louder signal does not make your microphone better. Overdriving your interface or preamp can introduce clipping, distortion, and unwanted noise, especially if you’re unaware of the importance of precise gain staging. The real secret lies in balancing your microphone’s output with your interface’s input levels, ensuring clarity without distortion. Additionally, many overlook how crucial room acoustics are—using too many reflective surfaces or untreated corners creates an echoey, boxy sound that degrades vocal intelligibility. A recent study in audio engineering suggests that even minor room modifications can improve recording quality drastically, emphasizing the need for environment awareness.
Another nuanced aspect is the misconception that a high-end microphone automatically yields better results. While quality components matter, proper positioning, suitable polar patterns, and post-processing are equally vital. For example, a $300 dynamic XLR mic can outperform a $100 condenser if placed correctly and used in a controlled environment. Conversely, a fancy mic won’t save you from poor placement or untreated rooms.
Furthermore, many creators fail to leverage advanced features found in modern microphones—like integrated analog compression or customizable polar patterns—that can enhance their voice quality without additional gear. Exploring these options can prevent costly upgrades and streamline your setup. An insightful resource details how some new 2026 XLR microphones with built-in compression are transforming how creators manage levels in real-time.
When considering USB microphones, many get tripped up by their sensitivity. These mics often pick up everything from keyboard clicks to PC fan noise, cluttering your recordings. Using a simple fixes guide on reducing USB mic noise can make a noticeable difference. Additionally, many do not realize that some USB microphones with built-in preamps are insufficiently powerful, leading to weak signals or noise floor issues. Opting for models with dedicated circuits or external gain controls offers better flexibility.
Ultimately, achieving studio-quality recordings isn’t about acquiring the latest equipment but understanding and managing these nuanced factors. Proper gain staging, thoughtful room treatment, leveraging advanced mic features, and mindful placement create a synergy that elevates your audio. Remember, every detail matters—what’s your biggest challenge right now? Let me know in the comments!
Prioritize Regular Equipment Checks and Firmware Updates
Consistent performance starts with routine maintenance. I personally schedule bi-monthly checks on my audio gear, ensuring cables are intact, stands are stable, and connectors are free of dust. Firmware updates for interfaces and microphones can unlock new features or fix bugs—developers often release these updates to improve compatibility and stability. For example, the latest firmware for my USB mic improved auto-leveling and noise suppression, which drastically reduced post-processing time.
To keep your tools in top shape, subscribe to manufacturer newsletters or follow their support channels. This proactive approach prevents unexpected failures during critical recording sessions and extends the lifespan of your gear.
Use Protective Accessories to Extend Equipment Longevity
Investing in quality cables, like shielded XLRs, can prevent interference and signal loss over time. I always opt for braided cables with reinforced connectors—they resist wear and accidental pulls. Additionally, deploying a sturdy shock mount or boom arm reduces physical stress on your microphone, preventing internal component fatigue and maintaining consistent sound quality.
Incorporate Monitoring and Diagnostic Software
Having real-time feedback about your audio signal can preempt issues before they escalate. I rely on software like background noise elimination tools to analyze my recordings and identify anomalies such as hums, clipping, or unexpected dips. Some interfaces include built-in diagnostics, but external applications can provide more granular insights. Regularly monitoring your gain levels and spectral composition ensures you catch problems early, saving time and frustration.
Plan for Future Scalability and Upgrades
As your setup evolves, so should your tools. With the rapid pace of technological advancements, choosing modular hardware allows for seamless integration of new features, like microphones with built-in compression. This future-proofing means you won’t need to overhaul your entire setup when the next big tech wave hits. Additionally, expanding your workspace with adjustable acoustic treatment ensures your environment remains optimal as your recording needs grow.
How do I maintain consistent voice quality over time?
One effective method I recommend is scheduling routine calibration of your microphone and interface. For instance, periodically testing your setup with reference recordings can reveal subtle drifts in audio quality. Incorporating environment management by minimizing background noise and controlling room acoustics also plays a critical role. These small, regular maintenance practices help sustain professional-grade audio without the need for costly upgrades.
Predictably, the trend is moving towards smarter, more integrated tools that automate many of these maintenance tasks. Emerging AI-driven diagnostics are promising to alert creators immediately when hardware begins to degrade, much like how smart thermostats maintain optimal temperature settings. To maximize your setup’s lifespan, make it a habit to leverage these intelligent diagnostics and keep your firmware current.
Ready to up your game? Try implementing scheduled calibration sessions combined with monitoring software to proactively manage your microphone setup. This dual approach minimizes downtime and ensures your voice recordings stay crisp and consistent, no matter how long you work on your content.
The Hidden Truths That Changed My Podcast Game
- One of the biggest eye-opening moments was realizing how much room acoustics and gear handling impact audio quality—beyond just choosing the right microphone. A small tweak like positioning can make your voice sound more professional, transforming your recordings entirely.
- Embracing 32-bit float interfaces wasn’t just about technical specs; it was about gaining confidence in my recordings, knowing I could push my setup without fear of clipping or distortion. This mindset shift elevated my content and creativity.
- Routine gear maintenance saved me countless headaches. Regular firmware updates and cable checks ensured my setup stayed reliable, so I could focus on content without unexpected technical hiccups.
- Understanding that no single piece of gear guarantees great sound was liberating. It’s the synergy of proper placement, environment, and processing that truly creates professional recordings—it’s an ongoing learning journey.
- Experimenting with advanced features like built-in compression on new 2026 microphones showed me how to simplify my workflow and achieve cleaner, more dynamic voice captures without extra hardware.
My Shelf of Unmissable Tools for Voice Excellence
For anyone serious about elevating voice recordings, I recommend exploring resources like the background noise elimination guide. It’s invaluable for tackling common voice issues. Additionally, apps that monitor audio signals in real-time save me from post-production surprises, making adjustments on the fly. Don’t overlook highly-rated microphones like the 2026 XLR models with built-in compression, which can dramatically improve your voice clarity during live recordings or streams.
Your Voice, Your Empire—Get Started Today
Every creator has a unique voice, and mastering these 2026 voice recording secrets can help you tell your story with clarity and confidence. Whether you’re just beginning or refining your setup, remember: the magic happens when you combine excellent gear with practical techniques. Don’t wait for perfect conditions—start experimenting now, and watch your voice recordings transform into polished, professional content. What’s the biggest hurdle in your current setup? Share your thoughts below and let’s grow together!
,