You know that sinking feeling when you listen back to a new voice recording, and instead of crisp, clear vocals, all you hear is a muffled, distant sound? I’ve been there more times than I can count, frantically trying to adjust settings or shouting into my mic, hoping it’ll fix itself. That
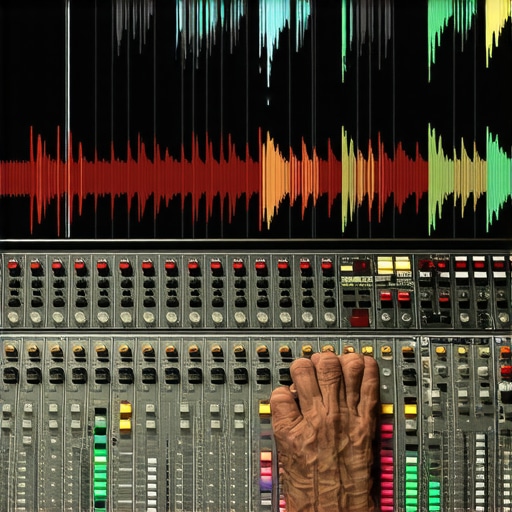
Choose the Right Microphone for Your Setup
Start by assessing whether a USB microphone or an XLR microphone suits your needs. USB mics are plug-and-play, perfect for beginners or minimal setups. In contrast, XLR microphones offer superior quality and flexibility but require an audio interface or mixer. Remember, many top streamers are switching to USB for simplicity, but understanding your core requirements makes all the difference.
Proper Microphone Placement and Positioning
Place your microphone about 6 to 12 inches from your mouth, slightly off-center to avoid plosives. Use a desk stand or boom arm to position it consistently. During a personal session, I once spent an hour adjusting my mic until I found the sweet spot that minimized sibilance and popping sounds. A well-positioned mic captures your voice clearly and reduces background noise, making editing easier later.
Improve Room Acoustics for Cleaner Sound
Rooms with bare walls often create echo and reverb. To mitigate this, avoid placing your mic in a reflective space. Use soft furnishings, rugs, or acoustic panels strategically. For a quick fix, I replaced foam panels with plush blankets and moved my desk closer to my wall, which cut down echo and improved clarity instantly. For more effective soundproofing ideas, check soundproofing alternatives.
Set Gain Levels for Natural Voice Quality
Adjust your microphone’s gain so your voice levels peak around -6 to -12 dB on your recording software. Too high, and you’ll get clipping; too low, and your audio becomes noisy. Using a test recording, I increased gain gradually until I heard slight distortion, then backed off slightly. Many devices have auto-gain features, but manual adjustments give you control—you’ll find your voice sounds more natural.
Apply Equalization to Shape Your Voice
Equalizing your audio helps enhance clarity and remove muddiness. Boost frequencies around 3-5 kHz subtly to improve intelligibility, and cut bass frequencies below 80 Hz to eliminate rumble. If your voice sounds tinny, try reducing high frequencies slightly. For a quick tune-up, I used simple EQ presets and found that I achieved a richer tone without any complex plugins. Learn more about effective EQ tricks at these quick fixes.
Filter and Noise Reduction Tools
Use a noise gate or gate threshold to cut out background hums and room noise during silent parts. A noise suppression plugin can also reduce fan noise or keyboard sounds. During my latest recording, I set up a noise gate and noticed a significant decrease in distracting sounds. Experiment with thresholds to maintain a natural sound. Many editing tools offer built-in noise reduction—mastering this step makes your voice the focus, not the environment.
Test and Refine Your Setup Regularly
Consistently test your microphone setup by recording short clips and listening on different devices. Small adjustments to mic placement, EQ, or gain can drastically improve quality. I dedicate time weekly to tweak my settings based on room changes or equipment updates. Also, keep handy resources like these testing guides to ensure your setup remains optimal. Equipment and room acoustics evolve, so regular refinement is key to professional-sounding voice recordings.Many enthusiasts believe that choosing the most expensive microphone guarantees professional sound quality, but the truth is more nuanced. In reality, most people get caught up in misconceptions about voice recording gear, especially when it comes to streaming microphones and the differences between USB and XLR setups. For instance, while high-end XLR microphones offer excellent clarity, they can be overkill for beginners if room acoustics and placement aren’t properly managed. Conversely, many underestimate the potential of budget-friendly options and overlook the importance of proper room treatment and gain staging.
Are Higher-Quality Microphones Always the Better Choice for Streaming and Podcasting?
The answer depends on your environment and skills. An expensive microphone won’t compensate for poor acoustics or improper positioning. Additionally, there’s a common myth that USB microphones are inherently inferior to XLR mics; however, recent advancements have blurred this line, and some USB models now outperform older XLR counterparts in ease of use and sound quality, especially when paired with a good audio interface. Be cautious of the trap of overcollecting gear without mastering basic setup principles, which often results in subpar recordings despite having premium equipment. For advanced users, understanding how subtle factors like capsule design, polar patterns, and internal electronics influence sound can make a significant difference—check this resource for insights on recent trends. Remember, investing in soundproofing, proper gain control, and mastering EQ adjustments often yields better results than merely upgrading equipment. Don’t fall into the trap of assuming that gear alone can fix all recording issues. Instead, focus on refining your technique and understanding the hidden nuances that can elevate your audio quality. Have you ever fallen into this trap? Let me know in the comments.
Keep Your Gear Sounding Fresh with Proper Maintenance
To ensure your voice recordings, streaming quality, and podcast audio stay pristine over time, regular maintenance is essential. Clean your microphone’s grille and capsule gently with a soft, lint-free cloth every few months to prevent dust buildup that can muffle sound quality. Use compressed air cautiously to clear debris from internal meshes, but avoid spraying directly into sensitive components. Investigate and replace worn cables or connectors promptly to avoid signal degradation. For USB microphones, ensure firmware updates are installed, as manufacturers often release performance or stability patches. With well-maintained equipment, you’ll enjoy consistent sound clarity and reduce the need for post-production fixes.
Tools That Make Maintenance Easier
Invest in specialized tools like a small brush designed for microphone capsules or acoustic cleaning swabs. These facilitate gentle cleaning without risking damage. I personally rely on compressed air cans with adjustable nozzles to blast away dust from XLR connectors and internal ports. When it comes to software, keep your drivers updated and, for USB mics with smart features, regularly check for firmware updates via the manufacturer’s platform. For noise reduction and calibration, software plugins such as these recommended tools can help maintain optimal audio input levels, which is especially useful if your environment or hardware undergoes changes.
Long-Term Results Require Consistency and Upgrades
Consistent upkeep translates directly to better long-term results. For example, periodically testing your setup with performance tests helps catch issues early. Likewise, updating your software and firmware, or even replacing aging cables with improved shielded alternatives like those explained in this guide, can prevent signal noise or latency problems. Don’t forget to periodically revisit your room acoustics and mic placement; small tweaks can significantly enhance clarity and reduce background noise, providing a solid foundation for professional-sounding recordings regardless of your evolving setup.
Scaling Your Setup for Growth
As your needs expand—perhaps moving from solo streaming to hosting multiple microphones or integrating into larger studios—your maintenance approach must scale too. Use structured cable management systems to prevent wear and damage over time. Consider installing acoustic panels in strategic positions, as simpler solutions like moving furniture or adding rugs can make quick improvements, similar to what I’ve done in my space. When investing in new equipment, prioritize versatile tools like budget-friendly XLR mics that won’t outgrow your room’s acoustics. Regularly revisit calibration and test the entire system’s performance to maintain top-quality audio for your growing audience.
How do I maintain my microphone setup over time?
Consistent care involves a combination of physical cleaning, firmware updates, cable inspections, and room acoustics adjustments. Schedule quarterly checkups to clean and test your equipment, replacing parts as needed. Using diagnostic software allows you to monitor input levels and signal quality, catching issues before they impact your recordings or streams. For professional results, consider investing in a dedicated audio interface with stable gain controls, as detailed here. Regular practice and proactive maintenance not only extend your gear’s lifespan but ensure your content remains crisp and engaging, encouraging your audience to keep coming back.
What I Wish I Knew About Mic Placement From the Start
Initially, I believed that owning an expensive microphone was enough. Turns out, proper positioning is more critical than gear alone—that lightbulb moment changed everything. Placing my mic slightly off-axis and at the right distance dramatically improved clarity and reduced plosives, proving that technique beats hardware in many cases.
How Room Acoustics Can Make or Break Your Voice Quality
My recordings struggled with echo until I started treating my space with soft furnishings and strategic placement. Tiny adjustments, like moving closer to a wall or adding a blanket, cut down reverb instantly. This taught me that your environment can elevate or diminish your microphone’s potential—don’t overlook it.
My Secret Weapon for Consistent Sound—Regular Fine-Tuning
Scheduling weekly tests and tweaks became a game-changer. Recording short clips and analyzing them on different devices revealed subtle issues I previously missed. Continuous refinement ensures your voice remains professional and polished, turning good recordings into great ones over time.
Why Many Overlook the Power of Proper Gain Control
Adjusting gain levels might seem trivial, but getting it just right can prevent clipping and sibilance, leading to a natural sound. I learned to test and listen carefully, understanding that mastering gain staging is essential for a balanced voice—an underrated skill that pays dividends.
From My Experience: Prioritizing Room and Technique Over Upgrading Gear
It’s tempting to chase the latest mic but investing in room treatment and mastering setup fundamentals often yields better results. For example, many top creators are switching to budget-friendly USB microphones after optimizing their environments. Remember, gear is just part of the equation; your technique and space make the real difference.
Where to Go Next With Your Voice Recording Journey
Explore advanced resources like this guide on popular trends, or experiment with noise reduction techniques from soundproofing tips. Continuously learning and adapting transforms good setups into studio-quality recordings, empowering you to share your voice authentically and confidently.