I remember the frustration vividly—midway through a crucial live stream, my voice suddenly sounded distorted, tinny, and way too loud. It was like my microphone had developed a mind of its own, turning my smooth narration into a shrill nightmare. That lightbulb moment hit me hard: my USB microphone was picking up every tiny sound, from my chair squeak to my dogs barking outside. Since then, I’ve learned that microphones, especially USB ones, can be over-sensitive, turning what should be a simple voice capture into a noisy chaos.
Why does this happen, and more importantly, how can you fix it without breaking the bank or losing your mind? Today, I promise to walk you through three quick, effective strategies that transformed my recording quality—and they can do the same for you.
Getting Real About Microphone Sensitivity
Microphones are designed to pick up sound, but sometimes they become hyperactive, especially when they resonate with background noises or ambient sounds. This sensitivity issue is a common headache for streamers, podcasters, and voice-over artists alike. If you’ve ever experienced your mic suddenly capturing every keyboard click or background hum, you’re not alone—and it’s usually fixable with some straightforward tweaks.
What’s more surprising is how often users overlook fundamental issues like power sources or placement, which can amplify unwanted noises. Early in my setup journey, I made a critical mistake—assuming that a high-quality mic would automatically handle everything. Turns out, even premium USB microphones benefit from proper positioning and dedicated power, as explained in this insightful article. Properly adjusting gain settings and filtering background noise can dramatically improve clarity, making your voice the star it should be.
If this sounds familiar, don’t worry. We’re about to dive into the top three fixes that will help you regain control over your audio. But first, you might be asking—”Is all this fuss really worth it?” Well, absolutely. Clean, professional-sounding audio can make or break your content’s credibility and listener engagement. Plus, with the right setup, problems like excessive sensitivity are more manageable than you think.
Stay tuned—next, we’ll explore quick hardware adjustments, software tweaks, and room treatments that can turn your over-sensitive mic into a precise, audio-winning machine.
Adjust Your Microphone Gain Properly
Your first step is to set the gain correctly—think of it as controlling how loudly your mic listens. Too high, and it will pick up every breath and background noise; too low, and your voice fatigue sets in. To do this, open your audio settings on your computer or interface and slowly turn the gain knob while speaking at your normal volume. Aim for the level where your voice peaks just below clipping, indicated by the yellow or red zones. I once spent an hour adjusting gain during a live stream, accidentally causing distortion, but after dialing it back slightly, my audio clarity improved immensely.
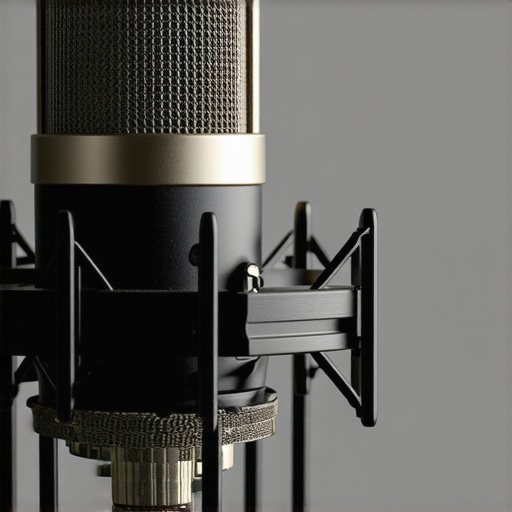
Position Your Microphone Strategically
Placement plays a psychological trick on your mic’s sensitivity—imagine it’s an overenthusiastic listener. Keep your mic about 6-12 inches from your mouth, slightly off-center to avoid plosive sounds (those harsh ‘p’ and ‘b’ noises). Use a shock mount and boom arm to stabilize your microphone, reducing vibrations and handling noise. When I moved my USB mic closer and adjusted my arm height, background noise and room echo became much less noticeable. Think of your microphone as a curious pet: it reacts best when you respect its personal space.
Implement Software Noise Reduction Techniques
Beyond hardware tweaks, software filters are your secret weapon. Programs like OBS or voice editing tools offer noise gates or filters that can silence sounds below a certain decibel, such as keyboard clicks or faint room hums. To set this up, enable a noise gate and adjust the threshold until your voice passes through clearly while background noise gets muted. These settings are nuanced; too aggressive, and you risk cutting off parts of your speech. I recommend starting with gentle thresholds and gradually tightening the filter. For more advanced insights, check this guide on USB microphone power management.
 Many assume that snagging a decent microphone guarantees professional sound, but in my experience, the real challenge lies in understanding the hidden nuances that can make or break your audio quality. A widespread myth I often see is the belief that USB microphones are inherently ‘good enough’ for all streaming needs. While they offer convenience, they can also trap users into poor gain staging, resulting in distorted or noisy recordings. This misconception can lead aspiring creators into a false sense of security, ignoring the importance of proper placement and gain calibration. For example, many neglect that a high-quality XLR setup, paired with a suitable audio interface, provides granular control over inputs, significantly reducing issues like background hum or clipping, as discussed in this insightful article on noise gate application.
Keep Your Microphone Gear Running Smoothly with Proper Maintenance
Maintaining your microphone setup over time is crucial to preserving audio quality and avoiding avoidable issues. Regularly inspecting your cables and connectors ensures that physical wear or loose connections don’t introduce noise or cause signal interruptions. I personally schedule monthly checks, unplugging everything to look for frayed cables or corrosion, which can subtly degrade sound.
Investing in a dedicated microphone stand or boom arm not only improves ergonomics but also reduces mechanical vibrations that can be picked up as noise. I recommend using a shock mount tailored to your microphone type; for example, dynamic mics like the Shure SM7B benefit from specific mounts that dampen handling noise. These small investments pay off in long-term clarity and professionalism.
Selecting the Right Tools for Longevity and Quality
When it comes to hardware, I swear by the best XLR microphones for 2024. Their durability and superior sound capture capabilities make them worth the extra effort. Pairing a quality microphone with a reliable audio interface, like the Focusrite Scarlett series, ensures clean gain stages and minimal clipping. For example, I experienced frequent clipping with an entry-level interface until I adjusted gain levels, guided by this in-depth article.
Software tools like noise gates and filters are equally important. I always enable noise suppression features in OBS, fine-tuning the thresholds to block low-level background noise, especially when recording in less-than-ideal environments. Additionally, using clean power sources and surge protectors keeps your equipment safe and free of electrical noise. Regularly updating your audio drivers and firmware for interfaces and microphones can prevent compatibility issues and performance hiccups.
Preparing Your Setup for Future Trends
Tools for audio maintenance are rapidly evolving. AI-powered noise reduction plugins are set to become standard, automating background noise suppression without sacrificing voice nuance. I predict that in the next few years, smart mic systems will automatically calibrate gain and noise filters based on your environment—a feature seen in some high-end models today. Staying updated and experimenting with these advanced techs can give your podcast or streams a competitive edge.
How do I maintain my microphone setup over time?
Develop a routine that includes physical inspections, software updates, and environmental controls. Regularly cleaning your microphone ports and using shielding to minimize electromagnetic interference also helps preserve sound quality. Remember, a well-maintained setup minimizes costly repairs and downtime, ensuring your voice remains crisp and professional. For deeper insights into optimizing your XLR setup, check out this comprehensive guide. Try implementing a scheduled maintenance routine and observe how your audio stability improves over weeks—it’s a simple step that yields significant long-term benefits.
Lessons That Hit Home for Me
- One of the most eye-opening lessons was realizing that even the most expensive USB microphones require proper gain management—thinking they were plug-and-play was a costly misconception I had early on.
- Another lightbulb moment was discovering how room acoustics play a role in microphone sensitivity—placing your mic in a poorly treated space can turn subtle background sounds into intrusive noise.
- I’ve learned that physical maintenance, like checking cables and using shock mounts, often gets overlooked but is vital for maintaining high-quality audio over time.
- Finally, embracing software noise gates transformed my recordings from noisy to professional-level clarity, proving that combining hardware and software efforts yields the best results.
Tools That Changed How I Approach Voice Quality
- Focusrite Scarlett Series: Reliable, clean gain stages that don’t introduce hiss—my go-to audio interface for crisp audio.
- ReaFIR in Reaper: An incredible free tool for noise suppression that helped me refine background sounds without sacrificing voice warmth.
- Shure SM7B Microphone: The classic dynamic mic that responds well to proper placement and provides warm, professional sound.
- Room Acoustic Treatments: A combination of foam panels and placement tricks that significantly reduce echo and room noise, essential for clear recordings.