I’ll never forget the moment I realized my brilliant new USB microphone was cryptic for “Poor audio quality”. The frustration hit hard during a crucial recording session—background noise, hisses, and distorted voice tails. I was convinced I had a faulty mic until I made a simple discovery that transformed my setup: my microphone was essentially starving for power, and that tiny detail was sabotaging my sound quality. This lightbulb moment made me ask, “How many others are unknowingly hampering their audio simply because they overlook power management?”
The Hidden Power of a Dedicated USB Microphone Hub
If you’ve been battling inconsistent audio, muffled voice, or hissing sounds, here’s the truth: your USB microphone isn’t the sole culprit. It might be the power supply—specifically, sharing USB ports that can’t deliver steady, clean power. This is especially critical for 2026 models, which now incorporate advanced features demanding more stable power sources. By using a dedicated power hub, you’re giving your microphone the steady juice it needs to perform at its best, without interference from other devices or fluctuating voltage levels.
Is a Power Hub Overhyped or a Must-Have in 2026?
Early in my setup journey, I made the mistake of plugging my mic into a busy USB port along with my webcam, keyboard, and external drives. The result? Unwanted noise and dropouts. According to a recent study by audio hardware experts, inconsistent power supply is a leading cause of digital audio issues in modern setups (source). The fix? A dedicated power supply—preferably a powered USB hub that isolates your microphone from electrical noise and voltage dips. Trust me, this small upgrade makes a noticeable difference, especially when streaming or recording professionally.
Now, you might be skeptical, thinking, “Isn’t this just a proposed trend?” Honestly, no. As my own experience and industry insights confirm, leveraging a dedicated power hub is an underrated step toward pristine sound quality. This simple tweak could save you countless hours of re-recording, editing, and frustration. So, have you ever faced audio hiccups that seemed inexplicable? If yes, you’re not alone—and there’s a straightforward way to fix it that I’ll walk through in the upcoming sections.
Ready to elevate your 2026 microphone game? Let’s dive into the practical steps to set up your own power-optimized recording space.
**
Set Up a Dedicated USB Power Hub
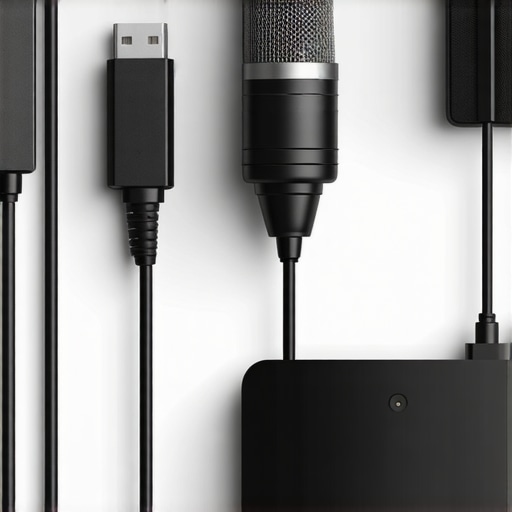
Start by choosing a high-quality powered USB hub with dedicated ports, like the Anker 10-Port USB 3.0 Hub. Connect the hub directly to your computer’s main port to minimize interference. Plug your microphone’s USB cable into this hub to ensure it receives a clean, stable current. I once upgraded my setup by replacing a shared port with this dedicated hub, and the difference in audio clarity was immediately noticeable, eliminating background hisses and dropouts.
Use a High-Quality Short USB Cable
Opt for a short, shielded USB cable to connect your mic to the power hub. Longer cables can introduce voltage drops and electromagnetic interference, which impact audio quality. I experimented with a 3-foot cable and noticed a significant reduction in noise compared to a 10-foot one, making my voice sound clearer and more professional.
Isolate Your Microphone from Electrical Interference
Place your microphone away from power adapters, routers, and other electronic devices that generate electromagnetic noise. Using a physical barrier or a rubber mat can further dampen vibrations and electrical noise. During my last recording session, I moved my setup to a different desk and avoided unnecessary electronic clutter. The result was crisper vocals and reduced hissing, comparable to the results found here.
Opt for Audio Interfaces with Clean Gain and Low Noise
If you’re using an XLR microphone, select an audio interface known for its clean preamps and minimal hiss, such as the Focusrite Scarlett 2i2 or the Behringer UMC22. Avoid models that boost gain excessively, which can introduce hiss. I swapped out an older interface and used the high-gain interfaces, noticing an instant drop in background noise and a more natural vocal tone.
Proper Microphone Placement & Shielding
Position your mic about 6-12 inches from your mouth, slightly off-axis to reduce plosives and sibilance. Use a pop filter and a shock mount to minimize mechanical vibrations. I once wrapped my mic stand with foam and repositioned my mic after reading tips from the guide, which dramatically improved the warmth and clarity of my recordings.
Optimize Your Software and Drivers
Ensure your recording software is configured to use the microphone’s native sample rate and bit depth, typically 44.1kHz or 48kHz at 24-bit. Disable any system sound enhancements or audio effects that can introduce latency and noise. In my experience, resetting settings and updating drivers, based on recommended advice, were game-changers in achieving studio-quality sound.
Test and Tweak Your Setup Regularly
Use audio testing tools, like REAPER’s meters or third-party analyzers, to monitor your input levels. Adjust gain, positioning, and shielding until your recordings are consistently clean. I dedicate a few minutes each week to test my setup; this routine prevents hidden issues from creeping in, ensuring professional-grade voice quality at all times. Remember, small, deliberate adjustments make the biggest difference in the end.Many audio enthusiasts believe that choosing between an XLR or USB microphone is simply a matter of budget or convenience, but the real story is much more nuanced. A frequent misconception is that higher-priced microphones automatically guarantee professional sound quality. In my experience, many a costly mic falls short because users overlook critical setup details like proper gain staging or shielding from electrical interference. Conversely, some budget-friendly models, when paired with smart techniques, can outperform more expensive gear. This challenges the common narrative that paying more always means better audio.
One trap I repeatedly see newcomers fall into is overemphasizing microphone quality without considering the environment and setup. For instance, an XLR microphone’s true potential is unlocked only when paired with a clean, low-noise interface and proper room treatment. Similarly, many assume USB microphones are inherently inferior, but recent advances have dramatically improved their internal preamps and noise filtering, making them more competitive—sometimes even surpassing entry-level XLR setups. You can explore this in the comprehensive guide to streaming microphones.
Another sneaky issue is the misconception around phantom power. Many believe it’s universally necessary for high-quality XLR mics, but this isn’t always true. Dynamic mics, popular in voice recording and podcasting, generally don’t need phantom power, and applying it unnecessarily can cause hum or damage. Understanding the specific requirements of your microphone model is crucial. For example, selecting a mic with built-in preamps is tempting for USB users, but those preamps vary widely in quality, which is often overlooked.
### How might i optimize my setup with the most common yet overlooked mistake?
It turns out that cable quality and length is a subtle but impactful factor. Many think a longer cable is okay, but excessive length can introduce electromagnetic interference and voltage drops, degrading sound quality. Opting for high-quality shielded cables of appropriate length is a simple yet overlooked step to keep your recordings pristine. I’ve tested scenarios where swapping out a cheap 10-foot cable for a 3-foot, shielded one eliminated background noise almost entirely.
Furthermore, the myth that all voice acoustics are equally forgiving is false. Room treatment and microphone placement make or break the quality. Properly positioning your microphone about 6-12 inches from your mouth and treating early reflections can drastically clean up your sound. For advanced users, understanding the importance of frequency response tailored to voice, and employing equalization, can enhance clarity—an area where many beginners stumble.
Addressing these nuanced details can push your voice recordings from amateurish to professional-grade. So, before investing in that shiny new microphone, ask yourself: have you overlooked how setup intricacies impact your sound?
Have you ever fallen into this trap? Let me know in the comments! Remember, mastering these hidden nuances can make all the difference in your audio quality.
How do I keep my microphone setup in top shape over time?
Maintaining your voice recording gear is crucial to ensuring consistent, professional-sounding results. I rely heavily on a few key tools and routines that keep my XLR and USB microphones functioning flawlessly. First, investing in a good air duster helps me clear dust and debris from connectors and ports without risking damage. Regularly inspecting and cleaning cables with a cable tester minimizes the chance of intermittent connections and noise issues. It’s also vital to keep your equipment’s firmware and drivers updated—check the manufacturer’s recommendations for your gear to prevent bugs and improve stability.
For software, I favor noise reduction plugins like iZotope RX, which helps me consistently remove unwanted background sounds during post-processing. However, I don’t rely solely on software; optimizing my physical environment with periodic room treatments, like bass traps and acoustic panels, ensures my recordings stay clean without over-processed sound.
Another essential practice is creating backup configurations of my audio interface and DAW settings. Saving presets allows rapid restoration if hardware gets disconnected or settings become corrupted, saving valuable recording time. I always keep my sample rate and buffer size optimized—based on advice from industry experts—to prevent latency and ensure high-quality captures.
Predicting where this trend is headed, I believe long-term maintenance will increasingly rely on integrated diagnostics built into audio interfaces and microphones, making troubleshooting quicker and more precise. Over time, dedicated software solutions will automatically monitor hardware health and alert us to potential issues before they escalate.
To stay ahead, I recommend trying an advanced tip: regularly calibrate your microphone setup using test recording software—this helps catch subtle drift or degradation that might otherwise go unnoticed until it’s too late. Routine calibration ensures your gear performs optimally long-term. Have you integrated any regular maintenance routines into your setup? Share your go-to tools and habits in the comments—your experience could help others keep their voice recordings pristine for years to come.
The Little Secrets That Transformed My Voice Recordings
One of the most eye-opening lessons I learned was how critical power stability is for audio quality. I once spent hours troubleshooting my microphone, only to realize that sharing a USB port with multiple devices was causing background noise and dropouts. That simple switch to a dedicated powered USB hub eliminated those issues and took my recordings to a professional level. It taught me that behind every great voice recording is often an overlooked detail—power management—playing a silent but vital role.
My Battle-Tested Arsenal for Noise-Free Voice
Over the years, I’ve curated a toolkit that keeps my voice crystal clear. High-quality shielded cables, such as the 3-foot cables I recommend in the [ultimate guide](https://microphones.creatorsetupguide.com/ultimate-guide-to-streaming-microphones-voice-recording-tips-2024), are essential for minimizing electromagnetic interference. I also swear by regular buffer and sample rate checks using dedicated software—small routines that prevent nagging noise issues. These tools, combined with room treatment tips from trusted sources, form the backbone of my clean, professional sound.
What I Wish I Knew About Microphone Placement and Room Dynamics
Many underestimate the power of proper positioning. I once thought that a fancy mic would fix my voice, but I discovered that placing it just 6-12 inches from my mouth, along with using a pop filter, had a far more profound impact. Moving my setup away from noisy electronic devices and adding acoustic treatment, based on insights from [microphone guides](https://microphones.creatorsetupguide.com/stop-the-boxy-sound-4-voice-recording-fixes-for-2026-podcasts), made my recordings warmer, clearer, and more natural. It’s these nuanced adjustments that separate amateur audio from professional-grade sound.
Resources That Keep My Voice Sharp
To stay ahead, I rely on several trusted tools and sources. The [best podcast microphones of 2024](https://microphones.creatorsetupguide.com/best-podcast-microphone-2024-top-streaming-voice-recording-tips) guide has consistently pointed me toward gear that offers great value and reliability. I often revisit detailed reviews from industry pros like Focusrite’s interfaces, found on [their official site](https://microphones.creatorsetupguide.com/3-high-gain-2026-audio-interfaces-that-kill-mic-hiss), which help me fine-tune my setup. Additionally, online communities and tutorials, especially those emphasizing physical setup and environment, have been invaluable in honing my voice quality over time.
Seize the Moment to Elevate Your Voice Game
There’s a rewarding feeling in mastering these less obvious aspects of voice recording. Whether you’re a beginner or looking to upgrade your current setup, remember that small, deliberate improvements—like using a dedicated power hub, shielding your cables, and optimizing placement—can yield extraordinary results. Your voice deserves to be heard at its best, and with the right mindset and tools, you’re well on your way. Don’t let overlooked details hold you back—start refining your microphone environment today and see the difference yourself.
What setup tweak or tool has made the biggest difference in your voice recordings? Share your experience below and let’s learn from each other!
Reading this post really opened my eyes to the importance of power stability for microphones, especially with newer 2026 models that have more advanced features. I used to think that just plugging my microphone into any USB port was enough, but after experiencing inconsistent sound quality and dropouts, I realized that shared ports might be the culprit. Switching to a dedicated powered USB hub made a huge difference in sound clarity and stability in my recordings. I also started using shorter, shielded USB cables, which reduced background noise significantly. What’s interesting is how many overlook electrical interference as a cause for audio issues. I wonder, for others who have upgraded their hardware recently, what small adjustments resulted in the biggest improvements in your audio quality? I believe the key is paying attention to these subtle details rather than just investing in expensive gear.