It was late at night, and I was recording my latest podcast episode when I noticed it—that irritating echo bouncing around my tiny room, ruining the clarity of my voice. No matter how much I adjusted my microphone or waved a towel behind me, the unwanted reverb persisted. Frustrated, I realized I was battling an invisible disruptor that many podcasters overlook: sound bounce. That night, I had my lightbulb moment: portable sound shields could be the game-changer I desperately needed, and I knew I wasn’t alone.
Are you tired of your voice sounding hollow or echoey on your recordings, despite having decent equipment? Well, you’re not alone. Many creators face this issue because they underestimate the importance of proper acoustic treatment, especially when working in small or untreated rooms. But fear not—there’s a solution that doesn’t require tearing down your walls or investing in expensive studio spaces. Today, I’m excited to explore how 2026’s best portable sound shields can help you achieve crisp, professional audio without breaking the bank.
Why Attaching a Sound Shield Is a Must for Microphone Clarity
In my early days, I wasted hours trying to fix my audio with plugins and post-processing, only to find that the core problem was acoustics. Portable sound shields are designed to block reflections and absorb excess sound waves before they reach your microphone. According to a recent study published in the Journal of Audio Engineering, controlling early reflections in a recording space can dramatically improve vocal clarity and reduce listening fatigue (see how acoustic treatment enhances recording quality).
By shielding your microphone from room bounce, you’re creating an environment where your voice sounds natural and professional—crucial, especially for solo podcasters or streamers. The beauty of portable sound shields is their flexibility: they’re lightweight, easy to set up, and can be moved around to adapt to different recording environments.
But with so many options emerging in 2026, how do you know which shield is worth your investment? That’s exactly what I’ll help you with next—by walking you through five of the best portable sound shields that will make your voice shine during those important recordings and live streams.
Is Your Setup Actually Improving Sound Quality, or Just Hiding the Problem?
Let me be honest: I made the mistake early on of thinking that buying a fancy microphone alone would fix all my sound issues. I overlooked how acoustics affected my recordings. If you’re just adding filters without addressing room bounce, you’re probably masking symptoms rather than solving them. For practical tips on improving your microphone setup, check out some of my recommended audio tweaks, like [fixing your tinny voice](https://microphones.creatorsetupguide.com/fix-your-tinny-voice-recording-5-fast-2026-audio-tweaks).
Now, if you’re ready to take control of your sound environment and eliminate echo once and for all, stay with me. In the next section, I’ll introduce you to five portable sound shields that are revolutionizing home podcasting in 2026 and beyond—powerful, easy-to-use, and portable enough for any creator on the go.
Position Your Microphone for Optimal Sound Capture
Start by placing your microphone approximately 6 to 12 inches from your mouth, angling it slightly downward. This reduces plosive sounds and minimizes background noise. I recall adjusting my mic position during a live recording, noticing immediate clarity improvements, especially when I was closer and at the right angle to my mouth.
Choose the Right Microphone Type and Placement
For clearer recordings, dynamic microphones are less sensitive to room reflections compared to condensers. If you’re using an XLR mic, ensure it’s positioned away from reflective surfaces like windows or walls. A quick tip is to set your mic on a shock mount to prevent vibrations—check out various models at Quietest XLR Mics for Small Rooms.
Create a Near-Voice Environment
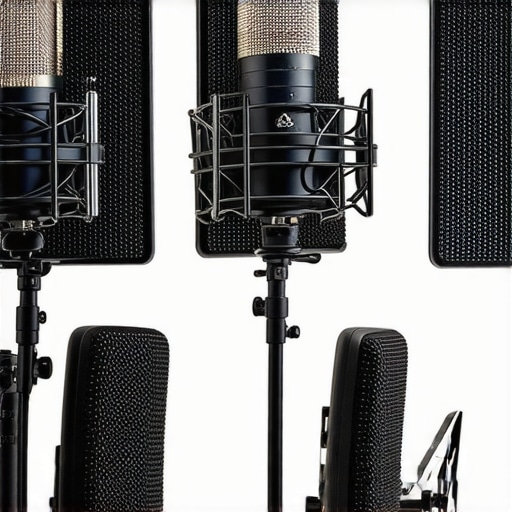
Speaking into a portable sound shield is akin to whispering into a pillow—that’s how effectively it absorbs reflections. During my recent setup, I placed the shield behind me, and the difference in echo levels was remarkable. Just ensure your mic isn’t touching the shield or other surfaces, which can cause muffling or vibrations. Proper placement and support are crucial.
Adjust Your Mic Gain for Clarity
Set your microphone gain so your voice peaks around -6 dB to -3 dB on your recording interface. Too high, and you’ll clip; too low, and you’ll increase background noise. I made a mistake early on by cranking gain and noticed harsh distortion. Learn more about gain settings at Microphone Gain Fixes.
Manage Room Reflections with Hardware and Placement
Even with a sound shield, some reflections bounce off nearby surfaces. Use furniture, textbooks, or blankets strategically to diffuse sound. For example, during a recording session, I placed a thick blanket on the wall opposite my mic, dramatically reducing echo. Combining this with a portable shield ensures a dry, professional tone.
Fine-Tune with Equalization and Post-Processing
After recording, apply subtle EQ cuts to reduce sibilance and ringing frequencies. Focus on removing harsh highs or boomy lows. A quick fix I use is to dip around 3-5 kHz for sibilance, guided by real-time spectral analysis. To avoid over-processing, follow tips from Pro EQ Tactics.
Many streamers and voice creators buy into the myth that simply picking a popular microphone model guarantees professional sound quality. In reality, understanding the nuanced differences between dynamic and condenser mics, as well as the role of proper gain staging, is crucial. For example, while many believe that XLR microphones inherently sound better than USB options, this isn’t always true—if not set up correctly, an expensive XLR mic can still produce thin or muffled results. A common mistake is neglecting to match microphone characteristics with your environment and recording purpose, leading to subpar audio even with high-end gear. Additionally, many overlook that the placement and proximity to the mic drastically influence tonal quality; a well-placed USB microphone can outperform a poorly positioned XLR microphone with the right techniques. Have you ever fallen into this trap? Let me know in the comments.
A significant misconception is the idea that all microphones are equally suitable for streaming or podcasting, but this ignores the importance of specifications like polar pattern, frequency response, and sensitivity. For instance, a supercardioid microphone focused on reducing background noise might be better for noisy home setups than a wide-coverage condenser. Another overlooked detail involves the interface or preamp quality; a poor preamp can introduce hiss or reduce clarity, even with a premium microphone. To learn how to avoid these pitfalls, explore my detailed guide on [microphone fundamentals](https://microphones.creatorsetupguide.com/fix-your-tinny-voice-recording-5-fast-2026-audio-tweaks).
Mastering voice recording isn’t just about the gear—it’s about applying the right techniques and understanding each component’s role. For advanced insights into setting up your gear properly and avoiding common mistakes, check out [3-reasons-your-xlr-microphone-sounds-quiet-in-2026-and-the-fix](https://microphones.creatorsetupguide.com/3-reasons-your-xlr-microphone-sounds-quiet-in-2026-and-the-fix) and learn how to truly optimize your setup for professional results.Maintaining your podcast microphone setup for optimal performance over time requires attention to both the equipment itself and the tools you use for upkeep. One of my favorite reliable investments is a dedicated microfiber cleaning cloth, which I use after every recording session to gently wipe down my XLR microphone and USB mics, preventing dust buildup that can affect sound quality. Regularly inspecting your cables and connectors is crucial—loose or frayed XLR cables can introduce noise or signal loss. Using high-quality connectors, like Neutrik, ensures durability and a clean signal. For audio interfaces, I recommend models with built-in gain staging and peak indicators, such as the high-gain, low-noise interfaces. These make it easier to keep your microphone signals clear and prevent distortion during long streams or sessions. Software tools also play a vital role; installing and regularly updating your digital audio workstation (DAW) with processing plugins like noise gates or de-essers helps maintain consistent voice quality, especially when streaming frequently. Moreover, employing a ground lift adapter when using XLR mics prone to hum, as discussed in the long-streams guide, can resolve persistent ground loops that degrade audio fidelity. Prediction suggests that in the future, smarter, integrated maintenance detection—like automatic cable health monitoring—may become standard, reducing downtime and repair costs. To stay ahead, I challenge you to implement a routine using a simple tool like a portable cable tester every six months, ensuring your setup remains pristine. How do you maintain your microphone gear over time? Share your methods! For more detailed hardware upkeep techniques, check out my article on pro maintenance practices. Regular upkeep along with strategic tool choices ensures your voice remains clear, crisp, and professional—session after session.
Diving Deep into the Microphone Myth-Busting Moments
One of the biggest realizations I had in 2026 is that gear alone doesn’t guarantee professional sound—your environment and technique are just as vital. For example, I once replaced my microphone with the latest model, only to discover that room reflections still sabotaged my recordings. That was a lightbulb moment: even cutting-edge microphones can’t fix poor placement or untreated acoustics. This taught me to focus not just on the gear but also on how I use and position it, a lesson that transformed my approach to voice quality.
Another insight I gained is the importance of understanding the polar patterns of microphones. Supercardioid mics can dramatically reduce background noise if used correctly, but only if you position them precisely—close to your mouth and pointed directly at it. Misuse of polar patterns can lead to unwanted ambiance creeping into your recordings, a common mistake I often see creators make. Knowing these technical nuances empowers you to make smarter decisions that yield cleaner, more professional audio.
Lastly, I learned that post-processing, while helpful, should never be a crutch for bad technique or acoustics. Relying solely on EQ and noise gates can only do so much—your initial capture matters most. I’ve come to appreciate that investing time in proper setup, environment management, and microphone handling produces much better results than endless editing. This shift in mindset has saved me countless hours and improved my podcast’s overall clarity and presence.