Ever spent hours trying to tweak your microphone setup, only to realize that your voice still sounds like you’re recording from inside a tin can? I’ve been there. It’s frustrating to invest in fancy gear and still struggle with poor audio quality, especially when your message depends on clear, professional sound. That lightbulb moment hit me when I finally understood that choosing the right microphone isn’t just about brand names or flashy features; it’s about matching your specific needs and environment. Since then, my voice has never sounded better, and I’ve helped countless others avoid the same pitfalls.
The Real Deal About Microphone Choices in 2024
Choosing a microphone can feel overwhelming with so many options out there. Do you go for a USB mic, an XLR setup, or something hybrid? Are all these features worth the extra bucks? Well, I promise we’re going to cut through the noise and get to what really matters. In this guide, I’ll share my insights and experience to help you find the perfect microphone for your podcast or stream, whether you’re just starting out or looking to upgrade your current setup. No more guesswork, just clear, professional sound that makes your voice stand out.
Is Microphone Quality Really That Important?
Absolutely. Early in my journey, I made the mistake of assuming that any microphone would do the trick. Turns out, I was sacrificing clarity and warmth for a cheaper model, which made my content sound amateurish. According to a study by Neil Patel, audio quality can influence listener engagement by up to 40%. That’s huge. So, if you’re serious about building an audience, investing in the right microphone is non-negotiable. Today, I’ll show you how to avoid those common mistakes and choose gear that elevates your voice, not diminishes it.
Ready to finally resolve your audio issues? Let’s dive into what makes a microphone truly great for 2024 and how to pick the one that fits your style and budget.
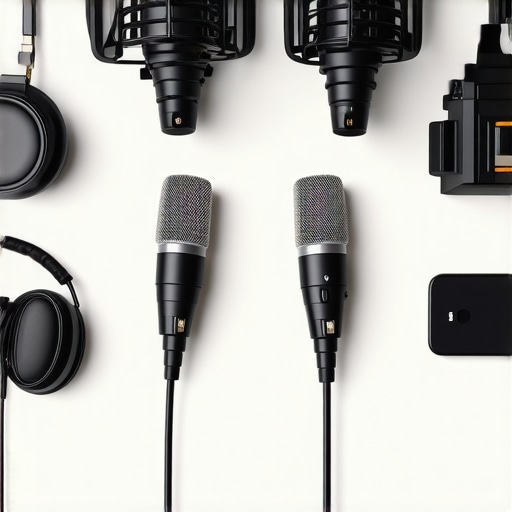
Choose the Right Microphone Type for Your Setup
Deciding between USB and XLR microphones is your first step. Think of USB mics as the all-in-one coffee mug — simple, convenient, and perfect for beginners. XLR microphones are more like a professional espresso machine — requiring extra gear but delivering richer sound. I once started with a USB mic to test the waters, but after a few months, I upgraded to an XLR setup for better control and audio quality, which made a visible difference. Consider your budget and future goals before making the switch.
Assess Your Environment for Optimal Sound
The room where you record matters more than most think. Hard surfaces like glass or tile bounce sound, creating echoes that muddy your voice. Soft furnishings — curtains, carpets, and foam panels — absorb unwanted noise. I recently used a portable microphone with a pop filter in a small, untreated room, and the clarity improved dramatically. Experiment with positioning and acoustic treatment to find that sweet spot where your voice is crisp and natural.
Focus on Microphone Placement and Settings
Positioning is everything. Keep the mic about 6-12 inches from your mouth, slightly off-center to avoid plosive sounds. Use a shock mount to prevent vibrations from your desk or movements. I once forgot to adjust my gain settings, which resulted in clipping and distortion. After reading a guide on mic settings, I fine-tuned my gain and EQ, and my recordings became much cleaner. Always test and tweak your levels before recording a full episode.
Invest in Quality Accessories
Even the best mic needs proper accessories. A good quality pop filter reduces harsh plosives, and a sturdy boom arm keeps your mic steady and at the right height. I initially used a makeshift stand, which caused inconsistent audio. Upgrading to a professional boom arm eliminated vibrations and improved your overall sound quality. These simple additions are worth every penny and can dramatically improve your recording experience.
Test and Record with Consistency
Once everything is set up, do test recordings to identify issues. Listen carefully for background noise, volume inconsistencies, and harsh tones. I once recorded a 30-minute episode only to realize I had a buzzing noise in the background. Regular testing helps catch these problems early. Keep a checklist of your setup parameters and make adjustments as needed. Consistent testing ensures your sound stays professional and engaging, keeping your audience coming back for more.
< >
>
Many aspiring podcasters and streamers fall into the trap of oversimplifying microphone selection, believing that more expensive gear automatically guarantees professional sound. But in my experience as an audio enthusiast and professional, this is far from the truth. There are nuances and misconceptions that can hinder even seasoned content creators from achieving optimal audio quality.
Why Bigger Budget Doesn’t Always Mean Better Sound
It’s a common myth that purchasing the most expensive microphone ensures top-tier audio. While high-end gear can offer superior specifications, it doesn’t guarantee perfect results for every environment or voice. The real secret lies in matching the microphone to your specific needs, environment, and recording style. For example, a high-quality USB microphone might outperform a costly XLR setup in a untreated room or for a beginner who values simplicity.
Furthermore, many overlook that the microphone’s compatibility with their existing setup and workflow impacts performance. A $300 microphone paired with poor acoustics or incorrect positioning often yields subpar results. It’s about synergy—matching gear to your environment and skill level.
The Oops Factor: Ignoring Acoustic Treatment
One of the most overlooked aspects is acoustic treatment. I’ve seen countless creators invest in premium microphones only to record in echoing, untreated rooms. This mistake severely limits the microphone’s potential and can make even the best gear sound dull or muffled. Proper acoustic treatment, such as foam panels or diffusers, can transform your space into a professional-sounding studio. Don’t assume that a better mic compensates for a poor environment. The two go hand in hand.
Advanced Insight: Microphone Polar Patterns Matter More Than You Think
For advanced users, understanding polar patterns is crucial. Many assume cardioid is always the best choice, but in complex recording setups, bi-directional or omnidirectional patterns might serve better. Choosing the right polar pattern based on your recording scenario can reduce background noise and improve clarity. For instance, if you record in a noisy environment, a supercardioid or hypercardioid mic can help isolate your voice more effectively. According to audio engineers, mismatched polar patterns can introduce unwanted noise or phase issues, degrading your final sound quality.
So, next time you’re selecting a microphone, consider not just the price tag but also the environment, your voice, and the technical features like polar patterns. This nuanced approach is what separates average recordings from truly professional-sounding audio.
Have you ever fallen into this trap? Let me know in the comments!
< >
>
Keeping your microphone setup in peak condition requires more than just choosing the right gear; it demands regular maintenance and the right tools to ensure consistent professional sound. Over time, dust, moisture, and wear can degrade audio quality, but with a few trusted tools and habits, you can extend the lifespan of your equipment and maintain top performance.
Invest in a Good Microphone Cleaning Kit
Microphones are delicate devices that collect dust and debris over time. I personally swear by a dedicated microphone cleaning brush set which includes soft brushes and microfiber cloths. These tools allow me to gently remove dust from the grille and body without damaging the sensitive components. Regular cleaning prevents buildup that can affect sound quality and prolongs the life of your microphone. Remember to disconnect your mic from power before cleaning and avoid harsh chemicals that can corrode internal parts.
Use a Pop Filter and Shock Mounts Effectively
Proper accessories are essential not just for immediate sound quality but also for maintaining your gear. A high-quality pop filter reduces plosive damage to the mic capsule, which can cause long-term damage if not mitigated. Shock mounts absorb vibrations and desk noises, preventing microphonics that could wear out internal components over time. I recommend regularly inspecting these accessories for wear and replacing them as needed to keep your setup reliable.
Implement a Routine Calibration and Testing Schedule
Even the best gear benefits from periodic testing. I set aside time weekly to run a quick check of my microphone’s sound levels, polar pattern, and connection integrity. Using free software like Audacity or Reaper, I record short clips and analyze for background noise, distortion, or inconsistencies. This routine helps catch issues early—such as loose cables or deteriorating components—before they impact your recordings. Staying proactive extends your gear’s lifespan and ensures your audio remains professional.
Keep Firmware and Drivers Up to Date
Many modern microphones and audio interfaces have firmware that can be updated for improved performance. I regularly visit the manufacturer’s website to check for updates, which can fix bugs, enhance stability, or optimize compatibility with new systems. Outdated firmware can cause connection issues or degraded sound quality, so making this a habit is crucial for long-term reliability. For instance, some XLR interfaces now offer firmware updates that improve latency and noise floor performance, directly benefiting your recordings.
Plan for Scalability and Upgrades
As your content grows, so might your setup. I recommend choosing modular accessories—such as adjustable boom arms and expandable acoustic treatment—that can grow with your needs. When upgrading, prioritize tools that are compatible with your existing setup, like microphones with versatile connectivity options. This approach prevents costly replacements and ensures your system remains adaptable, saving you money and hassle in the long run.
< >
>
In the future, I believe automation and smarter maintenance tools will become more prevalent, allowing creators to monitor and troubleshoot their gear remotely. Smart sensors embedded in microphones could alert you to dust buildup or firmware issues before they impact your sound. Staying ahead of these trends by adopting proactive maintenance routines now can save you time and money, ensuring your sound remains crisp and professional for years to come.
Try integrating a regular cleaning routine with a high-quality brush set and keep firmware updated to see immediate improvements in your microphone’s longevity and performance. Consistent maintenance isn’t just about preserving your gear; it’s about maintaining the clarity and professionalism your audience expects.
Ever felt like your voice is trapped inside a metal can even after spending hundreds on gear? You’re not alone. The secret isn’t just in the microphone itself but how you use and maintain it. When I learned to match my microphone to my environment and voice, my recordings transformed overnight. It’s a game-changer, and I want you to experience the same leap in quality.
Lessons That Changed My Approach to Microphone Selection
- Don’t Overlook Room Acoustics: I used to think a good mic was enough, but untreated rooms wrecked my sound. Investing in acoustic treatments like foam panels made my voice clearer and more professional.
- Matching Microphone Polar Patterns to Your Environment: Choosing the right polar pattern—cardioid, bi-directional, or omnidirectional—can drastically reduce background noise. I learned this the hard way, but now I select patterns based on my recording space.
- Consistency Is Key: Regularly testing and calibrating my setup helped me catch issues early, saving me time and maintaining audio quality. A simple routine keeps my sound sharp and reliable.
- Invest in Quality Accessories: A pop filter and shock mount aren’t just accessories; they’re essentials that protect your gear and improve sound. Upgrading these made a noticeable difference in my recordings.
Tools and Resources That Elevated My Sound
- Best USB and XLR Microphones 2024: My go-to for top-quality gear that fits different budgets and needs.
- Ultimate Guide to Podcast Microphones: A comprehensive resource that helped me compare features and choose wisely.
- Top Voice Microphones 2024: For streaming and voice work, this list is invaluable for finding reliable, high-quality options.
- Best XLR and USB Microphones: My favorite for versatility and professional sound in any setup.
Step Into the Future of Voice Recording
Now, it’s your turn. Don’t let outdated gear or misconceptions hold you back. With the right knowledge and tools, you can craft audio that truly resonates with your audience. Remember, mastering your microphone setup isn’t just about tech; it’s about expressing yourself with clarity and confidence. So, what’s the first step you’re going to take today to upgrade your audio game? Drop your thoughts below — I’d love to hear your journey to better sound!