Have you ever sat down to record your podcast or start a live stream, only to be greeted by a muffled, distant, or inconsistent voice? I remember my first few attempts—thinking I had the perfect setup, only to realize my microphone was doing me more harm than good. The frustration of endless tweaking, hoping that a simple mic swap would fix everything, was real. It wasn’t until I made a crucial mistake—buying a cheap microphone just because it looked cool—that I truly understood the importance of choosing the right mic for professional-quality sound. That lightbulb moment transformed my entire approach to voice recording and streaming.
Pick the Right Microphone for Your Voice
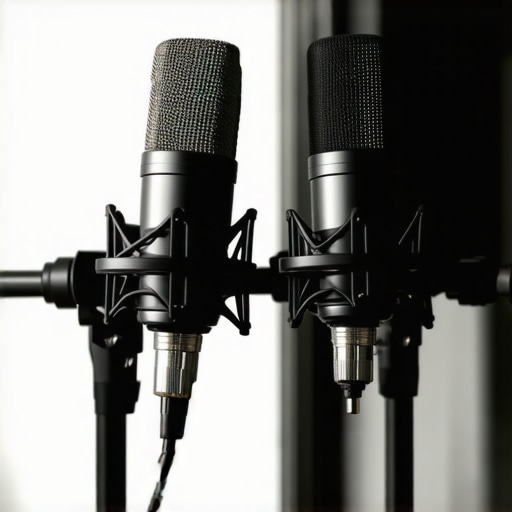
Start by understanding the main types: USB, XLR, and hybrid microphones. I once chose a budget USB mic for my first podcast, thinking it would be enough. The result? A dull, muffled sound that made editing a nightmare. That experience taught me to research each type thoroughly. Check out this guide to compare options and find the best match for your needs.
Test Different Microphone Models
Once you’ve narrowed down the type, test specific models. I remember borrowing a popular USB mic and recording a quick session. The clarity was impressive, but it picked up too much background noise. Switching to a cardioid pattern XLR mic improved focus on my voice. Always test mics in your usual environment and listen critically. Recording a short clip and playing it back helps identify the nuances of each mic’s sound quality. For top picks, see this comparison.
Optimize Your Recording Environment
Even the best microphone needs a good environment. Use soft materials like foam panels or blankets to dampen echo. I once set up in a bare room, which caused a lot of reverb. After adding some foam, the sound instantly improved. Position your mic close to your mouth—about 6-12 inches—to capture clear voice without picking up unwanted room noise. Experiment with placement; sometimes, a slight angle or height change makes a big difference. Check out these tips for enhancing your sound environment.
Adjust Your Microphone Settings
Don’t forget to tweak your settings. For USB mics, use the software controls to set gain levels; too high causes distortion, too low loses detail. For XLR mics, adjust preamp gain through your audio interface. I once recorded with too much gain, resulting in a harsh, clipping sound. Lowering it improved clarity. Use a pop filter or windscreen to reduce plosive sounds and sibilance. For detailed setup advice, see this guide.
Record Test Clips and Refine
Always record short test clips and listen carefully. During my early days, I spent hours editing because of inconsistent volumes and background noise. After making small adjustments—changing mic angles, lowering gain, and improving environment—I noticed a huge leap in quality. Use headphones during recording to catch issues in real-time. Repeat this process until you’re satisfied with your sound quality. For more advanced tips, visit this resource.
Many creators assume that choosing the most expensive microphone guarantees professional sound quality, but this is a misconception. In reality, understanding the nuances of microphone types and setups can make a significant difference. For instance, a popular USB microphone might seem convenient, but often lacks the nuanced control that XLR microphones provide, especially when paired with a quality audio interface. This flexibility allows for better sound shaping, noise reduction, and customization, which are crucial for high-quality voice recordings or streaming. Instead of just chasing the latest shiny gadget, focus on what suits your environment and voice best. For an in-depth comparison, check out this expert guide.
Maintaining your podcast microphone for long-term performance might seem straightforward, but the reality is that even high-quality gear requires regular care and smart tools to keep it sounding its best. My personal routine involves a few key practices that ensure my USB microphone or XLR microphone remains in top shape, avoiding the common pitfalls that lead to degraded sound quality over time.
How do I maintain my microphone over time?
First, always keep your microphone clean. For USB mics, a gentle wipe with a soft, lint-free cloth after each session prevents dust and moisture buildup. For XLR microphones, I recommend using a small brush or compressed air to clean the grille and capsule area, especially if you record in environments prone to dust. Regularly inspecting cables and connectors is equally crucial—damaged cables can introduce noise or cause signal loss, so I replace them immediately if I notice any fraying or looseness.
Next, investing in a quality pop filter or windscreen is essential—not just for sound quality, but for protecting the microphone capsule from saliva and debris. I’ve found that replacing cheap, flimsy screens with professional-grade ones significantly extends the lifespan of my mic. Additionally, a dedicated mic stand with shock absorption minimizes vibrations and handling noise, which can quickly wear down even the best equipment.
For streaming mics, software calibration is also vital. I use software controls to set optimal gain levels, preventing distortion and ensuring consistent audio levels. Over time, software updates from your mic manufacturer can improve performance, so staying current is a good habit. Also, regular firmware updates can fix bugs and enhance compatibility, as noted in technical documentation from major brands like Rode or Shure.
Monitoring your recordings with good headphones during sessions allows you to catch issues early—whether it’s background noise, plosives, or gain problems. This habit saves hours in post-production and helps you tweak your setup on the fly.
Long-term tools for reliable sound
In my setup, I rely on tools like the Audacity or Reaper audio editing software for post-recording cleanup. These programs allow me to perform noise reduction, equalization, and compression, which extend the useful life of my recordings. Investing in a high-quality audio interface, such as the Focusrite Scarlett series, provides clean preamp gain and robust connections that protect your gear’s longevity.
Looking ahead, I predict that AI-driven diagnostics will become common in microphone management, alerting creators to potential issues before they affect sound quality. Already, some platforms analyze your recordings for clarity and background noise, offering real-time suggestions.
If you want to take your setup to the next level, try implementing a regular schedule of cleaning, firmware updates, and software calibration. These small but impactful steps will keep your microphone sounding professional for years to come, saving you money and frustration in the long run. For a comprehensive overview, see this resource.
Over the years, I’ve learned that the real secret to professional-quality podcast sound isn’t just about buying the most expensive microphone. It’s about understanding the nuances, making smart choices, and caring for your gear. Here are some insider lessons I’ve picked up that can help you avoid common pitfalls and elevate your recordings.
The Hardest Lesson I Learned About Podcast Microphones
One of my biggest mistakes was assuming that a flashy, cheap USB microphone would do the job. The muffled sound and background noise made editing a nightmare. It taught me that investing in the right type—like a cardioid XLR mic paired with a good interface—makes a huge difference. Don’t fall for the hype; focus on what truly suits your environment and voice.
3 Myths About Microphone Quality That Held Me Back
I used to think that price always equaled quality. Turns out, even affordable mics can deliver great results if you understand how to set them up properly. Another myth was that surrounding your mic with foam panels would magically fix everything—environment matters just as much as the gear. Lastly, I believed that once I bought a mic, I was set for life. Regular maintenance and calibration are key to long-term success.
What Experts Won’t Tell You About Long-Term Microphone Care
Many creators overlook regular cleaning and proper storage. Using a soft cloth and compressed air keeps dust at bay. Replacing cheap pop filters with professional-grade screens protects your capsule and extends its lifespan. Also, keeping your cables in check prevents signal loss and noise issues. These small habits preserve your gear and ensure consistent sound quality over years.
Curated Recommendations for Sound Excellence
My Essential Toolkit for Podcasting includes the top microphone types guide, which helped me understand whether USB or XLR was best for my needs. I trust this resource for comparing models and features, and this one for choosing the perfect mic for clear voice recordings. Lastly, the ultimate guide offers ongoing tips for maintaining and optimizing your setup.
Your Turn to Try
Getting your podcast sound just right is a journey, not a one-time fix. With the right microphone and care routine, you can make your voice stand out and connect more effectively with your audience. Remember, every detail counts—from environment to settings. Keep experimenting, learning, and refining—your perfect sound is within reach.
What has been your biggest challenge in setting up your microphone? Share your experience below—I’d love to hear your story!
Reading this post really resonated with my own experience starting out with podcasting. I initially bought a cheap USB mic solely for convenience, but the sound was just not up to par, and I ended up spending more time trying to clean up the audio than actually recording. Since switching to a mid-range XLR mic and investing in proper room treatment, my recordings have improved significantly. One thing I’ve learned is that environment plays a crucial role—no matter how good your mic is. I’ve also started experimenting with microphone positioning and gain settings, which made a big difference. Has anyone found that investing in their recording environment yields better results than just upgrading the mic? I’d love to hear tips on balancing gear upgrades with environmental adjustments for optimal sound quality.
This post really hits home for me, especially when it comes to understanding the importance of environment and proper setup. I spent a long time focusing solely on upgrading my microphone, but I overlooked how much my room acoustics impacted my recordings. Once I added foam panels and adjusted mic placement, the audio clarity improved drastically, even with a more modest mic. I think many new creators might fall into the trap of constantly chasing the latest gear without optimizing their environment first. Have others found that tweaking the acoustics or microphone positioning can often provide a bigger boost in sound quality than upgrading hardware? I’d love to hear strategies on how to effectively balance budget constraints with environment improvements—sometimes small changes can make a big difference.
This post really hits the nail on the head about how crucial it is to understand the different microphone types and their roles in producing professional-sounding audio. I remember my early days of podcasting, where I underestimated the importance of environment and mic positioning. I initially just bought a decent USB mic, but I realized that no matter how good the mic was, echo and background noise could ruin the sound. After I started experimenting with room treatments like foam panels and adjusting mic placement, the clarity improved dramatically without upgrading my gear. It makes me wonder—how many creators feel they need expensive equipment to sound good, when in reality, proper setup and environment matter just as much, if not more? Have others found that small, affordable adjustments in their recording space made a bigger difference than hardware upgrades? Would love to hear some budget-friendly tips that really work.