I remember the first time I set up my streaming space, excited but utterly lost. I bought a cheap condenser mic, plugged it in, and hit record. The result? Crisp silence. Turns out, I had no idea about the importance of choosing the right microphone. That lightbulb moment hit hard. Since then, I’ve learned that a good microphone isn’t just a luxury — it’s the backbone of clear, engaging content. If you’ve ever felt frustrated by poor audio quality or unsure about what gear to pick, you’re not alone. Many creators stumble here, but the good news is, you don’t have to stay stuck.
Why Picking the Right Microphone Matters More Than Ever in 2024
In 2024, the podcasting and streaming landscape is fiercer than ever. With millions of voices vying for attention, your audio quality can make or break your growth. Think about it: even the most compelling content can be overshadowed by muffled sound or background noise. According to a study by Wired, listeners are 75% more likely to stay engaged with clear, professional-sounding audio. That’s why investing in a quality microphone is no longer optional; it’s essential.
But here’s the tricky part — with so many options, how do you find the perfect fit? Should you go for an XLR setup or stick with a USB mic? What about the difference between condenser and dynamic microphones? I’ve been there, and I’ve made some costly mistakes early on, like choosing a mic based solely on popularity rather than performance. Trust me, that’s a quick way to waste money and end up with subpar audio. Instead, knowing what to look for can turn this confusing purchase into a game-changer for your channel.
Have you ever bought a microphone only to realize it doesn’t suit your voice or setup?
If so, you’re not alone. I’ve spent countless hours researching, testing, and talking to other creators to find the best options for 2024. Whether you’re a beginner or upgrading your gear, this guide will walk you through the top picks and what makes them stand out. Ready to ditch the guesswork and start sounding professional? Let’s dive into the most important features to consider and the best microphones for every budget.
Before we get into the specifics, if you want a comprehensive overview, check out my ultimate guide to top podcast and streaming microphones for 2024. It covers everything from XLR to USB, condenser to dynamic, so you’ll be well-equipped to make an informed decision. Now, let’s focus on what really matters when choosing your mic — so you can finally get the audio quality you deserve and stand out in 2024’s crowded space.
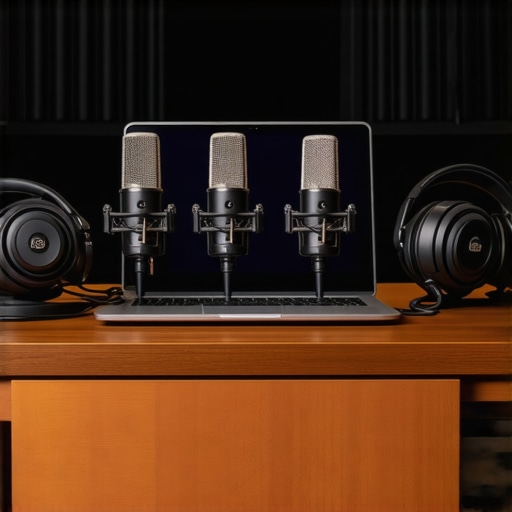
Test Your Voice with Multiple Microphones
Start by auditioning different microphones, especially models recommended in top USB and XLR microphones for 2024. For example, I once borrowed a popular condenser mic from a fellow creator and recorded a quick episode. The raw sound was harsh and unbalanced. This experience taught me that not every mic suits every voice or space.
Set Up Properly and Test
Proper setup is key. Place your mic at eye level, about 6-12 inches from your mouth, to avoid plosives and sibilance. Use a pop filter to soften harsh sounds, as I did when I upgraded my setup. Record short test clips and listen critically on different devices—your phone, headphones, and studio monitors. Adjust positioning and settings until your audio feels natural and clear.
Adjust Gain and Settings for Natural Sound
Gain controls how loud your voice is captured. A common mistake is setting gain too high, which causes distortion and background noise. Start with low gain and gradually increase until your voice dominates the background. Use software or hardware meters to visually monitor levels. I learned this the hard way when my first recordings clipped because I didn’t watch the meters closely.
Choose Between USB and XLR Based on Your Needs
Decide whether a USB or XLR microphone fits your workflow. USB mics like top USB mics for clear podcasting in 2024 are plug-and-play, perfect for beginners or those with limited space. XLR mics, on the other hand, often require an audio interface but offer higher quality and flexibility for future upgrades. I started with a USB but moved to XLR as my setup grew more professional, which improved sound clarity significantly.
Test Different Microphone Types for Your Voice
Condenser microphones capture a wide frequency range and are sensitive, ideal for studio environments. Dynamic microphones are less sensitive and better at rejecting background noise, making them suited for noisy spaces. When I tested a condenser mic in my small room, it picked up every sound, but switching to a dynamic mic reduced background noise and improved voice clarity. Learn more about these types at this comprehensive guide.
Fine-Tune for Your Environment and Voice
Every voice and space is different. Use equalization (EQ) to enhance clarity—boosting high frequencies can add brightness, while cutting muddiness in the mid-range can improve intelligibility. I experimented with EQ settings after recording several test clips, and found small adjustments made a big difference. If you need more detailed tips, check out top voice recording microphones.
Use Software for Final Polish
Leverage audio editing software like Audacity or Adobe Audition to clean up your recordings. Noise reduction, compression, and leveling ensure your voice stays consistent and professional. I regularly use noise reduction to eliminate background hums after testing different placement setups, which made my recordings sound more polished. For tutorials and recommendations, visit this resource.
Many creators fall into the trap of oversimplifying microphone choices, believing that spending more always guarantees better sound. But in my experience, this isn’t the full story. One of the biggest misconceptions is that a high-end microphone automatically suits every voice and environment. In reality, what works for one person might not work for another. For example, some high-end condenser mics excel in studio settings but can pick up every background noise in a noisy home office. To truly optimize your audio, you need to consider the nuances of your voice and space, not just the price tag or popularity of the mic. For more insights on choosing the right gear, check out my ultimate guide to top podcast and streaming microphones for 2024.
Another common myth is that bigger or more complex setups automatically sound better. Many believe XLR microphones paired with expensive audio interfaces produce superior sound compared to simple USB mics. While this can be true in some cases, it’s also easy to overcomplicate your setup and introduce more points of failure. Advanced mistakes, like improper gain staging or neglecting room acoustics, can negate the benefits of professional gear. A simple, well-set-up USB microphone in a quiet room can outperform a poorly configured XLR setup. The key is understanding the nuances of your environment and how to fine-tune your gear. If you’re curious, explore my top USB and XLR microphones for 2024.
Why does microphone placement matter more than many realize?
Advanced creators know that placement can make or break your sound quality. Even with the best mic, incorrect positioning can result in muffled, distant, or harsh audio. Many beginners think that just plugging in a mic is enough, but professional setups involve strategic placement, acoustic treatment, and proper gain staging. For instance, placing your mic too close can cause plosives, while too far away might lose clarity. Experimenting with distance, angle, and room treatment can dramatically improve your recordings. According to a study by Wired, sound clarity significantly affects listener retention. Remember, the devil is in the details—don’t overlook the placement. Have you ever fallen into this trap? Let me know in the comments.
In summary, the real secret to great audio isn’t just about having the most expensive gear but understanding the nuances that influence sound quality. Avoid the myths that bigger, more complicated setups automatically mean better sound, and focus on mastering placement, environment, and fine-tuning your gear. Doing so will elevate your podcast or stream to the next level in 2024 and beyond. For a comprehensive look at the best gear and techniques, revisit my top microphone picks and start making smarter choices today.
Keeping your microphone setup running smoothly over time requires more than just initial calibration. With the rapid evolution of streaming and podcasting technology, it’s essential to invest in reliable tools and adopt proper maintenance routines to ensure your audio quality remains top-notch. From hardware safeguards to software updates, I’ll share the specific tools I personally rely on and the strategies I’ve found effective for long-term performance.
Invest in a Quality Boom Arm and Shock Mount
One of the most overlooked aspects of maintaining microphone quality is the physical support system. I use the Rode PSA1 boom arm because it offers stable positioning and reduces handling noise. Pairing this with a shock mount helps prevent vibrations and mechanical noise from reaching the capsule, which is crucial for consistent recordings. Regularly inspecting these components for wear and tightening screws ensures longevity and optimal performance.
Routine Software and Firmware Updates
Firmware updates may seem trivial, but they often include critical bug fixes and performance improvements. I make it a habit to check the manufacturer’s website every few months for updates to my microphone’s firmware or related audio interfaces. Additionally, keeping your audio editing software like Adobe Audition or Audacity updated ensures you have the latest tools for noise reduction and equalization, which are vital for maintaining sound clarity over time.
Use Protective Accessories
Spills, dust, and accidental knocks can damage sensitive components. I recommend always using a pop filter and a dust cover for your microphone when not in use. These simple accessories can prevent debris buildup and reduce the risk of damage. Additionally, a damp cloth and a gentle brush are useful for cleaning dust from the grille and other parts without risking internal damage.
Regular Calibration and Testing
Periodically, it’s worth testing your microphone’s response. I do this by recording a standard test tone or voice sample, then analyzing the waveform for any inconsistencies. If you notice a decline in clarity or an increase in background noise, it might be time for a deeper clean or to replace worn cables. Investing in a professional audio interface with built-in monitoring can help you spot issues early on.
How do I maintain my microphone over time?
To ensure your microphone remains in peak condition, establish a regular maintenance routine. Clean connectors with contact cleaner, keep cables coiled properly to avoid damage, and store your gear in a dry, dust-free environment. Also, monitor your setup’s performance by recording short clips periodically, listening on different devices, and adjusting your environment as needed. The future of microphone longevity lies in smart, connected accessories that can alert you to performance issues before they become critical, so staying informed about new tools and firmware updates will keep you ahead.
Remember, consistent maintenance and using the right tools not only extend your gear’s lifespan but also ensure your audio stays professional and clear, no matter how long you’ve been streaming or podcasting. For more detailed recommendations, check out my ultimate guide and start implementing these practices today. Don’t forget — a little proactive care goes a long way in preserving your investment and your sound quality.
What I Wish I Knew Before Choosing My Microphone
- One of my biggest lessons was that not every high-end microphone suits every voice or environment. I spent money on pricey gear only to realize it picked up too much background noise or didn’t match my voice. Now, I focus on matching microphone types to my space and voice for real results.
- Playing with placement and setup made a huge difference. Initially, I just plugged in and recorded—big mistake. Proper positioning, using a pop filter, and adjusting gain transformed my audio quality.
- Trusting my ears over specs was key. I learned to test on different devices, listen critically, and fine-tune settings instead of relying solely on reviews or popularity.
- Understanding the differences between condenser and dynamic mics changed my approach. Condensers are great in quiet spaces, but dynamics excel in noisy environments—matching your environment is everything.
- Regular maintenance, like cleaning connectors and updating firmware, keeps my gear performing at its best, saving me money and headaches later.
Tools That Elevated My Setup in 2024
- Rode PSA1 Boom Arm: Stable, easy to adjust, reduces handling noise—essential for a professional feel.
- Adobe Audition: Powerful editing suite that helps me clean up and polish my recordings with noise reduction and compression.
- Contact Cleaner and Dust Covers: Simple but effective for protecting my gear and ensuring longevity.
- Professional Cables and Connectors: Quality cables prevent noise and signal loss during long recordings.
Your Voice Matters—Start Improving Today
Great audio isn’t just about expensive gear; it’s about understanding your setup, making smart choices, and continuously fine-tuning. Don’t let misconceptions hold you back from sounding your best. With patience and the right knowledge, your microphone can become your most powerful tool for connecting with your audience in 2024. Ready to take your sound to the next level? The journey begins now—dive into the resources, experiment, and keep improving. What’s your biggest challenge with microphone setup? Share below and let’s grow together!
I totally relate to the initial frustration of setting up a streaming space with subpar gear. When I first started, I just went for the most popular USB microphone without doing much research, and I quickly learned that it didn’t quite match my voice or environment. Since switching to a dynamic mic and experimenting with placement and gain settings, my audio quality has greatly improved. One thing I’ve found crucial is investing in proper acoustic treatment and a stable boom arm, which really reduce handling noise and room echoes. I wonder, how many creators out there have found success combining a quality microphone with basic room treatments? I believe understanding the nuances of your environment and gear is what truly makes the difference in professional-sounding audio.
Reading through this post really hit home for me, especially the part about testing and emotional connection to your equipment. When I started, I bought a budget condenser mic, expecting great results, but it made my voice sound thin and distant. Switching to a dynamic microphone and placing it properly at about 8 inches from my mouth brought such a noticeable improvement, and I started hearing the difference a good setup makes. What really helped was experimenting with different placement angles and using a pop filter—small adjustments that made a huge difference in clarity. It made me realize that investing in quality gear without understanding the basics of placement and environment won’t do much good. I’m curious, how many of you have found that tweaking mic placement or room acoustics has been your best upgrade? I’d love to hear what changes worked best for others to elevate their audio quality.
This post really hits home for me, especially the part about the importance of microphone placement and environment. When I first started recording, I thought just buying a decent mic was enough. But I quickly realized that even with a good mic, poor placement and untreated room acoustics made my audio sound muffled and distant. After reading this, I applied small tweaks like positioning the mic at the right distance and adding simple acoustic panels, which made a world of difference. It’s incredible how much room treatment and positioning influence clarity. Have any of you found that even minor adjustments in placement or a few acoustic treatments dramatically improved your sound? I’d love to hear what specific tweaks made the biggest difference for your setup. Also, do you use any particular tools or techniques to find the perfect mic position? Would be great to share ideas on optimizing our audio quality for 2024.
I really appreciated this detailed breakdown. Starting out myself, I underestimated how much room acoustics and mic placement could influence sound quality. Switching from just plugging in a generic mic to experimenting with positioning and adding some affordable acoustic panels made a huge difference. It’s fascinating how even small changes—like angling the mic differently or increasing the distance—can elevate the clarity so much. I’ve also found that investing in a quality shock mount and boom arm helped reduce handling noise, creating a much more professional sound. It’s clear that understanding your environment plays a critical role. For those just beginning, what are some easy low-cost tweaks you’ve found most effective? Are there particular tools or apps you use to find the optimal mic placement? I think sharing these tips can help many avoid common pitfalls and speed up their progress.