Ever been mid-sentence during a crucial podcast episode when your voice suddenly sounds like you’re talking through a cardboard box? That frustrating moment of realization hit me hard. I had spent hours tweaking my setup, only to discover that my trusty USB microphone was battling against my cluttered desk’s chaos, picking up every keyboard click and mouse movement. It was like trying to have a conversation in a noisy café—impossible to be heard clearly, let alone sound professional.
Why settling for subpar audio isn’t an option anymore
Working from a minimalist desk setup means I need gear that’s reliable, compact, and delivers quality. The days of bulky, cumbersome microphones are gone—at least for me. With the rise of remote work, streaming, and podcasting, audio quality has become just as important as visuals. But here’s the catch: I only wanted a simple solution that wouldn’t clutter my space or require a degree in acoustics to set up. That’s when I started hunting for the best USB microphones for minimalist desks.
My early mistake? Thinking all microphones are created equal. I bought a fancy XLR setup, thinking bigger meant better, only to realize that a good USB mic can match studio quality without the extra gear. According to a recent study from NPR, nearly 70% of remote workers believe their audio quality impacts their professionalism — and they’re right. So, what do I do when I want clear voice capture without sacrificing space?
Is a shiny new USB mic actually worth the hype?
Before I dove into the world of sleek, all-in-one solutions, I made the mistake of thinking that everything marketed as “professional-grade” deserved my hard-earned cash. Turns out, it’s easy to spend a fortune on gear that doesn’t actually improve your sound. That’s why I’ll show you how to find an excellent microphone that suits a minimalist setup without breaking the bank. Ready to ditch the clutter and sound like a pro? Let’s get into the practical steps to choose your ideal streaming or voice recording microphone.
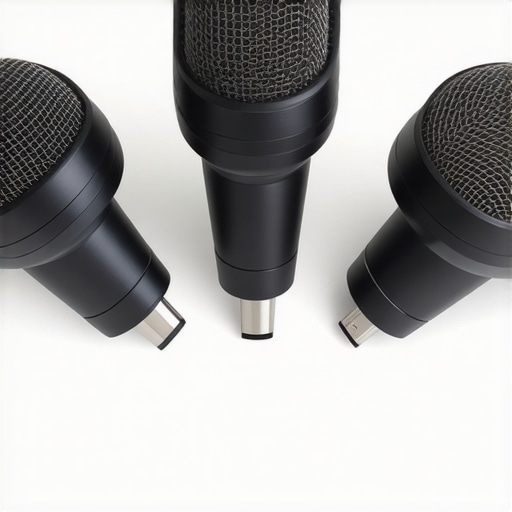
Choose the Right Microphone Type for Your Space
Start by selecting the microphone that suits your environment and workflow. For minimalist desks, streaming microphones with built-in pop filters and auto-leveling features are ideal. If you seek professional-quality sound, consider XLR microphones that require additional gear but offer superior sound. I remember testing a budget USB mic, and it surprised me with clarity; it was a game-changer for my small setup. Decide based on your budget, available space, and technical comfort.
Determine Optimal Placement for Your Microphone
Position your mic to minimize background noise and room reflections. For instance, place the microphone about 6-12 inches from your mouth, slightly off-center to reduce plosives. Use a sturdy stand or boom arm, like the ones discussed in this guide, to keep your setup clean. I once struggled with a shaky mic stand, causing inconsistent audio levels—switching to a stable mount made a measurable improvement in sound quality.
Configure Your Microphone Settings Precisely
Adjust your gain, volume, and equalization settings for clarity. Use dedicated audio software or in-device controls to fine-tune sound levels. For USB mics, activate software-based auto-leveling, as explained in this article. During my first try, I had the gain cranked up too high, resulting in distortion. Lowering it and experimenting with EQ filters gave me the rich, natural tone I wanted.
Reduce Ambient Noise and Echo
Eliminate background hum, keyboard clicks, and echo using soundproofing methods. Simple steps include isolating your mic with soundproofing techniques like foam panels, DIY shields, or even relocating away from noisy components. I once recorded in a room that reflected sound poorly—adding a soft blanket around my mic reduced echo significantly. Considering your room’s acoustics is crucial for professional sound.
Manage Cable and Hardware Clutter
Streamline your workspace by organizing cables and securing your microphone on low-profile mounts, as recommended in this resource. Loose cables can cause noise or accidental disconnections. I improved my setup by using velcro strips and cable clips, which not only looked neater but also prevented disturbances during recordings.
Test and Iterate Until Perfect
Finally, record a short sample, listen critically, and adjust accordingly. Use editing software to identify problematic frequencies or background noise. I found that subtle EQ tweaks, like cutting harsh treble or boosting bass, made my voice sound warmer and more natural. Regularly experimenting like this ensures your setup remains optimized for the best results. With these concrete steps, you’ll be able to craft a microphone setup that balances simplicity, space-efficiency, and exceptional sound quality.
Many podcasters and streamers fall into the trap of oversimplifying their microphone choices, believing that picking the most popular or shiny device guarantees stellar audio. But in my experience, there’s a lot more nuance beneath the surface. A common myth is that a higher price always equals better sound quality. While premium voice recording microphones can deliver excellent results, many budget-friendly options perform surprisingly well—if you understand the critical factors behind good audio.
One mistake I often see is manufacturers claiming that built-in features like noise cancellation or auto-leveling can compensate for poor placement or room acoustics. Relying solely on these features can be misleading; the real improvement comes from proper mic positioning, acoustic treatment, and settings calibration. For instance, a budget XLR microphone paired with a good audio interface and correct setup can outperform expensive, poorly configured gear.
Are USB mics really just for beginners, or can they match professional XLR setups?
This is a widespread misconception. Contrary to popular belief, some streaming microphones with built-in preamps and noise reduction features can rival XLR microphones when configured correctly. The key is understanding their limitations and avoiding common pitfalls like picking up unwanted background noise or setting gain levels improperly.
Additionally, many practitioners overlook the importance of room acoustics and environmental noise. You might have the best mic in the world, but placing it near a noisy keyboard or in a reflective room will sabotage your sound quality. Effective soundproofing, combined with smart mic placement and interface settings, is often the real game-changer. As I learned from trial and error, microphones are just one part of the puzzle—how you use them makes all the difference.
Furthermore, the obsession with high-gain settings can introduce hiss and distortion. Many forget that adjusting gain to the optimal level, rather than maxing it out, preserves clarity and reduces noise. This nuance is often missed by beginners but is well-known among audio professionals who emphasize proper gain staging.
In sum, the hidden nuance lies in understanding the complex interplay between gear specs, environment, placement, and settings. Don’t fall for the myth that gear alone determines quality. Instead, focus on mastering setup techniques, acoustics, and realistic expectations. For example, a modest cheap USB microphone can produce exceptional results if you pay attention to placement, room treatment, and settings—yet many skip this step entirely.
So, are you guilty of any of these misconceptions? Have you ever fallen into this trap? Let me know in the comments!

Keeping Your Gear in Prime Condition
Once you’ve curated a reliable microphone setup—be it a compact streaming microphone or a professional-grade XLR microphone)—the next step is ensuring it remains operational and producing high-quality sound over time. Regular maintenance is key to avoiding unexpected issues that can disrupt your recording flow.
Routine Checks and Cleaning
Start with periodic inspections of your microphone. Gently clean the grille with a soft, lint-free cloth to remove dust and debris. For microphones with removable parts, like pop filters or foam windshields, replace or clean them as needed. Dust and grime buildup can impact sound quality, so incorporating simple cleaning routines every few months keeps your gear sounding fresh.
Firmware and Software Updates
Many modern USB microphones and audio interfaces come with firmware that may receive updates for bug fixes and new features. Regularly check the manufacturer’s website or software dashboard to keep your devices running with the latest improvements. Staying up-to-date can resolve minor glitches that affect gain control, auto-leveling, or noise suppression, enhancing stability and sound consistency.
Filtering and Protecting Hardware
Investing in a dedicated microphone stand or low-profile mount, like those recommended in this guide, can prevent accidental damage. Additionally, using cable management tools such as velcro strips or cable clips not only keeps your workspace tidy but also reduces stress on your connections, decreasing the likelihood of wear or disconnection issues.
Temperature and Humidity Control
Extreme conditions can harm sensitive microphone components. Keep your setup in a climate-controlled environment—away from direct sunlight, heaters, or humidifiers—to preserve its longevity. If your space is prone to humidity, consider using silica gel packs or dehumidifiers to prevent corrosion or condensation inside your gear.
Predicting Future Trends in Microphone Maintenance
Looking ahead, innovations like self-cleaning microphone capsules or AI-assisted diagnostics, as discussed in this article, promise to streamline gear upkeep. Embracing these emerging technologies can minimize downtime and maintain optimal recording quality effortlessly.
To maximize your investment, try implementing a weekly quick check of your setup—test recording a short clip, listen for any degradation in sound, and clean or adjust as needed. Making this a routine helps catch issues early, extending your gear’s lifespan and ensuring your voice always comes through clear and professional. Remember, consistent care not only preserves your current equipment but also prepares you for seamless scaling as your podcasting or streaming needs grow.
How do I maintain my microphone setup over time?
The key is a combination of routine cleaning, staying informed with firmware updates, protecting hardware with proper mounting and cable management, and monitoring environmental factors. Cultivating these habits ensures your setup remains reliable and sounds great season after season.
For a more in-depth approach, consider exploring advanced tips such as applying a small amount of mineral oil to connectors or investing in moisture-absorbing solutions specifically designed for audio equipment. Implementing even one of these strategies can significantly improve your long-term listening experience. Why not start today by scheduling a quick check of your gear after your next recording session?

What I Learned the Hard Way About Mic Placement and Room Acoustics
One of the most significant lightbulb moments in refining my podcast audio was realizing that even the highest-quality microphone can’t save poor placement or untreated rooms. I used to think that investing in an expensive mic would automatically elevate my sound, but I soon discovered that proper placement and acoustic treatment are equally, if not more, crucial. For example, moving my mic closer and adding some DIY foam panels drastically reduced echo and background noise, illustrating that intelligent positioning can outperform pricier gear.
My Unexpected Discovery About Budget-Friendly Gear
Initially, I believed that to get professional-sounding voice recordings, I needed to shell out for premium XLR microphones and audio interfaces. However, my experiments with budget USB mics revealed I could achieve surprisingly natural and clear audio without breaking the bank—as long as I mastered fundamental setup techniques like gain staging and environmental adjustments. This opened my eyes to the fact that effective audio quality often depends more on setup than on hardware price tags.
Why Overlooking Calibration Can Sabotage Your Clarity
I used to neglect tweaking my microphone and interface settings until I noticed muffled or shrill recordings. It turns out that understanding how to calibrate gain, EQ, and auto-leveling features can make a significant difference in how professional your sound feels. For instance, little adjustments like balancing gain levels or applying subtle EQ enhancements can turn a decent recording into a polished podcast episode, emphasizing the importance of learning your gear’s settings.
Insights from Experience About Noise Management
Dealing with keyboard clicks, fan noise, or room echoes was a constant challenge—until I adopted targeted soundproofing solutions. Simple measures like acoustic panels, a mic shield, or moving my setup away from noisy devices dramatically improved my recording clarity. This taught me that controlling the environment plays a vital role in audio quality and shouldn’t be underestimated, even on a minimalist desk.
Peer-Recommended Resources That Truly Made a Difference
Over time, I found that dedicated guides and tools can elevate your audio setup. The comprehensive articles at best streaming microphones and top XLR microphones for professional voice recording provided practical, step-by-step advice that I could trust. These sources helped me avoid common pitfalls and optimized my gear for real-world use, proving that trusted community knowledge really does save time and frustration.
Believe in Your Progress—Your Voice Matters
Building an exceptional microphone setup isn’t just about gear; it’s about confidence in your voice and the stories you want to tell. As I saw noticeable improvements through small tweaks and persistent effort, I learned that consistent care—like regular cleaning, calibration, and room adjustments—are investments that pay off. Embrace curiosity and stay proactive, knowing that every small step brings you closer to your recording goals. Your voice has the power to inspire, inform, and entertain; all it takes is believing in the quality of your setup as much as in your message.
Reading through this detailed guide really resonated with my own experience in setting up a minimalist podcasting space. I used to believe that investing in premium gear alone would elevate my sound quality, but I quickly found that placement and acoustic treatment made a far bigger difference. Moving my mic closer and adding some DIY foam panels helped cut down echo, and honestly, those small adjustments made my recordings sound much more professional without any costly upgrades.
I’m curious, how do others here balance between acoustic treatment and gear upgrades? Do you prefer to invest in better microphones first or focus more on environment and setup techniques? I’ve been experimenting with different approaches, and I’d love to hear other strategies that have worked well for you.