Ever spent hours recording, only to realize your voice sounds flat, muffled, or just plain off? I’ve been there. One time, I thought I could get away with a cheap mic, convinced that any microphone would do. The result? A frustrating mess of echoes, background noise, and disappointing audio quality. It was a lightbulb moment—I needed to understand the different types of microphones and how they could transform my recordings. That’s when I dove deep into the world of microphones, and let me tell you, it made all the difference.
Why Choosing the Right Microphone Matters More Than You Think
Your microphone is the gateway to your voice. Whether you’re starting a podcast, streaming, or recording vocals, the right mic can make or break your sound quality. A mismatched microphone not only hampers your professionalism but can also cause listener fatigue. It’s not just about having the fanciest gear; it’s about selecting the right type for your voice and setup. I’ll show you how to cut through the noise and find the ideal microphone for your needs.
Have You Faced This Microphone Dilemma?
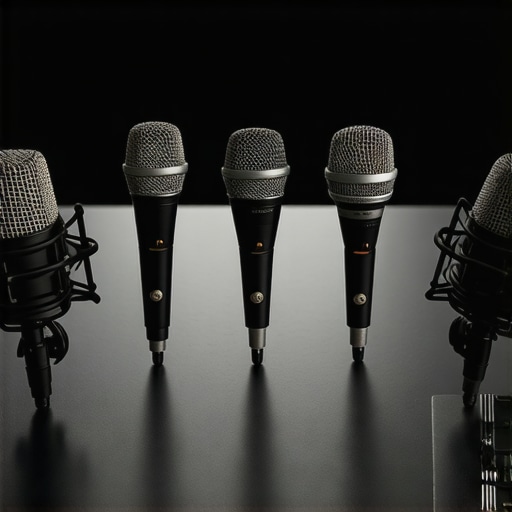
If you’ve ever bought a microphone based on reviews alone, only to find it doesn’t suit your voice or environment, you’re not alone. I made that mistake early on—thinking all mics are created equal, I picked a condenser for my noisy room. The result? More background noise than voice. Trust me, choosing the wrong microphone can be a costly lesson. That’s why understanding the different types and their benefits is crucial. To help you avoid my early pitfalls, I’ll guide you through the top microphone types for voice and podcasting in 2024. Curious? Check out the best options for your needs, from USB to XLR, at [this detailed guide](https://microphones.creatorsetupguide.com/best-voice-recording-streaming-microphones-for-podcasters-in-2024).
Identify Your Voice and Environment Before Buying
Start by analyzing your voice tone and recording space. For instance, if you have a loud, bass-heavy voice, a dynamic microphone might be your best bet because it handles loud sounds well and reduces background noise. Conversely, if your space is quiet and your voice is soft, a condenser mic can capture your nuances beautifully. I once bought a condenser mic for my noisy room, which resulted in a lot of background noise, but switching to a dynamic mic helped me record clean, professional-sounding voiceovers.
Match Microphone Type to Your Recording Goals
Decide whether you need a USB or XLR microphone. USB mics are ideal for beginners due to their plug-and-play simplicity, perfect for streaming or quick recordings. XLR mics, however, offer higher quality and flexibility, suitable for professional podcasting or studio setups. I started with a USB mic, but upgrading to an XLR system significantly improved my audio clarity, especially when paired with a good audio interface. For a comprehensive overview, check out this guide.
Test Different Microphones in Your Environment
Before committing, try out a few models if possible. Use a simple recording app to compare how each mic captures your voice. For example, I borrowed a few microphones from friends and recorded the same script. The results showed that some mics picked up more room echo than others. This hands-on approach saved me from investing in a mic that didn’t suit my environment. Remember, a mic’s performance can vary greatly depending on your space, so testing is crucial.
Focus on Directionality to Minimize Noise
Choose a microphone with the right pickup pattern. Cardioid mics capture sound mainly from the front, reducing side and background noise—great for home studios. Omnidirectional mics pick up sound equally from all directions, ideal for interviews or group recordings. I switched to a cardioid mic and noticed a drastic reduction in background noise, making my recordings clearer and more professional. For detailed recommendations, visit this resource.
Invest in Proper Accessories
Use a pop filter to reduce plosive sounds and a shock mount to minimize vibrations. These small accessories can dramatically improve your audio quality. I added a pop filter to my mic setup, which cut down on harsh ‘p’ sounds, and a shock mount that stopped handling noise from my desk. These investments are cost-effective and enhance the clarity of your recordings.
Fine-Tune Your Settings and Positioning
Position your microphone about 6-12 inches from your mouth, slightly off-center to avoid plosives. Adjust gain levels to prevent clipping. I once recorded with the mic too close, causing distorted sounds, but once I maintained proper distance and adjusted gain, my audio became crisp and balanced. Always do a test recording after making adjustments to find your optimal setup.
Many aspiring podcasters and streamers fall prey to misconceptions about microphones that can seriously hinder their audio quality. Let’s dig deeper into what most people get wrong and how to avoid these pitfalls. One widespread myth is that investing in the most expensive microphone guarantees professional sound. While high-end gear helps, it’s not the only factor. Proper placement, environment, and settings are equally crucial. For instance, a top-tier condenser mic won’t save you if your room is full of echo or background noise. Many believe that USB microphones are inherently inferior to XLR setups. That’s not necessarily true anymore—modern USB mics, like those recommended in this guide, can provide excellent quality for most applications. The real trick lies in matching the mic to your environment and goals, not just the connection type.
Another misconception is that the microphone’s frequency response is all that matters. In reality, placement and pickup pattern are just as important. For example, a cardioid mic with a narrow pickup pattern can significantly reduce ambient noise, but only if positioned correctly. Many users overlook the importance of accessories like pop filters and shock mounts, which can make a noticeable difference in clarity. A common trap is thinking that a better mic can compensate for poor setup or environment. Instead, focusing on proper positioning—about 6-12 inches from your mouth and slightly off-axis—can elevate your sound quality without extra expense. Additionally, some believe that more expensive microphones always sound better. In my experience, even budget mics, when used correctly, can outperform pricier models if they suit your voice and environment. It’s about the right tool for your specific needs, not the price tag.
Why Do Some Microphones Sound Better in Certain Environments?
This question often puzzles advanced users. The answer lies in the microphone’s design and how it interacts with your space. For example, dynamic microphones tend to reject background noise due to their limited frequency response and directional nature, making them ideal for noisy environments. Conversely, condensers capture a broader frequency range but are more sensitive to room acoustics, which can be a drawback if your space isn’t acoustically treated. According to audio engineer Bob Katz, understanding your environment and microphone characteristics is key to achieving optimal results. This expert guide emphasizes that even the best microphone won’t perform well if not paired appropriately with your space and purpose. So, don’t just chase the latest tech—study your environment and choose wisely. Have you ever fallen into this trap? Let me know in the comments.
Keeping your microphone setup in top shape requires more than just selecting the right model; regular maintenance and using the right tools are crucial for consistent quality. I personally rely on a few key pieces of equipment and routines that help me maintain high audio standards over time, ensuring my recordings remain clear and professional even after months of use.
How do I maintain my microphone gear over time?
The first step is investing in a good cleaning kit. I always keep a microfiber cloth and some isopropyl alcohol on hand to gently clean my microphone grille and body. Regular cleaning prevents dust buildup and grime, which can affect sound quality. For my XLR microphones, I use a dedicated shock mount that absorbs vibrations and handling noise, protecting the capsule from unnecessary wear. Pro tip: When cleaning, avoid harsh chemicals or excessive moisture that could damage sensitive components.
Another essential tool is a pop filter. Not only does it improve sound quality by reducing plosive sounds, but it also acts as a protective barrier, preventing saliva and moisture from reaching the microphone element. I recommend replacing or cleaning your pop filter periodically to prevent mold and bacteria buildup, especially if you record frequently.
For digital maintenance, I rely on audio editing software with noise reduction and equalization capabilities. I use Adobe Audition or Reaper to fine-tune recordings, removing background noise and ensuring consistent sound levels. Having a good audio interface, like the Focusrite Scarlett series, also makes a significant difference in maintaining signal integrity over time. These interfaces are durable, easy to clean, and provide reliable gain control.
Tools I recommend for long-term microphone care
Beyond basic cleaning, I recommend investing in a dehumidifier in your recording space to prevent moisture damage, especially if you live in a humid climate. It helps keep the environment dry, preserving both your microphone and other electronic gear. Additionally, a cable tester is invaluable for diagnosing and preventing connectivity issues. I’ve found that replacing damaged XLR or USB cables early on saves me from sudden recording interruptions and sound quality dips.
For storage, always keep your microphones in a dedicated case or padded bag when not in use. Proper storage prevents accidental drops and dust intrusion. If you’re serious about long-term performance, consider periodic calibration or professional servicing—some manufacturers offer this service, or you can find specialized audio technicians in your area.
Looking ahead, as microphone technology evolves, I predict that built-in diagnostics and self-cleaning features will become standard in higher-end models, reducing maintenance needs. Until then, a combination of good tools and routine care will keep your gear performing at its best.
Try implementing a regular cleaning schedule with a microfiber cloth and isopropyl alcohol, and see how much clearer your recordings become. Maintaining your equipment isn’t just about preserving value; it’s about consistently delivering top-notch audio quality that your audience will notice.
For more detailed advice tailored to your specific microphone type, check out this comprehensive guide.
Ever wondered why some voices sound professional while others fall flat? The secret often lies in the microphone you choose. After years of experimenting, I’ve discovered that the right microphone can elevate your recordings from amateur to broadcast-quality effortlessly.
The Hardest Lesson I Learned About Microphone Choices
- Myth Busting: More expensive doesn’t always mean better. I once bought a high-end condenser mic for my noisy room only to be disappointed by background noise. It taught me that environment and placement matter more than price tag.
- Environment Over Equipment: A great microphone paired with a poor setup can ruin your sound. I realized that investing in accessories like pop filters and shock mounts made a bigger difference than upgrading to a pricier mic.
- Matching Voice to Mic: My deep voice sounded muffled on some mics and clear on others. Learning about pickup patterns and polar responses helped me find the perfect match, dramatically improving clarity.
- Testing Is Key: Borrowing different models to record the same script revealed which microphone suited my space and voice best. This hands-on approach saved me from costly mistakes.
- Consistent Maintenance: Regular cleaning and proper storage preserve mic quality over time, ensuring each recording remains professional. Simple routines like wiping the grille and using dehumidifiers kept my gear in top shape.
My Essential Toolkit for Voice Clarity in 2024
- Best Microphones for Voice in 2024: A comprehensive guide that helped me pick models suited for my environment and goals.
- Top USB and XLR Microphones: My go-to for understanding the strengths of different connection types and how to choose the right one.
- Podcasting Gear for 2024: It’s helped me upgrade my setup without overspending, ensuring professional sound quality.
- Clear Voice Microphones: An invaluable resource for selecting mics that capture nuances and reduce noise effectively.
Your Turn to Elevate Your Sound
Choosing the right microphone isn’t just about tech—it’s about capturing your authentic voice and making sure it’s heard loud and clear. With the right tools and knowledge, you can turn your recordings into professional-quality content that resonates. Dive into the resources above, experiment with different setups, and don’t be afraid to tweak until it feels right. Your audience will thank you.
Have you ever struggled with mic placement or environmental noise? Share your experiences below—I’d love to hear what worked for you!
,