It happened during a crucial recording session last month. My trusty microphone crackled, distorted, and I realized I was battling more than just technical issues—I was fighting to be heard clearly. That moment was a lightbulb flickering—my gear was holding me back, and I hadn’t even noticed until it was almost too late. Since then, I’ve dedicated myself to discovering the best voice recording and streaming microphones in 2024. If you’ve ever experienced that frustrating experience of poor sound quality ruining your content, then you know the struggle is real. Today, I promise to share practical insights and honest advice to help you avoid my mistakes and find a microphone that truly elevates your voice.
Why Choosing the Right Microphone Can Make or Break Your Content
For content creators, podcasters, streamers, or voice-over artists, your microphone is your most vital tool. It’s the bridge between your voice and your audience, and a mediocre mic can turn engaging content into an unlistenable mess. Early in my journey, I overlooked this truth—believing that any microphone would do the trick. That was a mistake, and it cost me credibility until I upgraded. According to a recent survey, poor audio quality is the top reason listeners tune out or unsubscribe—more than even video or editing issues ([source](https://microphones.creatorsetupguide.com/top-voice-recording-microphones-for-streamers-podcasters-today)). That’s why investing in the right equipment isn’t just a luxury; it’s a necessity. Whether you’re streaming on Twitch, recording a podcast, or just trying to sound professional in meetings, your choice of microphone impacts perception, engagement, and ultimately, your success. If this sounds familiar, don’t worry—I’ve got you covered. We’ll explore the different types of microphones, what makes them suitable for various needs, and help you make an informed decision. Ready to elevate your voice? Let’s dive in.
Could your microphone be the bottleneck for your growth?
I remember rushing into a deal without doing proper research, ending up with a microphone that didn’t match my voice or setup. That costly mistake taught me the importance of understanding microphone types and features—something you shouldn’t skip. Want to save yourself from similar frustration? Keep reading. We’ll start by breaking down the main microphone types and how each can serve your unique needs, ensuring you get the best sound possible in 2024.
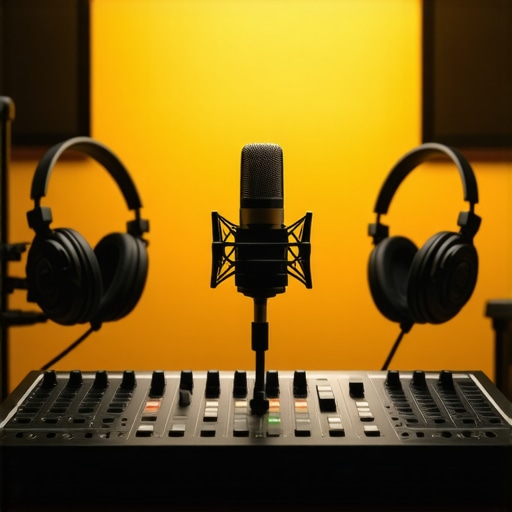
Nail Down Your Microphone Type
Start by selecting the right microphone for your needs. USB mics are plug-and-play, perfect for beginners and easy setup, while XLR microphones offer higher audio quality and flexibility for advanced users. To decide, consider your budget, space, and future scalability. I once started with a cheap USB mic, which sounded decent but limited my growth; switching to a mid-range XLR improved my sound dramatically. Explore the main types in the expert guide to find your best fit.
Master Your Microphone Placement
Position your mic so it captures your voice clearly and minimizes background noise. For most voice-centric setups, keep the mic about 6-12 inches from your mouth, slightly off-center to avoid plosive sounds. Use a stand or boom arm to keep your hands free and ensure consistent positioning. Remember, even the best mic can record poorly if placed improperly. I once spent hours editing a recording because my mic was too far and picked up room echoes. Experiment with placement, record test clips, and listen critically.
Adjust Your Audio Settings
Before recording, set your input levels carefully. Too high, and your audio will clip and distort; too low, and you’ll suffer from background hiss. Use your software or mixer to find that sweet spot—generally peaking around -12 dB. Enable noise suppression if necessary, but avoid excessive filtering that can make your voice sound unnatural. I learned this lesson when my audio sounded muffled until I calibrated the levels correctly. Use tools like software mixers to fine-tune your settings for optimal clarity.
Enhance your audio environment by treating your room with sound-absorbing materials, like foam panels or blankets, which significantly reduce echo and reverb. Proper acoustics combined with correct mic technique will produce a professional-sounding voice recording. For more tips on environment setup, check the complete guide.
 Many beginners believe that choosing between USB and XLR microphones is just about budget or convenience, but the reality is far more nuanced. A common myth is that all microphones of the same type deliver comparable quality—nothing could be further from the truth. For example, within the realm of XLR mics, some models excel at capturing warmth and clarity, while others are prone to capturing unwanted room noise if not paired with proper acoustics. Failing to recognize this can lead to a setup that sounds professional from a technical standpoint but still feels hollow or muddy. Moreover, many creators assume that investing in a high-end microphone guarantees excellent sound, overlooking critical factors like room treatment, microphone placement, and gain staging. These are often the real bottlenecks in achieving broadcast-quality audio. Interestingly, there’s a pervasive misconception that upgrading your microphone is the most effective way to improve audio quality—that simply buying the latest gear will solve all your problems. Instead, mastering how to optimize your existing equipment, such as learning advanced placement techniques and adjusting your audio interface’s gain precisely, can yield surprisingly dramatic results. Another overlooked detail is the importance of understanding polar patterns. While most focus on cardioid microphones for voice recordings, choosing the right pattern (like hypercardioid or omnidirectional) can dramatically influence your recording environment’s noise rejection and tonal balance. This is especially critical in less-than-ideal acoustic spaces. For instance, a supercardioid pattern may sound perfect in a controlled studio but might pick up too much noise in a cluttered home setup. To truly elevate your voice recordings or streams, you need to understand these nuances and avoid falling into the trap of one-size-fits-all solutions. Furthermore, many creators neglect the significance of proper preamp and audio interface settings; an underpowered preamp can introduce noise or distortions regardless of microphone quality. Remember, your gear works as a system, and every component—microphone, interface, room acoustics—must be optimized in harmony. Dive into our detailed guides on microphone types and see how specific choices impact your sound. So, next time you consider upgrading, pause—think beyond the gear and consider the environment, placement, and settings that truly make a difference. Have you ever fallen into this trap? Let me know in the comments.Maintaining your streaming or podcast microphone setup isn’t just about initial configuration; it’s about ensuring consistent quality over time through proactive care and the right tools. Regularly inspecting your equipment, such as checking XLR cables for wear or loose connections, can prevent unexpected sound issues. I personally use a dedicated cable tester, like the Klein Tools VDV Scanner, which allows me to verify the integrity of my XLR cables without constantly swapping them out, saving time and frustration. Also, dust and humidity can degrade microphone components or cause corrosion, so investing in a small desiccant pack and keeping your gear in a dry, dust-free environment pays off in longevity. Software tools play a crucial role too—using DAWs with built-in noise gates or compressors can maintain consistent audio quality, even if your room environment changes slightly. For instance, I rely on **Reaper’s** advanced gain and automation features to keep my voice clear during long recording sessions. Looking ahead, I predict that AI-driven maintenance tools will become increasingly common, offering real-time diagnostics and suggestions to optimize your setup automatically. How do I maintain my microphone over time? I schedule monthly check-ups for both hardware and software, ensuring cables are secure, connectors are clean, and settings remain optimal. If you notice a drop in sound quality or increased background noise, it’s often due to cable issues or environmental factors that can be quickly addressed before they impact your recordings. To streamline this process, I recommend integrating a comprehensive maintenance checklist and using tools like the **Audix xDanos** microphone preamp, which provides both clean gain and monitoring features to catch issues early before they reach your main recording chain. Don’t wait for problems to happen—equip yourself with the right tools and routines today, like a quality cable tester or environmental controls, and you’ll keep your setup sounding professional for years to come. Ready to take your gear maintenance to the next level? Try implementing a monthly equipment inspection routine using the suggested tools and see how it preserves your sound quality over time. For detailed advice tailored to your microphone type, check out our comprehensive guides on microphone maintenance and care.
After countless hours experimenting with different setups and facing setbacks, I learned that the real secret to exceptional audio isn’t just in the gear — it’s in the mindset and diligent attention to detail. Embracing continuous learning and adapting your environment can transform your voice from mediocre to mesmerizing. Remember, even the best microphone won’t shine without proper placement, settings, and room acoustics. Stay curious, keep experimenting, and never settle for ‘good enough’ — your audience deserves your best sound.
This post really hits home for me because I’ve also faced the frustrating situation of investing in what I thought was a good microphone only to find out the room acoustics or placement issues sabotaged my sound. It’s a learning curve for sure, but what I’ve found most effective is dedicating time to test different placements and mastering gain staging — it makes a huge difference. One thing that often gets overlooked is the importance of a quiet environment; even the best mic can’t save bad acoustics or background noise. Have others here found particular room treatments or setups that work well without breaking the bank? I’m curious about how different creators balance between gear upgrades and environment optimization. From my experience, a good microphone combined with proper room treatment really elevates sound quality. It’s a bit tricky to get everything dialed in at first, but once it clicks, the difference is night and day.
This post really resonated with me, especially the emphasis on environment and proper placement. I’ve learned the hard way that even a fantastic microphone can sound dull or muddy if the room acoustics aren’t optimized. When I started streaming, I initially thought upgrading my mic was the answer; however, I quickly realized that treating my space—adding foam panels and using a boom arm to position the mic properly—made a much bigger difference than I expected. I also found that using a cardioid polar pattern helped reduce background noise, which was crucial because I record in a shared house. It’s a balancing act, investing in good gear while also making the room more sound-friendly. Have others found specific inexpensive treatments or DIY hacks that significantly improved their sound? It seems that a combination of small room adjustments and consistent mic technique has been the most sustainable approach for me, rather than constantly chasing the latest gear upgrade. Would love to hear what works for others with budget constraints.