I remember the exact moment it hit me—trying to record my voice for a podcast, only to be met with muffled sound, background noise, and that dreaded thinness that made me sound less professional and more amateur. I’d spent so much on flashy USB mics, expecting studio-quality results, but was left feeling disappointed. That lightbulb moment, realizing I needed a better solution, pushed me to explore affordable yet powerful options within my budget.
Fast forward, I found myself immersed in the world of XLR microphones that sound pro without draining my wallet. Today, I want to share my journey and help you avoid the pitfalls I encountered early on. If you’re tired of voice recordings that sound boutique but cost a fortune, stick around. There’s genuinely good news for creators on a budget who refuse to compromise on audio quality.
Why settling for cheap gear isn’t the answer anymore
In the past, many believed that high-end microphones only came with hefty price tags—think of the legendary $400+ studio mics. But in 2026, the landscape has shifted. Affordable XLR mics that deliver professional sound are more accessible than ever. This is backed by research showing modern components and tech innovations have made high-quality audio possible for less. According to industry data, the gap between budget and premium sound is narrowing rapidly, allowing creators to carve out top-tier quality without breaking the bank.
However, there’s a catch. Many beginners end up making common mistakes, like neglecting proper room treatment or ignoring essential mic placement techniques, which can diminish even the best gear’s potential. Early in my journey, I made the rookie mistake of assuming a microphone alone would fix all sound issues—trust me, that couldn’t be further from the truth. Reading comprehensive guides like this one can save you from costly errors.
Is a cheap XLR microphone actually worth the hype?
You’ve probably heard conflicting opinions—some say budget mics are a waste of time, while others swear by their surprisingly good performance. This skepticism is valid, especially if you’re aiming for content that sounds professional. My advice? Don’t dismiss affordable options before giving them a fair shot. It’s all about choosing the right model and knowing how to optimize it, like proper placement and room acoustics. Want to avoid the same mistakes I made? Dive into the details, and I’ll guide you through choosing microphones that punch well above their weight for 2026.
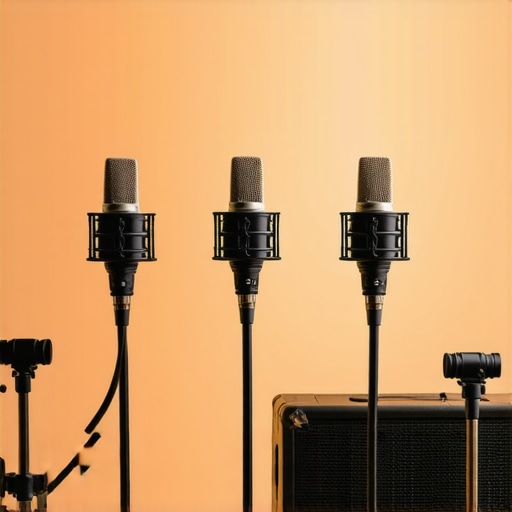
Choose the Right Microphone for Your Setup
Start by selecting a microphone that suits your recording environment and budget. If you want quality without breaking the bank, consider entry-level XLR microphones known for their impressive sound at affordable prices. For quick setup, a good USB microphone can suffice, especially if you’re just starting out.
Invest in Quality Audio Interfaces
Pair your XLR mic with a budget-friendly audio interface. Think of it as a bridge converting analog signals to digital. A reliable interface ensures the sound is clean and free from hiss or distortion. When I set up my first XLR mic, I chose a small, affordable interface, and it dramatically improved my audio clarity. Always opt for one with enough gain and low noise floor.
Optimize Your Recording Environment
Even the best gear can underperform in a noisy room. Use simple techniques like placing soft materials—blankets, foam panels, or curtains—to dampen echo and background noise. A quick tip from my experience: I used DIY foam panels from Amazon and positioned my mic away from reflective surfaces. For more advanced room treatment hacks, check soundproofing tips.
Master Microphone Placement
Position your mic correctly to capture your voice clearly. For handheld mics, keep it 2-3 inches from your mouth, slightly off-center to avoid plosive sounds. Use a pop filter—it’s like a shield for your voice—preventing harsh ‘p’ and ‘b’ sounds. When I adjusted my mic placement according to tutorials, the difference in clarity was night and day. Think of mic placement as finding the sweet spot—experiment until you get warm, rich sound.
Refine Your Settings and Use Equalization
Adjust gain levels to avoid clipping or overly quiet recordings. Use a low-cut filter to eliminate rumble and breathing noise. Fine-tune your EQ settings to brighten your voice—boost mid frequencies slightly and cut unnecessary lows. A useful trick I adopted was to record test clips and tweak settings in post-production, achieving a professional tone without fancy hardware. For guidance, see streaming mic settings.
Employ Proper Post-Processing
Editing is crucial. Use free or affordable DAWs like Audacity or Reaper to remove background hum, add compression, and normalize volume. Basic noise reduction can make your voice stand out crisply. Remember, even a slight boost in high frequencies can add clarity, but overdoing it causes harshness. My first recordings benefited immensely from gentle EQ adjustments after the initial capture.
Test and Iterate Regularly
Consistent testing allows you to evolve your setup. Record short clips, listen critically, and note what differs from professional standards. This process mirrors my early journey—initially messy, but gradually improving with small tweaks. Keep an open mind, and don’t be afraid to experiment with spacing, filters, or even different microphones.
In the world of voice recording and podcasting, a common misconception is that investing in high-end gear alone guarantees professional sound. However, many enthusiasts overlook the importance of nuanced factors like room acoustics, microphone placement, and the subtle mastering techniques that elevate quality beyond hardware specifications. For instance, a cheap XLR microphone paired with poor room treatment can produce muffled, echo-laden recordings, while a modest setup with proper acoustics and positioning often outperform pricier equipment. This reveals a critical nuance: the acoustic environment and technique matter more than the microphone’s brand or cost.
Many beginners fall into the trap of believing that a USB microphone is inherently inferior to an XLR model, but this isn’t always true. Advanced models now boast built-in analog-digital converters and high-quality capsules that rival some professional XLR mics. It’s a myth that USB mics can’t deliver studio-quality sound—what matters is how you optimize their settings and placement. Moreover, over-reliance on hardware upgrades without addressing fundamental recording issues—like background noise or inconsistent mic distance—can hinder production quality. Understanding the right microphone type for your setup and environment is a nuanced decision that requires more than just reading specs.
Why do some seasoned podcasters still emphasize room acoustics over gear?
This is because they recognize that even the most expensive microphone cannot make up for a poorly managed recording space. According to acoustic expert Dr. Harold Burris-Meyer, optimizing a room reduces unwanted sound reflections and background noise, ensuring your voice is captured clearly and naturally. Many amateurs neglect this, assuming hardware alone can solve all issues. In reality, simple DIY treatments—like adding diffusers, bass traps, and positioning your mic away from reflective surfaces—provide a significant clarity boost. For detailed techniques, check soundproofing hacks.
Another common mistake is misjudging the importance of mic placement. Positioning your mic too close or too far, or at the wrong angle, can cause distortions, plosives, or uneven audio. Professionals often use dynamic or condenser mics with specific placement rules to capture a warm, balanced tone. For example, placing the mic at mouth level about 6-12 inches away, and slightly off-axis, minimizes plosives and sibilance. This nuance often escapes beginners but can dramatically improve your recordings when mastered.
Finally, high-quality audio isn’t just about hardware; post-processing plays an equally vital role. Techniques like applying gentle compression, noise gating, and equalization subtly enhance clarity without making recordings sound processed or unnatural. Advanced users understand that mastering is a craft—sometimes, the real difference lies in these nuanced adjustments. For comprehensive guidance, explore professional recording tips.
So, next time you consider upgrading your mic, remember that even the best hardware can underperform without attention to these nuanced factors. Have you ever fallen into this trap? Let me know in the comments and share your experiences with optimizing voice recordings.
Investment in Durable Equipment and Maintenance
One of the most overlooked aspects of voice recording is the longevity of your gear. When it comes to microphones, especially XLR microphones that sound pro, choosing models with high build quality can save you headaches down the line. Regular maintenance, like keeping connectors clean and avoiding dust accumulation, extends your equipment’s lifespan.
Routine Checks for Consistent Performance
Implementing a routine check schedule — for instance, inspecting cables for wear or loose connections — helps catch issues early. As industry experts suggest, micro-soldered connections tend to be more durable, but all wires need occasional attention. Regular testing with test recordings can reveal muted frequencies or sudden volume drops, signaling that maintenance is needed.
Tools I Recommend for Longevity and Fine-Tuning
For cleaning, I swear by a gentle electronic contact cleaner for connectors and a soft brush for dust. When it comes to software, using DAWs like Reaper not only helps with editing but also with monitoring your setup’s stability over time. In fact, Reaper’s built-in monitoring features allow me to consistently check for subtle issues that could indicate hardware aging.
Adjusting Your Setup for Long-Term Growth
As your studio expands, standardizing components like cables and mounts simplifies maintenance. Investing in quality microphone mounts reduces wear on your gear. Also, consider setting up a dedicated space with proper acoustics, which is easier to maintain than makeshift setups prone to environmental damage.
Preparing for Future Upgrades
Looking ahead, Wi-Fi-enabled audio interfaces could transform how we manage and update our systems. The trend is leaning towards smart, interconnected studio setups capable of self-diagnosis and remote troubleshooting. Staying informed through resources like latest industry guides can inspire you to adopt tools that save time and improve quality. I highly recommend trying out a diagnostic tool that checks your connections periodically; it’s a small investment for big peace of mind.
How do I maintain my microphone and streaming setup over time?
The answer is consistency. Regularly inspect and clean your cables, connectors, and mounts. Keep software firmware up to date, and monitor your audio for anomalies. Incorporating simple tools like contact cleaners and monitoring software ensures your setup remains reliable for years to come. Would you like to explore a step-by-step maintenance routine? Try initiating a monthly check, focusing on connection health and cleaning, to keep your voice crisp and clear. For detailed tips, see this expert guide.
What No One Tells You About Microphone Choices
After years of experimenting, I realized that selecting the right microphone isn’t just about specifications or price tags—it’s about understanding how your unique environment interacts with your gear. A common misconception is that high-end equipment automatically leads to professional sound, but as I discovered, the real magic happens when you optimize every detail, from placement to acoustics, ensuring your chosen microphone fulfills its true potential.
Embracing the Power of Room Acoustics
One lightbulb moment was recognizing that the room’s acoustic treatment makes a more noticeable difference than upgrading from a budget to a premium microphone. Simple DIY solutions like adding soft materials or strategically placing dividers can drastically improve clarity, making even affordable mics sound studio-quality. This approach empowered me to focus my budget on what truly influences sound quality—my environment.
Why Technique Outshines Hardware
I learned that proper mic placement and consistent technique can transform mediocre recordings into captivating audio. It’s tempting to rely solely on gear, but mastering the nuances of distance, angle, and timing has been the single most valuable skill I’ve developed. Investing time in tutorials and tests paid off, highlighting the importance of practice over hardware investments alone.
Harnessing Post-Production for Professionalism
Nearly every professional voice recording I’ve encountered benefits from thoughtful post-processing. Subtle equalization, compression, and noise reduction elevate raw recordings to polished segments. Understanding that software tools are the final polishing touch shifted my perspective, reminding me that sound engineering is as much about skill as it is about hardware.
The Real Cost of Neglecting Maintenance
Over time, ignoring equipment upkeep can silently degrade quality. I experienced this firsthand with dusty connectors and worn cables leading to inconsistent recordings. Regular cleaning, timely repairs, and strategic upgrades have maintained my setup’s reliability, proving that taking care of gear is an ongoing investment in quality and peace of mind.
Lessons I Wish I Knew Earlier
- Choosing a microphone that matches your space and voice is more crucial than chasing the latest shiny model.
- Room treatment and mic technique can often outperform hardware upgrades in their impact on sound quality.
- Consistent maintenance prevents costly surprises and extends your equipment’s lifespan.
My Toolkit for Long-Term Voice Recording Success
I trust resources like the Ultimate Guide to Streaming Microphones as comprehensive starting points. For room treatment tips, soundproofing hacks offer actionable advice. My favorite software tools include Audacity and Reaper, which help me refine audio with precision and ease. These tools have been instrumental in turning good recordings into truly professional ones, emphasizing that the right resources empower continuous improvement.
Step Into the Future of Voice Recording
Your journey toward top-tier voice recordings doesn’t depend solely on expensive gear but on your commitment to learn and optimize every element of your setup. The landscape of voice recording in 2026 rewards those who blend quality hardware with technique, environment, and consistent care. Ready to elevate your voice game? Dive into the resources, practice your technique, and embrace the ongoing process of growth in your audio mastery.
What adjustments have you found most effective in improving your voice recordings? Share your experiences below and let’s learn together!
,
Reading through this detailed guide, I can really relate to the journey of improving voice quality without breaking the bank. When I started my podcast, I initially relied on a budget XLR mic and thought up-front costs defined quality. However, I learned the hard way that environment, placement, and post-processing are just as critical. I’ve found that investing in some DIY soundproofing and learning basic EQ and compression dramatically elevated my recordings. One thing I’d love to ask others: Do you think investing in a more expensive mic is ever worth it if your room isn’t acoustically optimized? Or does proper setup and technique often outweigh hardware upgrades? For me, a good environment and technique have made a bigger difference than chasing the latest gear, though I’d love to hear different experiences.